Melted Crayon Background
by Beate Johns
Create landscape or abstract backgrounds by melting crayons on glossy cardstock.
Supplies
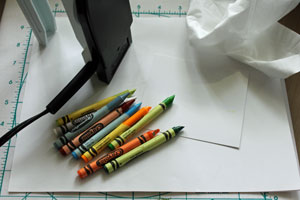
- Crayons
- Craft Iron, or travel iron without steam holes
- Cardstock, glossy used here
- Scrap Paper
- Tissue Paper
Step-by-Step
-
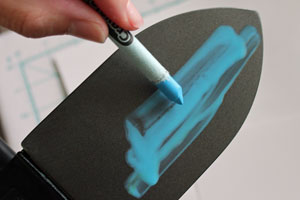
Step 1
Set your iron on medium heat. Once it is warm, start scribbling crayon over iron surface. The crayon will melt.
-
Add several colors for an interesting look.
-
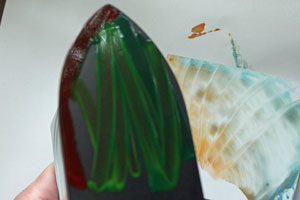
Step 2
Place your cardstock on top of your scrap paper on a heat resistant surface. Pull your iron over your entire piece of cardstock for a smooth finish.
Hint:
To achieve the ridged look shown here, move your iron in zigzag motion over your cardstock.
-
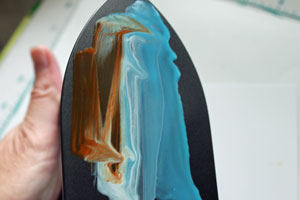
Step 3
Add more crayons to your iron. Several greens were added to the center of the iron and a brown crayon line was drawn on the left outer edge.
-
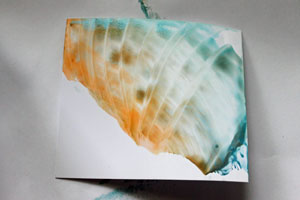
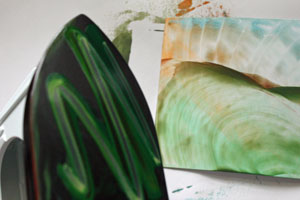
Apply crayon to the lower half of your cardstock. Here a figure eight was drawn with the iron to achieve the wavy look.
Hint:
To get edge to edge coverage, make sure you start on your scrap piece of paper and go over the entire cardstock, to the other side of your scrap paper, with your iron.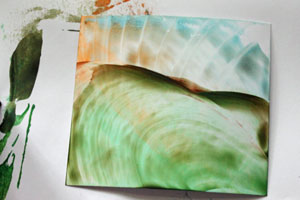
-
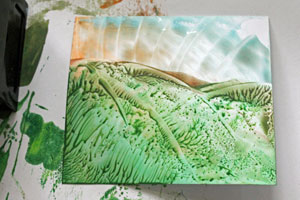
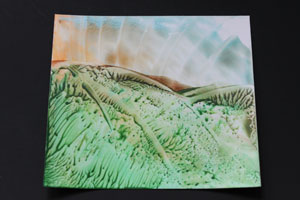
Step 4
For more texture add addtional green crayon colors to your iron.
-
Tap the bottom part of your cardstock with the iron. You will create a textured look.
-
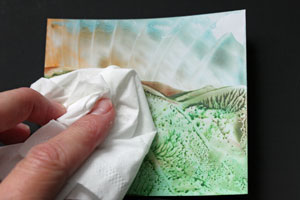
Step 5
Take a tissue paper and gently buff the cardstock to make it shine.
-
-
Step 6
Use crayon background as it is, or stamp on it.
Hint:
Jet Black Archival Ink and Black Stazon™ will both work. The ink will take a few minutes to dry.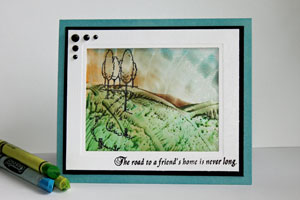
Video!
Variations
Make it really sparkle!
Glitter or Metallic crayons create a different background.
Wax paper method
Cover your ironing board with wax paper. Put the cardstock down and add crayon shavings on top. Cover this with another piece of wax paper. Iron over the wax paper until the crayon is melted.
Different surfaces
Be adventurous. Try different surfaces for different looks. Matte cardstock will give you a matte look.
Your Turn
You've seen the tutorial, now you try it! We've got a section of the gallery set aside for Melted Crayon Background. Try this technique, then upload your artwork to the gallery. Show us your creations!
***Please note - Internet Explorer/Edge is not a supported browser, and will not allow you to see the videos. Please use Chrome, Firefox or Safari to view our tutorial videos.
Questions and Comments
We'd love to get your feedback or questions. Leave your comment below.
It has been a while since I did this technique, but I think it doesn't scratch easily.
Hi Neva,
I am not sure about watercolor crayons. They should work, but they are a little pricy for that technique. I used metallic crayola crayons for that sample.
After playing with the technique again, I noticed that the background does scratch if you aren't careful.
I haven't tried sealing yet. Maybe acrylic sealer spray or future floor wax will work?
Just wipe over your iron with a paper towel or Kleenex while it's still hot. That will take the wax right off.
Hugs and smiles
Beate
Thanks for sharing.
This is another awesome tutorial! Thank you so much for the video! I can't wait to buy the supplies and iron so I can try it too!! TFS!
The cards and paintings will look more shiny as you use an old panty instead a tissue !
Thanks
T.
Also, as a side note, every time I click on one of these boxes I am put on Hooproll.com, what's with that? It's ANNOYING
I've been watching this technique on youtube, and its pretty interesting. Now i do not own an iron, but my question is: can you use this type of iron on a normal paper? Does it have a low heat setting that does not burn paper?
Page 1 of 3 pages 1 2 3 >