Maria’s Treat Box
by Maria Bell
Create a darling treat box.
Supplies
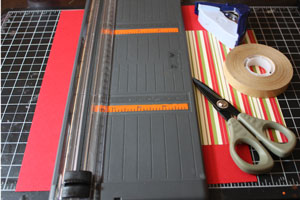
- One 8 1/2" x 10" piece of cardstock
- One 2" x 8" piece of patterned paper
- One 3 3/4" x 5 1/4" piece of patterned paper
- Scoring tool
- Round corner punch (optional)
- Strong adhesive
Step-by-Step
-
Step 1
Score the 8 1/2" x 10" piece of cardstock on the 8 1/2" side at 1/4", 2 1/4", 6 1/4" and 8 1/4".
Turn cardstock to 10" side and score at 5 1/2" and 7 1/2".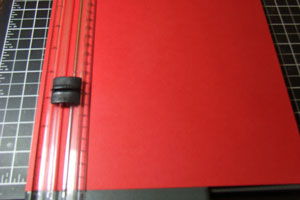
-
Step 2
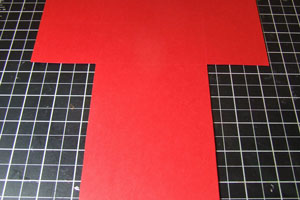
On the left side of the cardstock, starting at the 2 1/4" score line, cut to the 5 1/2" horizontal score line and cut off the 2 1/4" x 5 1/2" piece. Repeat this step on the right side.
-
Step 3
Turn the card stock to the 8 1/2" side and cut at the 7 1/2" score line to the 2 1/4" horizontal score line. Do not cut off the piece.
Repeat this step on the other side.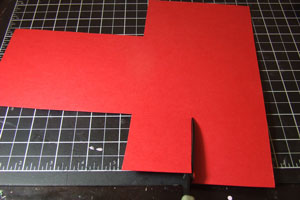
-
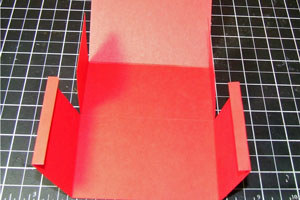
Step 4
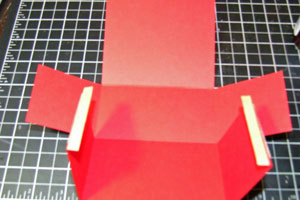
Fold the cardstock at the score lines as shown in the picture
-
Step 5 (Optional)
Round the corners of the 5 1/2" flap.
-
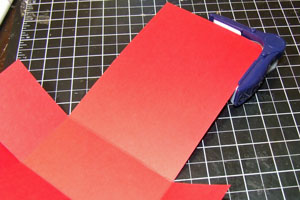
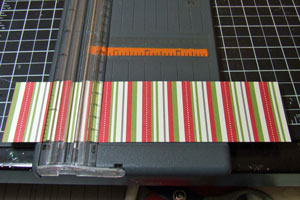
Step 6
Score the 2" x 8" piece of patterned paper at 2" and 6".
-
Step 7
Fold at the score lines as shown in the picture.
-
Step 8
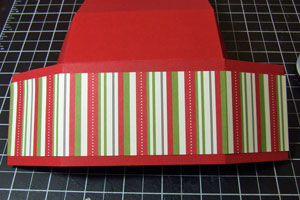
Adhere the 2" x 8" piece of patterned paper to the first 2 1/2" flap on your cardstock base.
-
Step 9
Apply strong adhesive to the 1/4" flap and the second 2" flap on the outer side of the flap.
Repeat on the right side of the box.
-
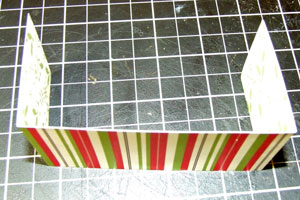
Step 10
Assemble the box as shown in the picture.
Round the corners of one end of the 3 3/4" x 5 1/4" patterned paper piece.
Adhere the patterned paper piece to the inside of the 5 1/2" back flap of the box to create a box lining.
-
Step 11
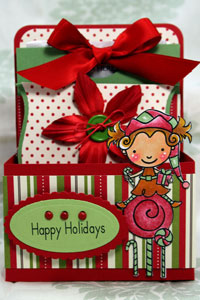
Decorate your box as desired and add treat bags.
Video!
Your Turn
You've seen the tutorial, now you try it! We've got a section of the gallery set aside for Maria’s Treat Box. Try this technique, then upload your artwork to the gallery. Show us your creations!
***Please note - Internet Explorer/Edge is not a supported browser, and will not allow you to see the videos. Please use Chrome, Firefox or Safari to view our tutorial videos.

Questions and Comments
We'd love to get your feedback or questions. Leave your comment below.
I LOVE your project however, I'm having trouble with the project my front piece is coming out way too big. its measuring 3 1/2 from the scrore line up. (front of box.) does that make sense?
Can you help what I may be missing or maybe measurements are off?
thank you
Page 1 of 1 pages