Mani Pedi Gift Box
by Stephanie Purvis
Tuck nail supplies into this cute flip top presentation box.
Supplies
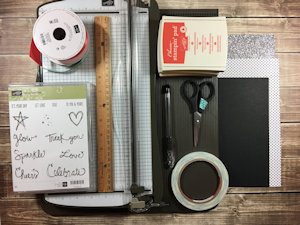
- Cardstock (Stampin Up!® Basic Black and Whisper White cardstock used here)
- Paper trimmer
- Scoring tool
- Ruler
- Pen or pencil
- Scissors
- Strong adhesive (SU! Tear and Tape and Glue Arts GlueGlider Pro used here)
- Other supplies as needed to complete the project (SU! products used here: Love Sparkles stamp set, Watermelon Wonder and Mint Macaron ribbon, Watermelon Wonder, Mint Macaroon and Basic Black ink, Pop of Pink patterned paper and Silver Glimmer Paper)
- Items to fill the box: nail polish, a mini nail file, toe separators, nail polish remover pads, etc., or items in another theme
Step-by-Step
-
Step 1
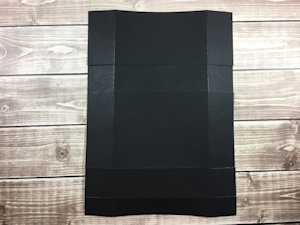
Trim a piece of cardstock to 8” x 11”. With the 8” side at the top of your scoring tool, score at 1 1/2” and 6 1/2”.
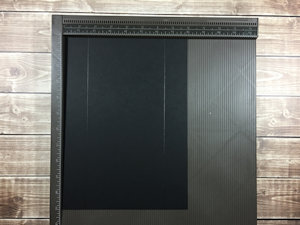
-
Step 2
Rotate the paper 90 degrees so that the 11” side is at the top of your scoring tool. Score at 1”, 2 1/2”, 6 1/2”, and 8”.
-
Step 3
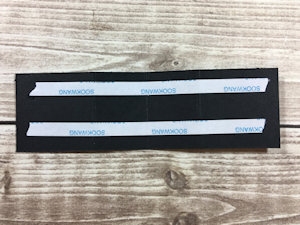
Trim a piece of cardstock to 1 1/2” x 5”. With the 5” side at the top of your scoring tool, score at 1 1/2”, 2 1/2”, and 3 1/2”.
-
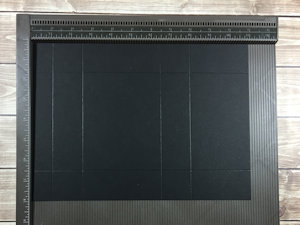
Step 4
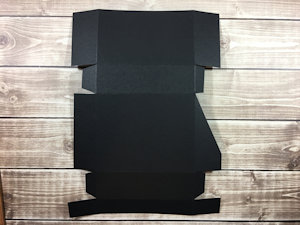
Fold and burnish all score lines. Cut all score lines along both 11” sides up to the intersecting score line to create tabs.
-
Step 5
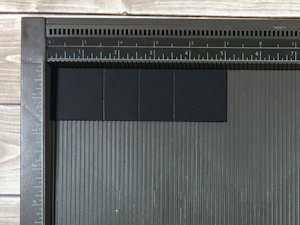
Cut the square tabs approximately in half.
TIP:
Trim small notches on the sides of these tabs to help the box go together more easily.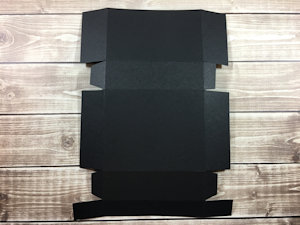
-
Step 6
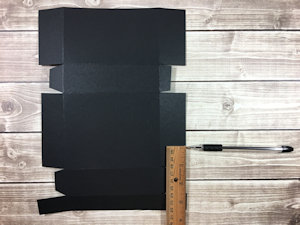
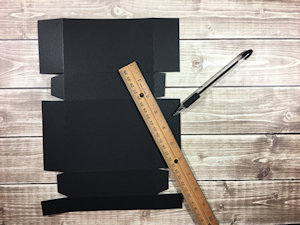
With the smallest flap toward the bottom of your work surface, measure up 1” from the bottom of the largest flap and make a mark toward the outside edge of the flap.
-
Step 7
Using a ruler, draw a diagonal line from the 1” mark up to the inside top corner of the flap.
-
Cut along this line to remove a triangle shape. Repeat on the opposite side.
-
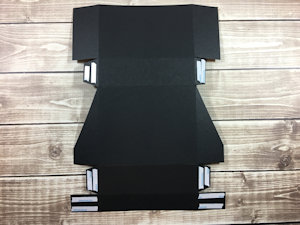
Step 8
Place adhesive on the back sides of all of the small tabs. Refer to the photo for placement.
-
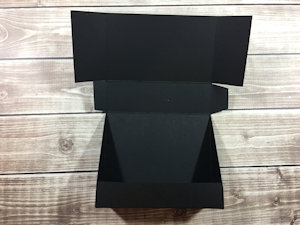
Step 9
Assemble the lower part of the box.
-
Assemble the top part of the box.
-
Step 10
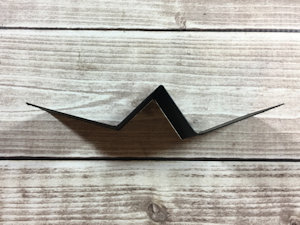
Fold the 1 1/2”x 5” piece of cardstock so that it resembles a mountain shape.
-
Apply adhesive to the bottom of the entire piece of cardstock.
-
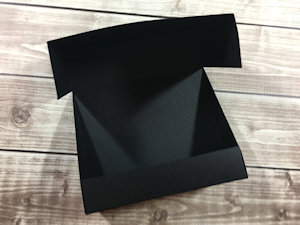
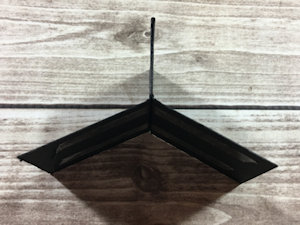
Step 11
Adhere the mountain shape together to create a divider.
-
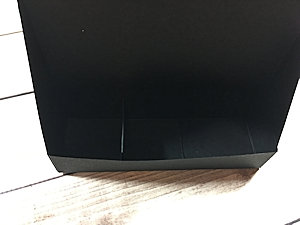
Place the divider inside the box, keeping the divider as far to the left side as possible.
-
Step 12
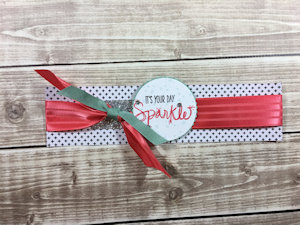
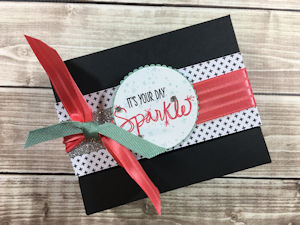
Decorate the box as desired. This patterned paper was cut to 8” x 2”.
-
Fill the box with nail polish, a mini nail file, toe separators and nail polish remover pads, found at pharmacies, dollar stores, department stores, or even online.

-
Step 13
Complete the project.
Video!
Your Turn
You've seen the tutorial, now you try it! We've got a section of the gallery set aside for Mani Pedi Gift Box. Try this technique, then upload your artwork to the gallery. Show us your creations!
***Please note - Internet Explorer/Edge is not a supported browser, and will not allow you to see the videos. Please use Chrome, Firefox or Safari to view our tutorial videos.

Questions and Comments
We'd love to get your feedback or questions. Leave your comment below.
Page 1 of 1 pages