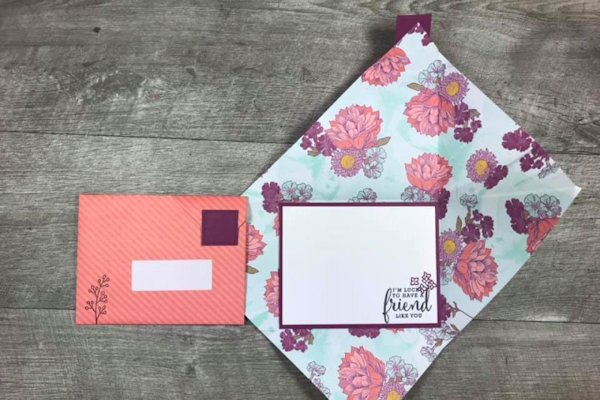
Magic Envelope Card
by Kelly Acheson
Make a card and envelope in one.
Supplies
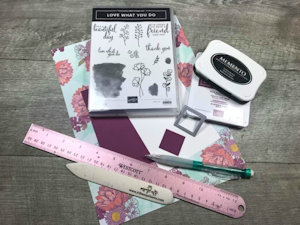
- Cardstock (Stampin’ Up!® Rich Razzleberry, Whisper White, and Tea Room Specialty Designer Series Paper used here)
- Bone folder
- Pencil and ruler
- Adhesive (Tombow Mono Liquid Glue used here)
- Other supplies as needed to complete the project (SU supplies used here: Die Cutting Machine, Stitched Shapes Framelits Dies, Whisper White, Rich Razzleberry cardstock & Tea Room Specialty Designer Series Paper, Love What You Do stamp set, Rich Razzleberry & Memento Tuxedo Black inks, )
Step-by-Step
-
Step 1
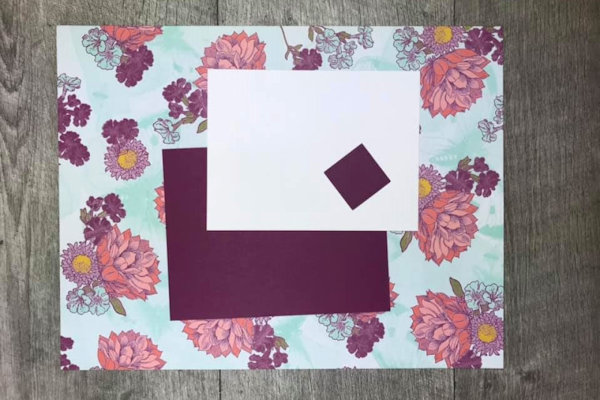
Cut paper at 11" x 8 1/2".
Cut solid cardstock at 4 1/4" x 5 1/2" and white cardstock at 4" x 5 1/4".
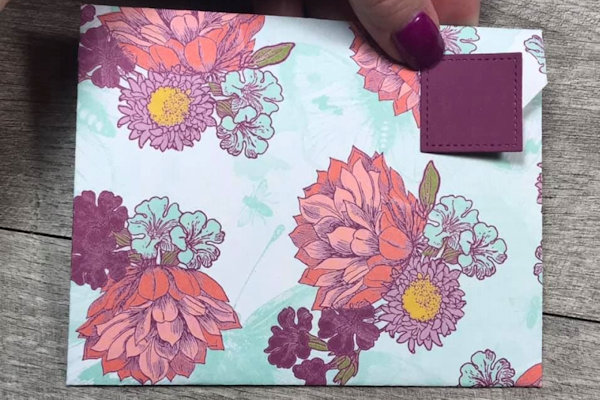
Die cut a small square. -
Step 2
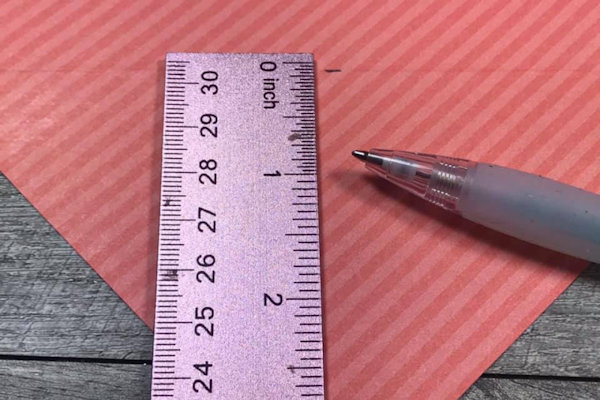
Mark 3 1/2" up from the bottom right corner with ruler and pencil.
-
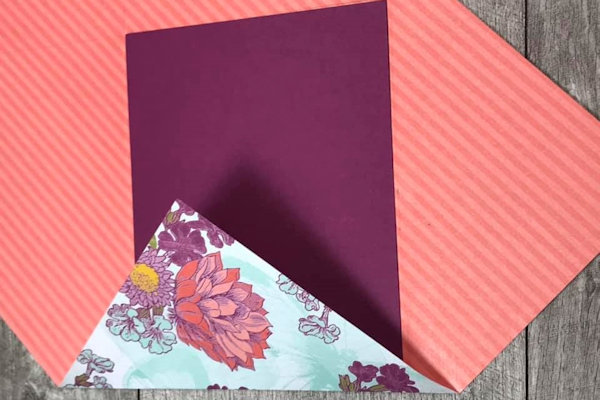
Step 3
Lay the solid cardstock layer onto the patterned paper, matching the bottom edge up with the pencil mark and making sure there is a triangle below the cardstock.
Fold the left edge over, making the fold line match up with the left side of the solid cardstock. Burnish the fold with a bone folder. -
Step 4
Push right side of designer series paper up to the solid cardstock edge, fold and burnish fold with bone folder.
-
Step 5
Fold up bottom triangle matching the fold line with the bottom of the solid cardstock. Burnish fold with bone folder.
-
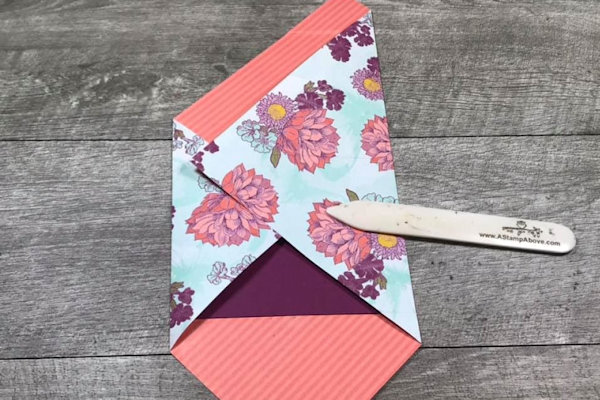
Step 6
Fold top of designer series paper down pushing it up against the edge of the solid cardstock. Burnish fold with bone folder.
-
Step 7
Fold final flap over and burnish fold with bone folder.
-
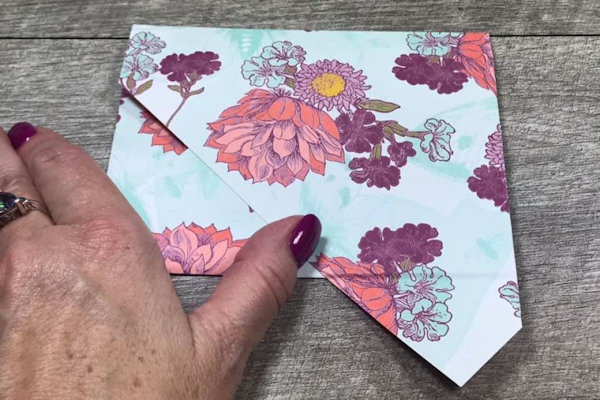
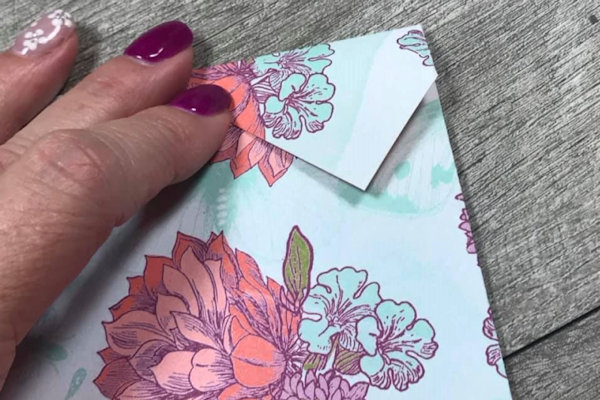
Step 8
Adhere small die cut square with Multipurpose Liquid Glue.
-
Step 9
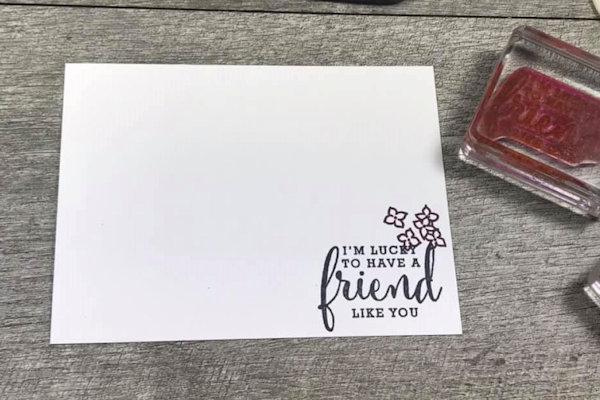
Stamp inside layer as desired.
-
Step 10
Adhere both layers inside card.
-
Step 11
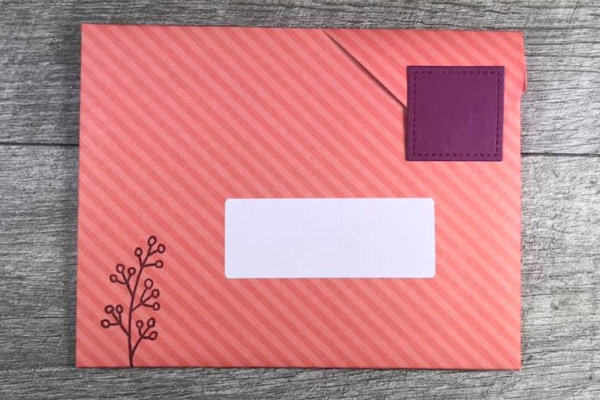
Stamp image on front of Magic Envelope Card and add an address label if desired.
-
Step 12
Complete the project.


Video!
Your Turn
You've seen the tutorial, now you try it! We've got a section of the gallery set aside for Magic Envelope Card. Try this technique, then upload your artwork to the gallery. Show us your creations!
***Please note - Internet Explorer/Edge is not a supported browser, and will not allow you to see the videos. Please use Chrome, Firefox or Safari to view our tutorial videos.

Questions and Comments
We'd love to get your feedback or questions. Leave your comment below.
TIA
Judi
This is so unique! Great color combination , thanks for taking the time to share this tutorial.
Page 1 of 1 pages