Layered Window Frame
by Laura Lipe
Create a unique folded card.
Supplies
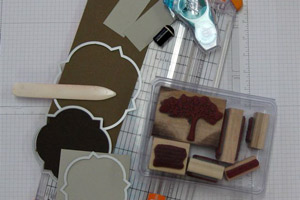
- One 4 1/4" x 11" piece of cardstock
- Two pieces of cardstock to fit third largest die
- Two 1 1/2" x 3 1/4" pieces of cardstock
- Window Frame Collection Framelits by Stampin’ Up! (largest and third largest in set) or similar die set
- Stamps and sentiment for card
- Paper Cutter
- Scoring tool
- Bone folder
- Die cutting machine
- Sponge or sponge dauber
- Adhesive
Step-by-Step
-
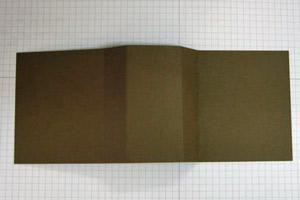
Step 1
Score the 4 1/4" x 11" cardstock at 3 1/2", 4 1/2", 6 1/2", and 7 1/2".
-
Step 2
Fold up with Valley, Mountain, Mountain, and Valley folds. Crease well.
-
Step 3
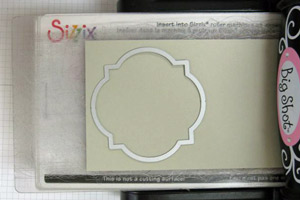
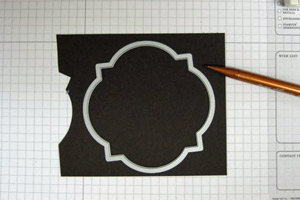
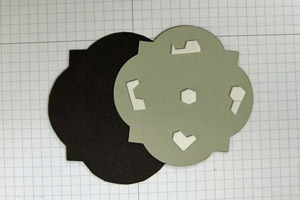
Lay the largest die on the folded card, making sure to center it top to bottom and exactly around the mountain folds. Use repositionable tape to hold die in place. Cut using die cutting machine.
Note:
Other die sets can also be used for this card as long as they are large enough to fit around the card for cutting.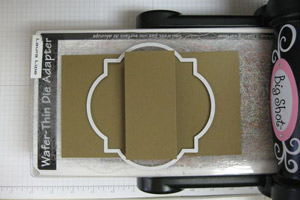
-

-
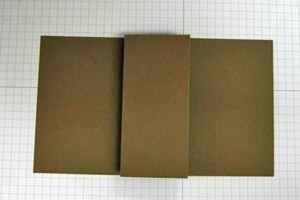
Step 4
Using the third largest die, cut out front of the card using die cutting machine.
-
Step 5
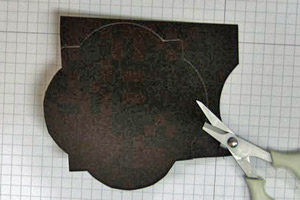
Again using the third largest die, with cutting edge facing up, trace around the outer edge of the die. Cut out with scissors. This will be the backing for the card front (step 4).
-
-
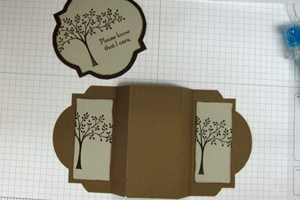
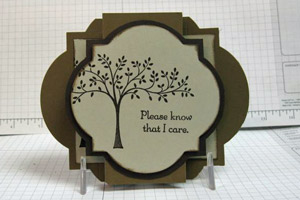
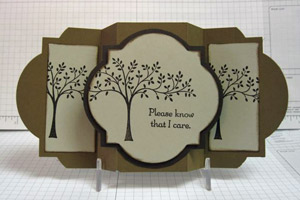
Step 6
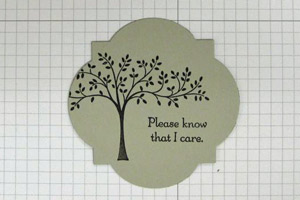
Stamp image on the front of the card. Sponge around edges to soften the look. Layer it to backing using dimensional adhesive.
-
-
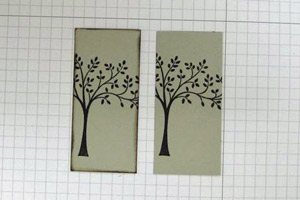
Step 7
Stamp that same image (or a different image if desired) on the two 1 1/2" x 3 1/4" pieces. Sponge around edges to soften. Adhere them to each side of the card, the part that will be folded behind the front.
-
-
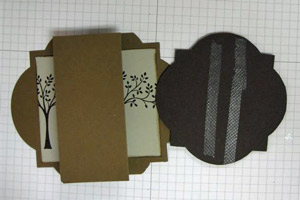
Step 8
Adhere the front image to the center of the folded card, making sure to only apply adhesive to the CENTER of it. Otherwise, the sides of the card will not pull out.
-
Step 9
The card will stand alone when the sides are pulled out a bit.
-
Video!
Your Turn
You've seen the tutorial, now you try it! We've got a section of the gallery set aside for Layered Window Frame. Try this technique, then upload your artwork to the gallery. Show us your creations!
***Please note - Internet Explorer/Edge is not a supported browser, and will not allow you to see the videos. Please use Chrome, Firefox or Safari to view our tutorial videos.

Questions and Comments
We'd love to get your feedback or questions. Leave your comment below.
Eleonora.
Thanks for sharing
Elaine
http://www.splitcoaststampers.com/gallery/photo/2397912?&cat=500&ppuser=261121
Page 1 of 2 pages 1 2 >