Layered Retiform
by Dina Kowal
Fill an abstract grid with layered colors to create a unique background panel.
Supplies

- Cardstock or watercolor paper
- Transparent or semi-transparent coloring medium (used for samples: Copic markers, QoR watercolors, Polychromos colored pencils)
- Ruler and pencil
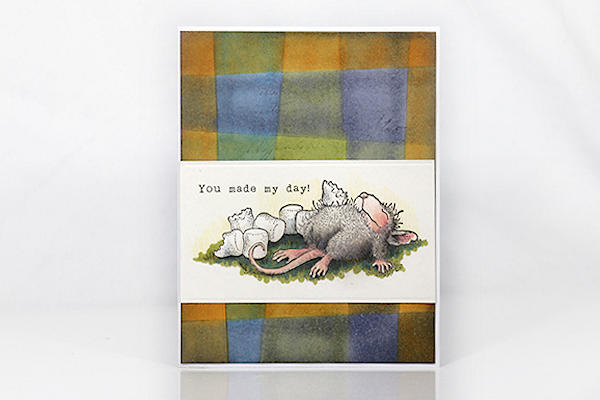
- Other supplies as needed to complete the project (used here: Stampabilities HMIR1018 Sugar Crash, Impression Obsession WP1102 Typewriter Slimline Shorts)
Step-by-Step
-
Step 1
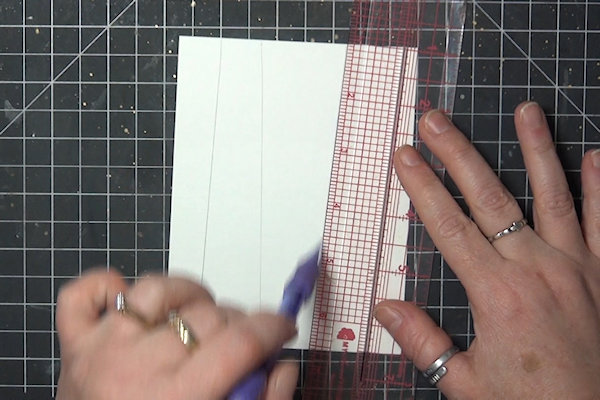
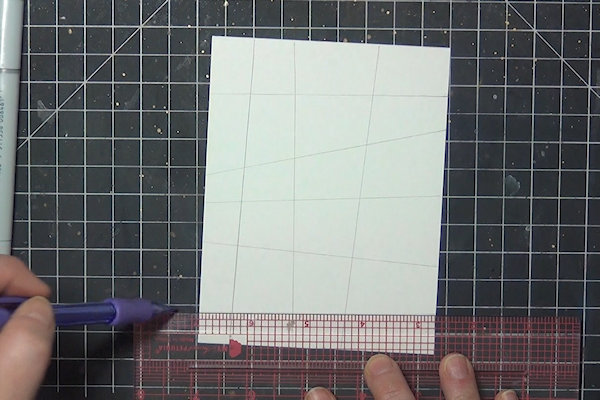
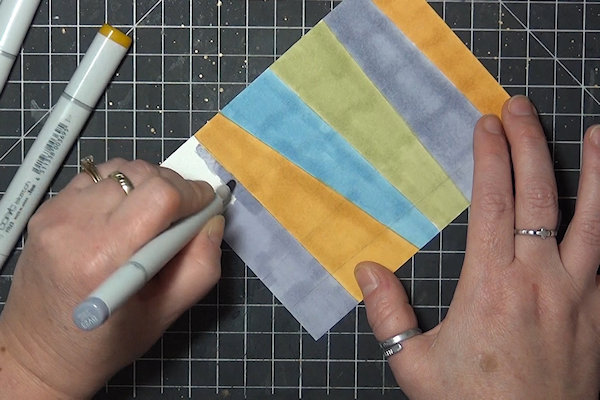
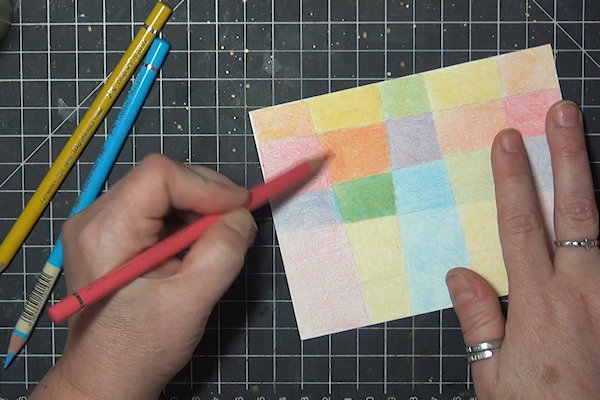
Prepare a piece of cardstock or watercolor paper for your project. Using a ruler and pencil, create an abstract grid on the panel beginning with 3-5 lines from top to bottom.
-
Add 3-5 lines from side to side. They can be precise if that fits your style; they do not need to be precise (you can even try curved lines or a freehand design, as long as the lines cross to create a grid of sorts).
-
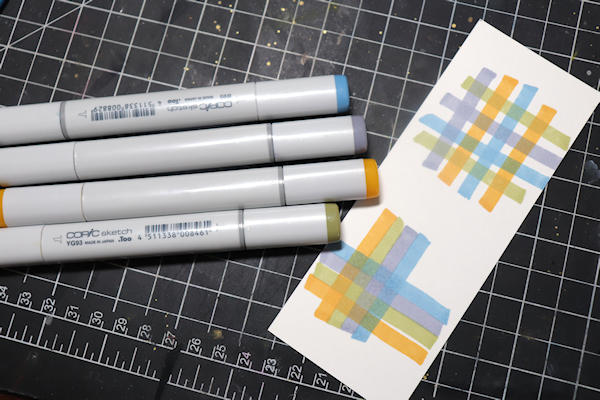
Step 2
Choose a medium, and 3-4 colors. Sharply contrasting colors may muddy when layered, but this is a great exercise in discovery – you may be surprised at the new colors you create, in a good way! You can create some test swatches with simple strokes on a scrap of the same paper you’re using for your background.
-
Step 3
Fill in the horizontal lines with the medium of your choice. Do your best to create even coverage – streaks will show through the layers. See the video for additional samples with different mediums!
-
You can create a pattern with the colors, or you can choose a random arrangement or order.
-
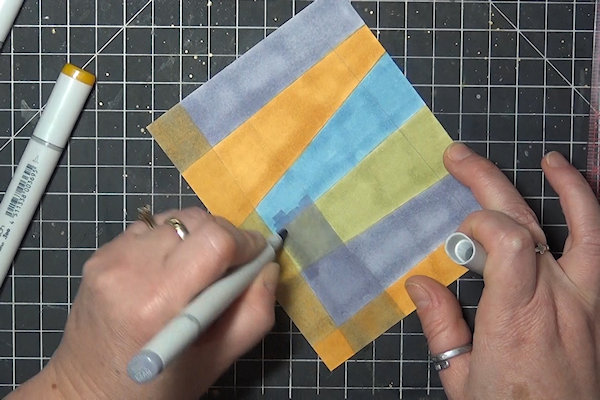
Step 4
Fill the vertical lines in the same way, layering over the colored bands from step 2. You can choose to fill in all these spaces or leave some alone. Note how the colors blend, and how the ‘underpainting’ shows through – this is also a great way to swatch colors and note the new colors that emerge through layering.
-
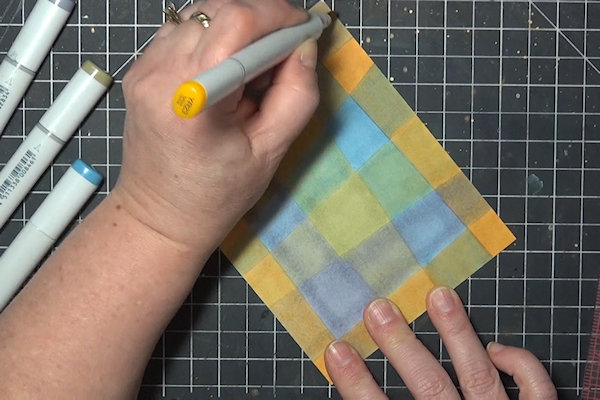
Continue across the panel until you have the look you want.
-
Step 5
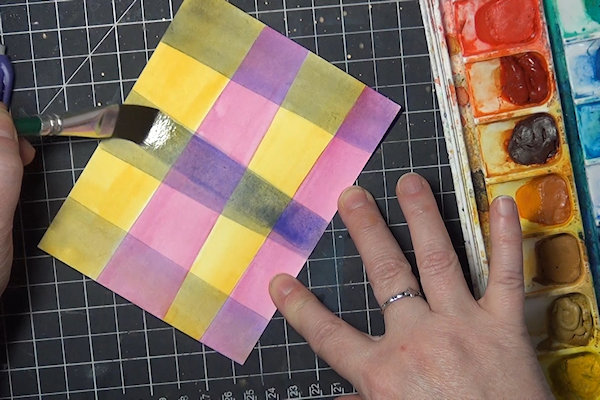
Depending on your medium, you may want to add a second coat of either color (or both!).
In this sample, a second coat of the blue-violet watercolor was added to increase contrast. -
In this sample using colored pencil, you can see the difference in intensity where additional layers of color were added.
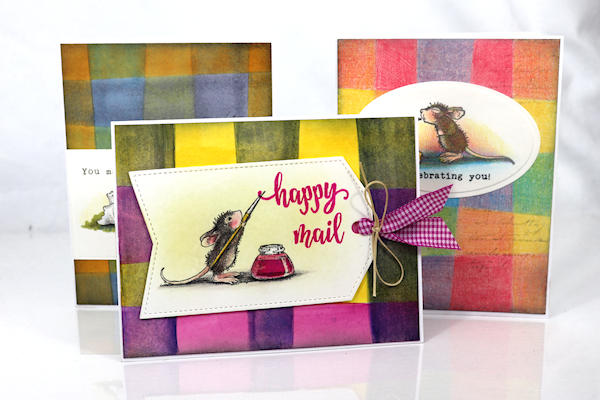
These finished cards are in the gallery. -
Step 6
Use the panel to complete a card or other project.

Video!
Your Turn
You've seen the tutorial, now you try it! We've got a section of the gallery set aside for Layered Retiform. Try this technique, then upload your artwork to the gallery. Show us your creations!
***Please note - Internet Explorer/Edge is not a supported browser, and will not allow you to see the videos. Please use Chrome, Firefox or Safari to view our tutorial videos.

Questions and Comments
We'd love to get your feedback or questions. Leave your comment below.
Page 1 of 1 pages