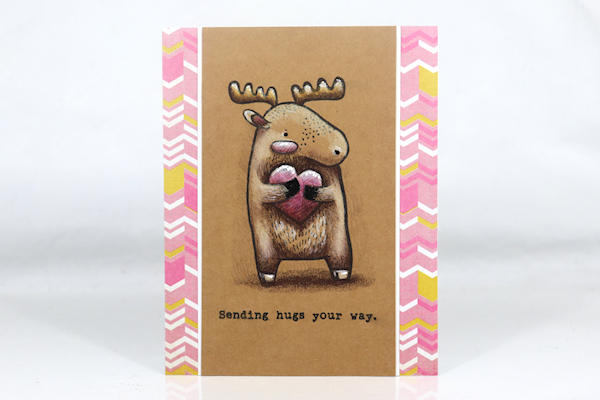
Kraft Pencil Coloring
by Dina Kowal
Learn tips for using colored pencils on kraft paper.
Supplies
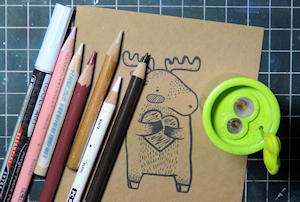
- Colored pencils (Prismacolors work best because of their opacity - light, medium, and dark for each color area, or highlight and shadows if using the kraft color base as the medium tone)
- Colorless blender pencil (optional, Prismacolor brand used here)
- Kraft cardstock (NOTE: kraft is a type of paper, not a color - 300gsm Brown Kraft Cardstock used here)
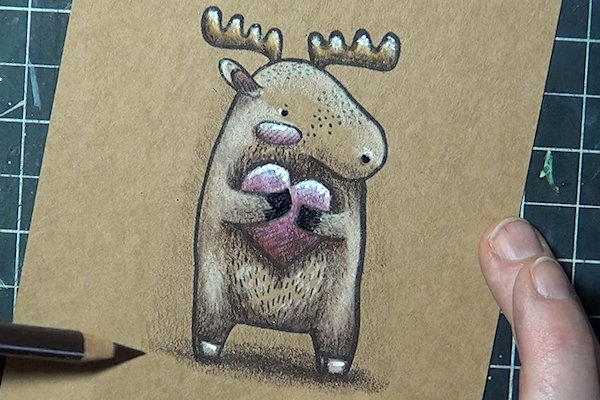
- Image to color (digital image used here: Folk Animals set from LePetiteMarket, Etsy)
- Acrylic paint pens (optional - black and white Tooli-Art fine pens used here)
- Pencil sharpener (Kum 2-hole sharpener used here)
Step-by-Step
-
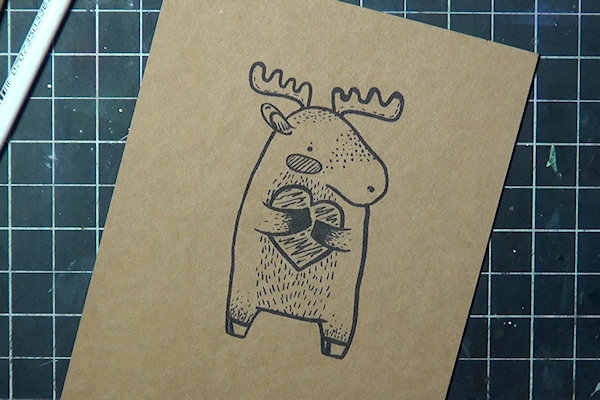
Step 1
Stamp or print an image to color on kraft paper or cardstock.
NOTE:
Kraft is a kind of paper rather than a color. It is strong, fibrous and toothy, which makes it an excellent surface for colored pencils. -
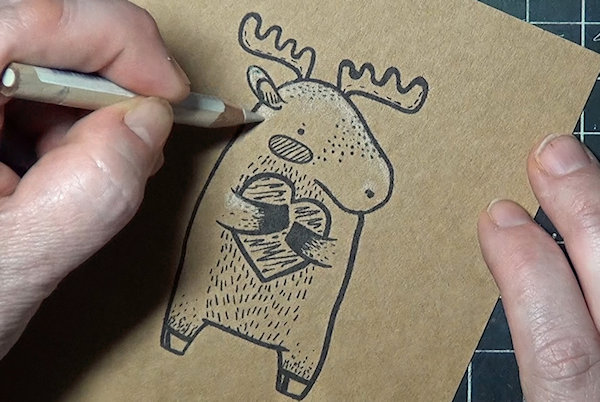
Step 2
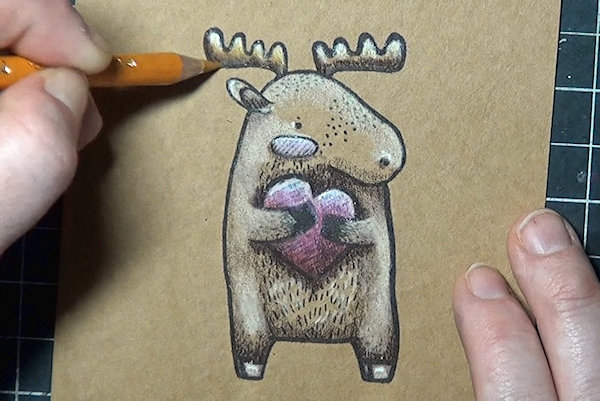
For monochrome coloring, begin with the highlights. Use very light pressure and a sharp pencil. This will allow you to add more layers, blend colors, and build intensity. Adding too much pigment too soon will fill the tooth of the paper and result in blocky coloring with less ability to blend.
Use a light color – white, cream, 10% grey, beige... Ginger Root (Prismacolor Premier) was used here, a pale beige. -
Highlight:
Areas that appear to be closer to you
Areas that are higher
Areas that appear to be curving or rounded toward you -
Step 3
Repeat step 2, layering again with light pressure over areas that need more intensity. These will typically be in the section of highlights where light would be most direct.
-
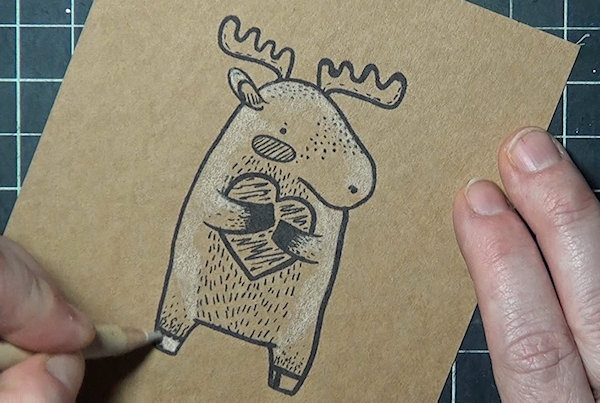
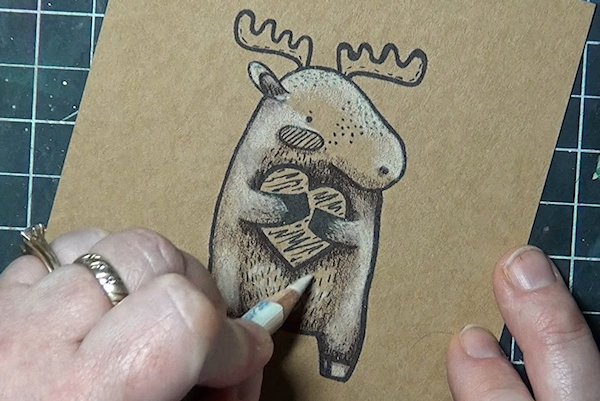
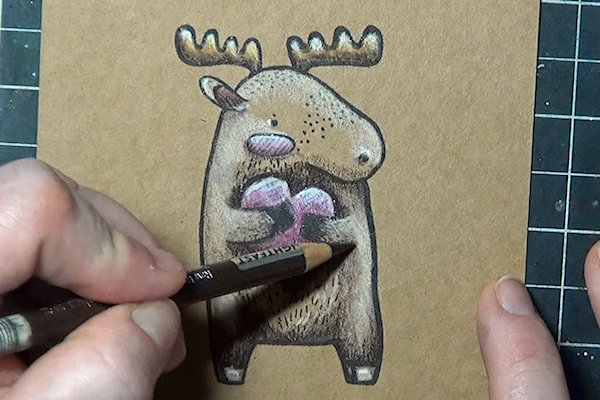
Step 4
Use a dark brown pencil with light pressure to begin adding shading to the image.
Shade:
Areas that are hidden behind or under something that would cast a shadow
Areas that are lower
Areas that are farther away or curving away -
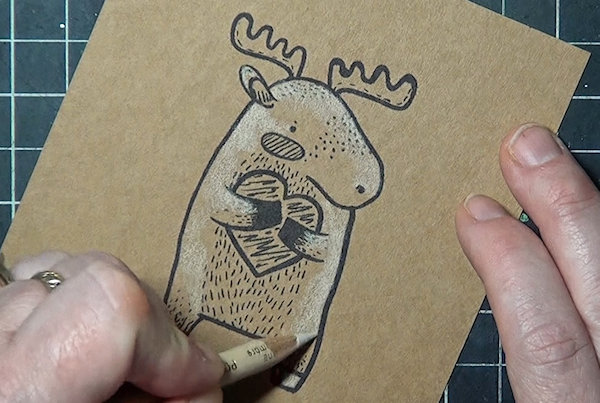
Step 5
Repeat step 4, layering again with light pressure over areas that need more intensity. These will typically be along the edges of the shadows where light would be least direct.
-
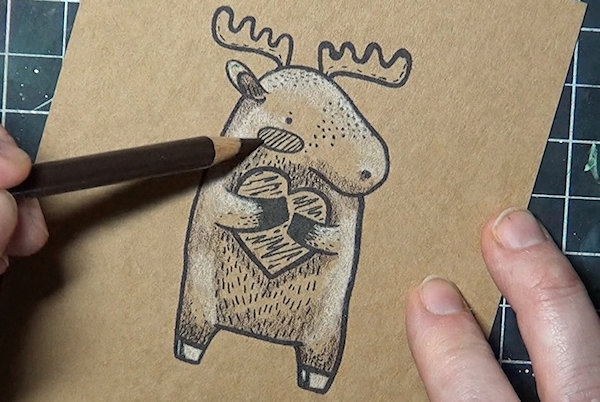
Step 6
Add light layers and textures with your light and dark pencils as needed to create contrast.
-
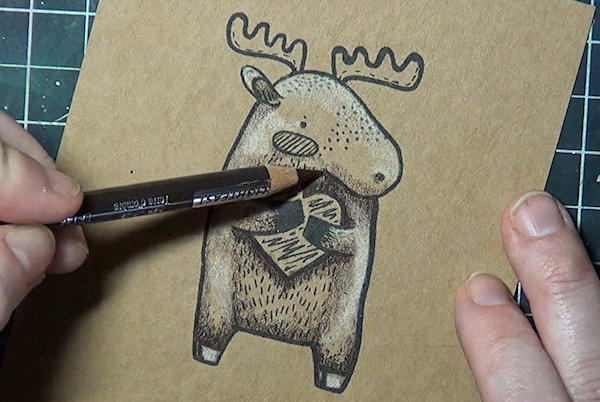
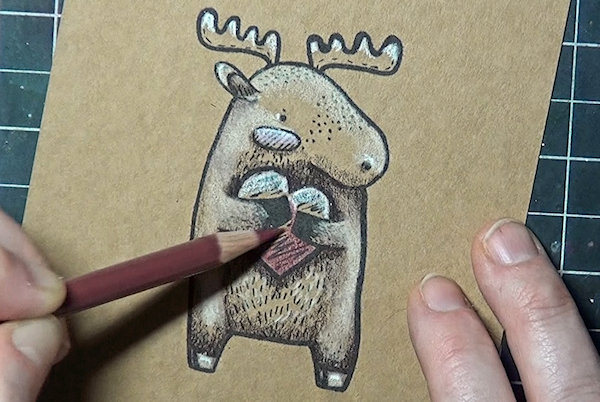
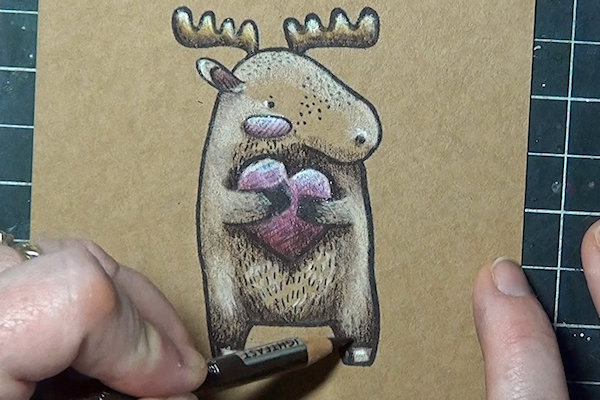
Step 7
For colored areas, again begin with the highlights as in Step 2. Be sure to use light pressure and keep your pencil sharp. Focus on one colored section at a time.
-
Step 8
Use a dark pencil with light pressure to begin adding shading to the section.
-
Step 9
Use a color between the light and dark to fill in the midtone. Lightly blend into the edges of the highlight and shadowed areas.
-
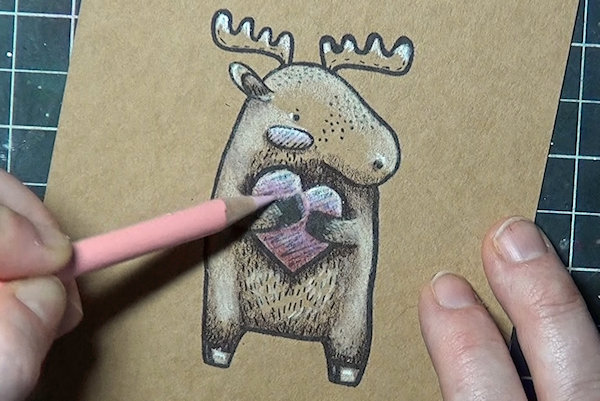
Step 10
Repeat Steps 7-9, layering lightly again to build the intensity of the highlight and shadow, then blend with the midtone.
-
Step 11
Repeat this process in each color area of the image.
-
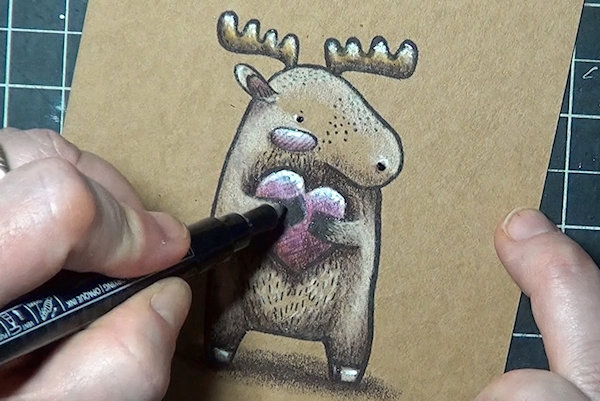
Step 12
Use a tighter circular motion and increase pressure slightly to saturate color where needed. A colorless blender pencil can also be used to burnish color or blend dark to light.
-
Add texture with small strokes of dark and/or light color.
-
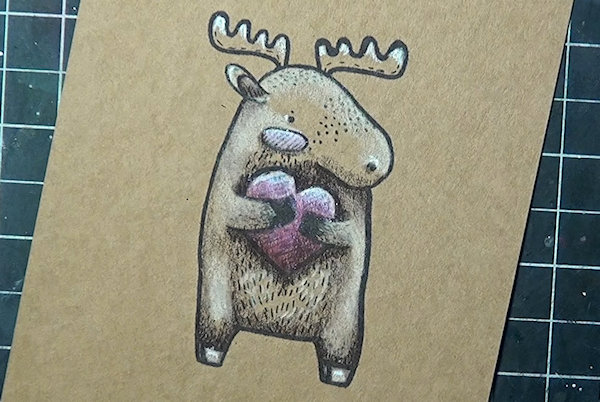
Step 13
Use gel or acrylic paint pens to add brighter highlights or refresh black areas (here: eyes, nose and hooves).
-
Step 14
A dark pencil used with very light pressure around the outside of the image can create a little contrast to help the image ‘pop’.
-
Step 15
Use the image to complete a card or other project.

Video!
Your Turn
You've seen the tutorial, now you try it! We've got a section of the gallery set aside for Kraft Pencil Coloring. Try this technique, then upload your artwork to the gallery. Show us your creations!
***Please note - Internet Explorer/Edge is not a supported browser, and will not allow you to see the videos. Please use Chrome, Firefox or Safari to view our tutorial videos.

Questions and Comments
We'd love to get your feedback or questions. Leave your comment below.
@The Monitor, that can just be a matter of blade placement, or even the casing stretching over time. The Kum sharpener I used in the video is very inexpensive and does sharpen to a nice point, and the blades are replaceable. What sharpener are you using?
If you go to Amazon, Item B007V5OB7K is the pack of replacement blades I buy for the Kum sharpener.
I noticed also you change hand position a lot. Probably automatic to you now like walking.
The clear blender pencil...are those pretty universal or we have to stay brand specific?
Thank you SO much, Dina!
Blessings and Merry Christmas,
Chrissy
Page 1 of 1 pages