Inkless Images
by Beverly Stewart
Create a sculpted cardstock embellishment using a stamped image as a guide.
Supplies
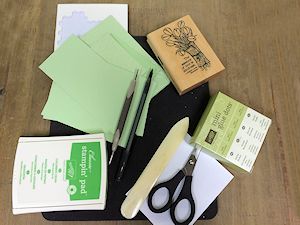
- Heavy solid color cardstock (Stampin’ Up! Pistachio Pudding used here)
- Outline stamp (if floral, thicker stems and leaves are preferable. In this sample: Love is Kindness (a la carte) by Stampin’ Up!)
- Detail scissors and/or craft knife
- Ink (any kind or color - will not show in final project)
- Thick foam mat
- Bone folder
- Plain paper scrap
- Stylus with medium or large tip
- Glue Dots or preferred adhesive
- Dimensionals
- Other supplies as needed to complete the project (2 different embossing folders and matching textured cardstock shown here)
Step-by-Step
-
Step 1
Stamp an outline image several times on heavy cardstock and once on a piece of scratch paper. Choose an image that has detail but is not too delicate to cut out.
Looking at the stamp image, determine which portions of the image might project toward the viewer or be raised if the object were 3-dimensional. These may be objects or sections that appear to be in the foreground, or are overlapping another object.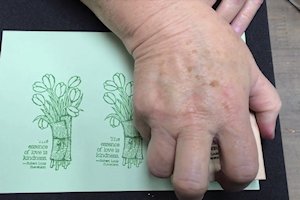
-
Since we are working in all one color, determine which parts of the image can add texture to your finished project. In this image, the newspaper wrapping and the string will definitely be the outer layers. File that thought away for a later step.

-
Step 2
Cut out the base layer (here, flowers and leaves). You may choose to cut more than one layer to add dimension. Here, the leaves will add dimension to the bouquet, so more layers of leaves are cut than of the tulips.
HINT:
For areas that might overlap or pieces of the image that wrap around, imagine where the outlines would go where the image disappears inside the wrapper, and cut on the imaginary lines. Though it won’t show in the finished product, the cuts need to lead the eye to suggest continuity.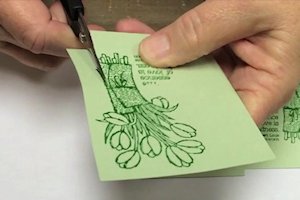
-
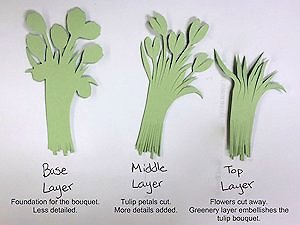
In the sample base layer, the stems and leaves are separated, but the tulips are left uncut. In layer 2, the tulips are cut and split with more detail. In layer 3 the tulips are completely cut away, just adding greenery to embellish.
-
Step 3
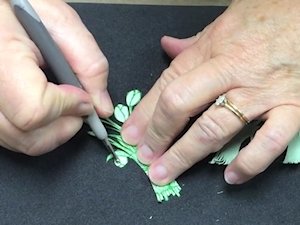
Gently shape the smaller and rounded elements of the image with a stylus, pressing into a foam mat with a circular motion.
-
For larger sections a bone folder may also be useful. Curl blade-like sections (like the tulip leaves) with a bone folder much like you would curl ribbon with scissors. They should have individual shapes, but not be too curly. Separate the individual stems by working them with your fingers so they do not lie flat.
-
Step 4
When working in only one color, texture is extremely important. Vary the texture of your pieces with techniques such as embossing or Faux Suede.
-
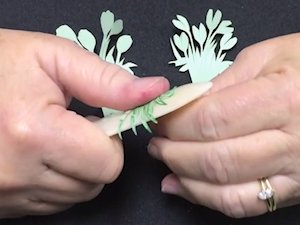
In the sample, the faux suede piece is used to wrap the bouquet.
-
Step 5
Add dimension with additional cuts of cardstock, such as the tie used here, to assemble the embellishment. Use adhesive as needed to hold the elements together (glue dots are used in the sample).
NOTE:
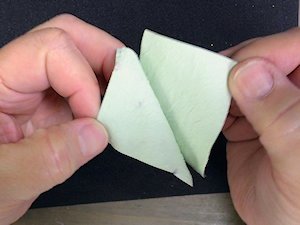
Paper has a grain, just as wood does. You can tell if you have cut across the grain if the paper tears easily and looks ragged. The paper will be stronger if cut along the long grain. If making a tie, simply cut a thin strand of paper about 1/16" wide. Gently tie it around your image. If you have accidentally cut across the grain, the paper will likely tear when you tie. If so, try again, cutting down the opposing side of the paper this time.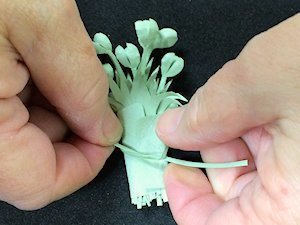
-
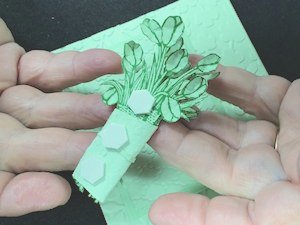
Step 6
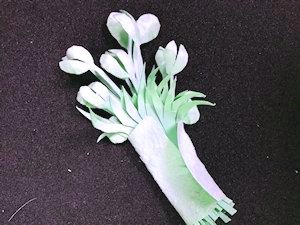
Add dimensionals to the back of the image to prepare for mounting on your card.
-
Remember to emphasize texture and create dimension when working with a single color, inkless image. When assembling the card, alternate layers of textured and plain cardstock.
-
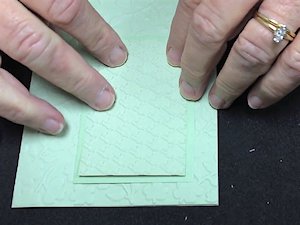
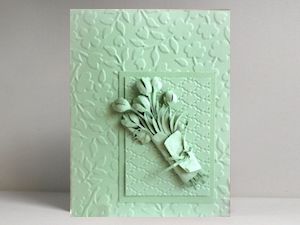
Step 7
Adhere the image to the finished card base. Keep embellishments to a minimum to keep the focus on the inkless image. Cards will need extra padding or a box for mailing.
Video!
Your Turn
You've seen the tutorial, now you try it! We've got a section of the gallery set aside for Inkless Images. Try this technique, then upload your artwork to the gallery. Show us your creations!
***Please note - Internet Explorer/Edge is not a supported browser, and will not allow you to see the videos. Please use Chrome, Firefox or Safari to view our tutorial videos.

Questions and Comments
We'd love to get your feedback or questions. Leave your comment below.
I'm extremely busy right now, preparing for my wedding, but you can bet the first chance I get that I will be attempting to make this.
Your instruction was excellent and easy to follow. Thank you so much for sharing your artistry with us.
http://lezardsdecilou.canalblog.com/
Page 1 of 1 pages