Inchie Snowflake Ornament
by Dina Kowal
Make a snowflake ornament using inchie squares as a base.
Supplies
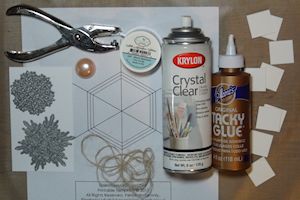
- Printable hexagon template
- 9 one-inch squares of heavy white or ivory matboard, watercolor paper, or cardstock (matboard Inchie Squares from Inchie Arts used here)
- Strong liquid adhesive (Aleene’s Tacky Glue used here)
- Snowflake dies (Impression Obsession Snowflakes Die Set DIE024-X and Mitten Die Set DIE025-ZZ used here
- White cardstock
- Hole punch
- Cord, ribbon or twine
- Button or jewel, 5/8" or larger
- Glitter (Silk Microfine Glitter from Elizabeth Craft Designs used here)
- Clear gloss finish (aerosol works best - Krylon Crystal Clear spray used here)
- Other supplies as needed to complete the project (sponge, Gold Delicata ink, hot glue gun, Bow-Easy, wire cutters)
Step-by-Step
-
Step 1
Prepare 9 one-inch squares from heavy card or matboard. (Matboard provides the best weight and dimension, but something thinner will also work fine.)
(Opt.) Decorate the squares by stamping over them with a metallic ink if desired, or use an embossing folder to add texture. Sponge the edges for an added decorative effect.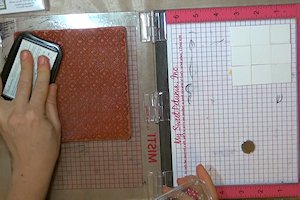
-
TIP:
To hold the squares together for stamping, arrange them onto a piece of wide painter’s tape or use temporary adhesive to stick them onto another sheet of paper.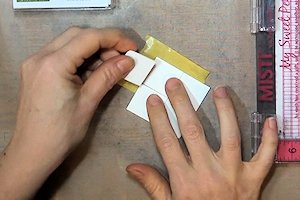
-
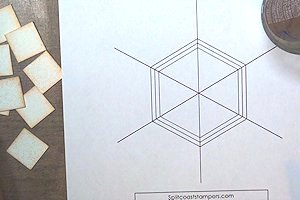
Step 2
Print the hexagon template.
-
Step 3
Arrange 3 of the squares on the template, lining up the corners at a diagonal on the intersecting lines as shown.
NOTE:
Each square’s outside point should touch the same line on the hexagon to ensure symmetry.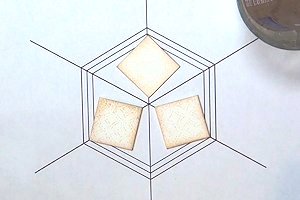
-
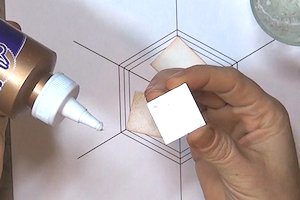
Step 4
Add a dot of glue to two opposing corners of the next square. Arrange as above, aligning the outside corner of the square with the hexagon outline, and laying the glued corners onto the squares already on the template.
-
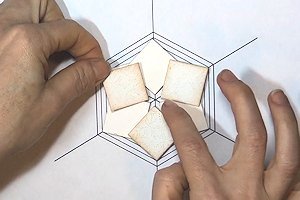
Repeat 2 more times. Adjust the pieces as needed – they may tend to shift slightly as you work.
Allow the piece to dry completely before proceeding.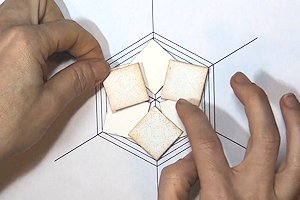
-
Step 5
Turn the dried ornament over. Repeat step 4 on the back side, sandwiching the original layer to cover up any glue that might have been showing at the corners.
-
Step 6
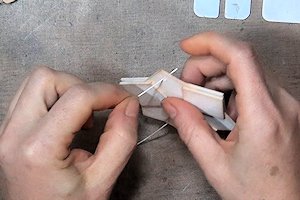
Punch a hole at the top of the ornament. Thread cord or twine through the hole and tie it off with a knot.
-
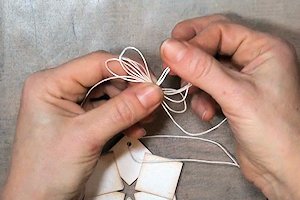
From the same trim, tie a muti-loop bow for the ornament center. (A Bow-Easy tool was used to tie the bow for the sample.)
-
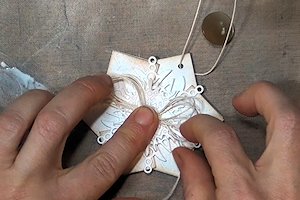
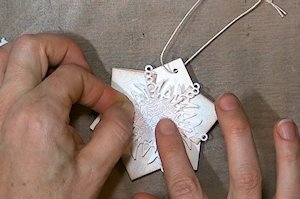
Step 7
Die cut one or two snowflakes for each side of the ornament.
Center and adhere them to the ornament.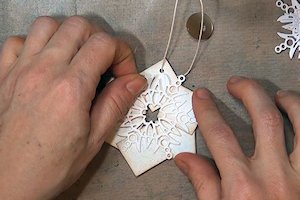
-
TIP:
To adhere delicate die cuts, lay down some glue on a craft mat. Lay the die cut lightly into the glue, then apply it to the ornament.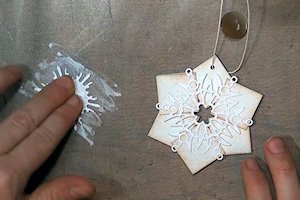
-
Step 8
Glue the multi-loop bow to the center front of the ornament.
-
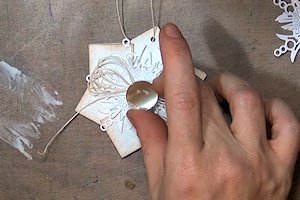
Step 9
Glue a button or large gem in the center of the bow.
-
TIP:
Shanks can be removed from buttons with wire cutters.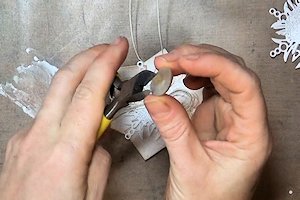
-
Step 10
Decorate the back side if desired.
-
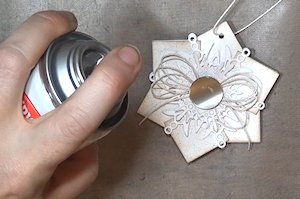
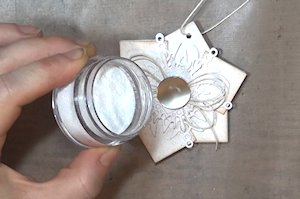
Step 11
Give the ornament a little shine by brushing or spraying it with a clear gloss finish (photo staged for tutorial only - please spray in a well ventilated area).
-
While the gloss is still wet, sprinkle in some glitter.
-
Step 12
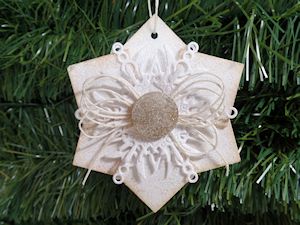
Add any other finishing touches you desire to complete the project. Use it to adorn a package or Christmas tree.
Video!
Your Turn
You've seen the tutorial, now you try it! We've got a section of the gallery set aside for Inchie Snowflake Ornament. Try this technique, then upload your artwork to the gallery. Show us your creations!
***Please note - Internet Explorer/Edge is not a supported browser, and will not allow you to see the videos. Please use Chrome, Firefox or Safari to view our tutorial videos.

Questions and Comments
We'd love to get your feedback or questions. Leave your comment below.
I also love your technique of applying glue to an intricate die cut. Thanks for sharing!!
I am cross-eyed from applying tiny lines of glue to intricate die cuts of swirled Christmas trees LOL
Barbara
Joni
Page 1 of 1 pages