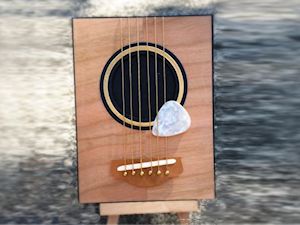
Guitar Card
by Carol Lovenstein
Make a guitar shaped card for the music lover in your life.
Supplies
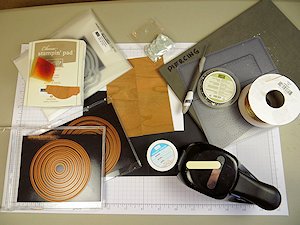
- Cardstock – black, white, vanilla, gold foil
- Wood veneer (Cherry used here)
- Gold cording (6 pieces – 5-1/2" each)
- Mini brads (6)
- Adhesive (1/4" double sided tape, Foam Dimensionals, Scotch tape)
- Die cutting machine
- Circle dies (Spellbinders® Classic Circles (Large & Small) used here)
- Label die (Stampin’ Up!® Deco Labels Framelits used here)
- Word Window punch (optional)
- Clear embossing powder
- Heat tool
- Paper piercing tool
- Piercing mat
- Sponge
- Guitar pick
Step-by-Step
-
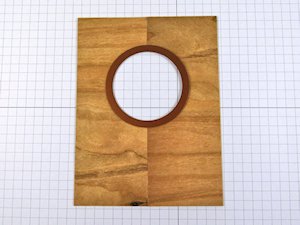
Step 1
With the grain horizontal, cut a 4" x 5 1/4" piece of wood veneer into two - 2" x 5 1/4" lengths. Rotate one piece 180 degrees to create a center seam.
Adhere pieces butted together onto 4" x 5 1/4" cardstock.
-
Step 2
Die cut a 2 1/8" circle through both layers, centered on the seam, approximately 1" from top (Spellbinders Classic Circles – Small #4 die used here).
-
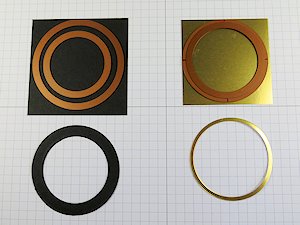
Step 3
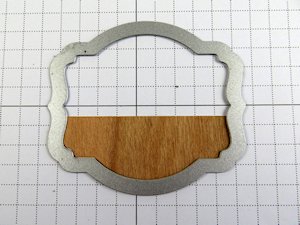
Die cut a large circle frame from black cardstock using 1 7/8" (Small Circles #5) and 2-9/16" (Large Circles #3) dies. Cut a small circle frame from gold foil cardstock using 2 1/8" (Small Circles #4) and 2 5/16" (Large Circles #4) dies. (Measurements are flexible.)
-
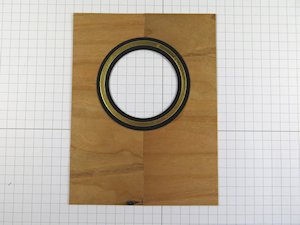
Step 4
Glue the large frame to the veneer panel, centered around the circle, then center the small frame onto the large frame.
-
Step 5
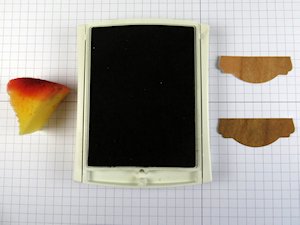
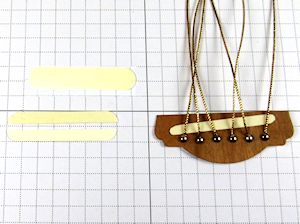
Die cut the bridge shape from veneer using a label die, making sure to run grain vertically. Position the die at the edge of the veneer so that only about 3/4" – 1" is cut, leaving a straight edge.
-
Step 6
Sponge the veneer piece lightly with ink to darken.
-
Step 7
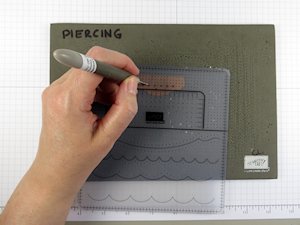
Poke 6 holes into the bridge with an awl or piercing tool, centered and 1/4" apart, approximately 1/2" down from the straight edge.
-
Step 8
Apply double stick tape to the back side of bridge. Thread a 5 1/2" piece of cording through each hole, sticking the ends to the tape on the back side. Install mini brads onto the front.
TIP:
Apply a 1/4" strip of Scotch tape over the cording and brad legs to make sure they don’t come loose.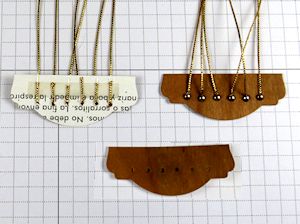
-
Step 9
9
Prepare a 5/8" x 2 1/8" strip of vanilla cardstock, inking with clear embossing ink and embossing with clear powder. Punch out Word Window shape. Cut the shape in half lengthwise and round the ends with scissors. It is okay if it’s not perfectly straight. Glue the piece to the bridge at an angle between the brads and vertical straight edge.
Adhere the bridge in the center below the circle using foam dimensionals, about 1/2" from the bottom.
TIP:
If not using the punch, cut a strip of cardstock that is 1/4" x 1 3/4", and round the ends with scissors.
-
Step 10
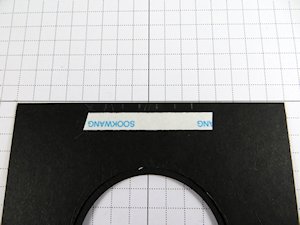
Turn the card face down. At the top pencil six tick marks 1/4" apart, centered. Apply another strip of double stick tape slightly below the tick marks on the card back. Align cords with tick marks, and press the ends down onto the tape. Make sure to pull cording taut.
-
TIP:
Apply Scotch tape over cord ends so they don’t come loose.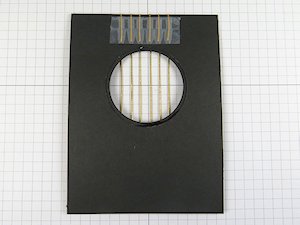
-
Step 11
Adhere card face to base with a generous amount of foam dimensionals.
Adhere your color choice of guitar pick to the card front with a foam dimensional.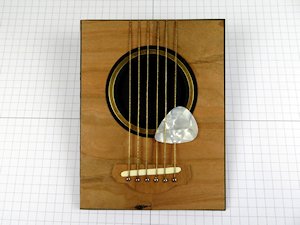
-
Step 12
Complete the project.
Video!
Variations
-
Make this slightly different version of the card with a curved edge. Click HERE for the template.
Follow the instructions above for embellishing, adjusting the measurements for the circle dies and cord spacing to the smaller template.
Also, if you don't have wood veneer, use wood grain stamps and sponge ink to create the look of wood.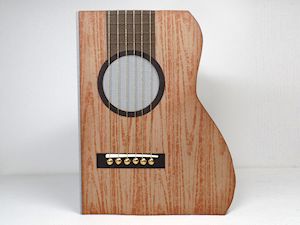
Your Turn
You've seen the tutorial, now you try it! We've got a section of the gallery set aside for Guitar Card. Try this technique, then upload your artwork to the gallery. Show us your creations!
***Please note - Internet Explorer/Edge is not a supported browser, and will not allow you to see the videos. Please use Chrome, Firefox or Safari to view our tutorial videos.

Questions and Comments
We'd love to get your feedback or questions. Leave your comment below.
Jocelyn x
aka JoBear2 on SCS
And...with 4 strings, you have a ukulele!!
Sue
thanks!
Page 1 of 2 pages 1 2 >