Glaze Pen Resist
by Dina Kowal
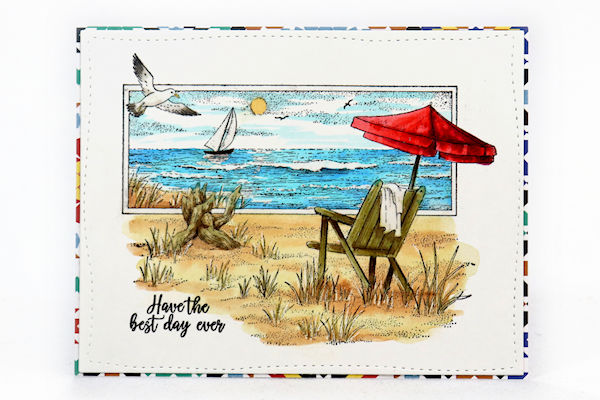
Use the waterproof property of Sakura's Glaze Pen for resist techniques.
Supplies
- Ink (Impression Obsession hybrid ink used here – use a hybrid or whatever ink is compatible with your coloring medium)
- Sakura Clear Glaze Gel Pen (also sold as Sakura AquaLip Gel Pen)
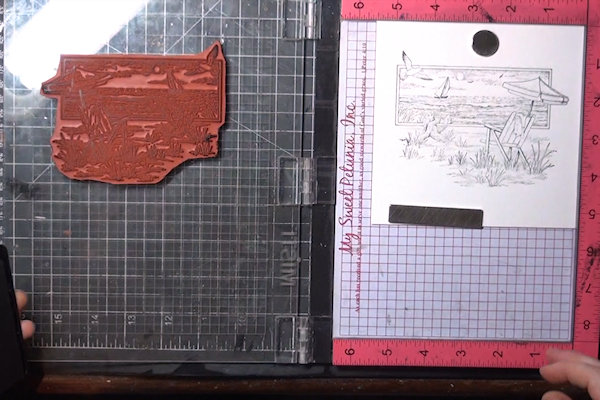
- Detailed stamp (Whimsy Stamps Beach Serenity cling stamp used here)
- Wet coloring medium (Copic and Karin Markers and QoR watercolors used here)
- Watercolor paper (140# Fabriano Studio Hot Press paper used here)
- Water
- Paintbrush
- Colorless blender (if using alcohol markers)
- Paper towel or baby wipe (for water-based mediums)
- Other supplies as needed to complete the project (used here: Whimsy Stamps Handstitched Rectangles die (retired), Bunny Balloons clear set (sentiment), Ella & Viv by Reminisce Spice Market Scrapbook Collection Kit
Step-by-Step
-
Step 1
Stamp a detailed image.
NOTE:
Hybrid ink was used here so that more than one medium could be demonstrated with the technique. This isn't necessary - choose an ink that is compatible with your coloring medium. -
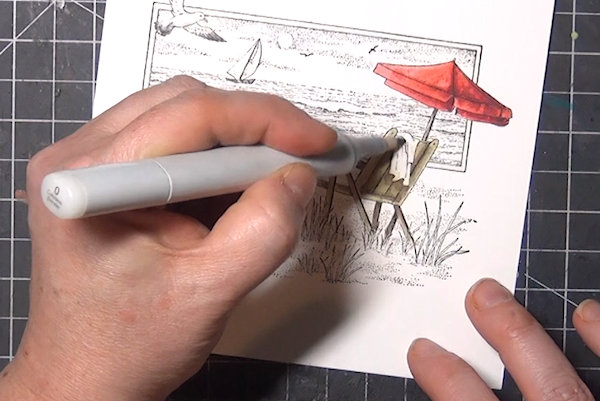
Step 2
Use the clear glaze pen to cover any areas of the image that you want to remain white. Allow the glaze to dry before continuing (it will lose its shine slightly). The glaze acts as a permanent mask when dry, as it is waterproof.
For this step the sails, towel, waves, and frame were glazed. -
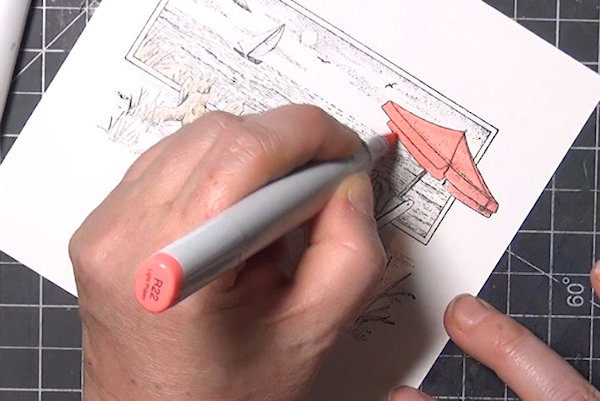
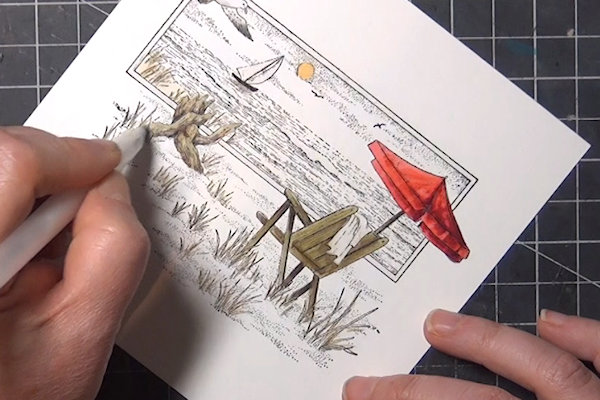
Step 3
Begin to add color to the image. Work in small sections and in layers.
For this step the driftwood was colored with a light marker, as well as the umbrella and the gull (Copics were used for these smaller areas and details). -
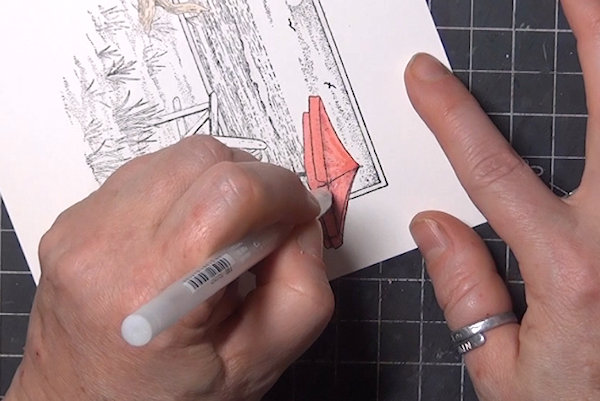
Step 4
Add details over the colored areas using the glaze pen before adding a second layer of color. Be sure the glaze is dry before proceeding.
-
When the next layer of color is added, the glazed areas will show.
-
Step 5
Keep adding color to the image. Where glaze has been added, the color underneath it will show through.
-
Where color sticks to the glaze, you can use a blender pen to remove it (for alcohol markers, a colorless blender; for watercolor a blender pen or even a baby wipe or damp cotton swab).
-
Step 6
The glaze pen can also be used to protect or mask colored areas as you continue to add color to the image.
Here, the gull, boat, driftwood, sun, chair, and umbrella have been glazed in preparation for coloring the background. -
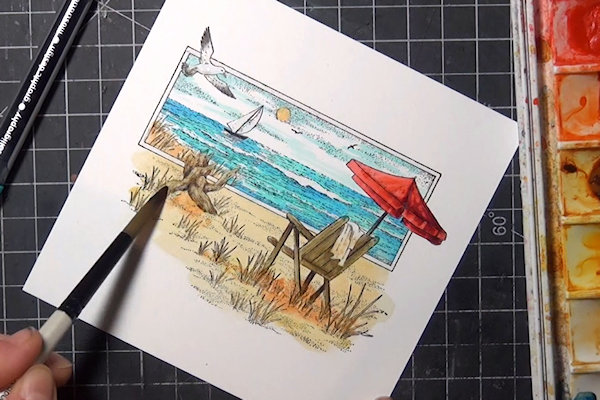
Step 7
Continue adding color to the image.
NOTE:
For the sample, I switched to watercolor here – it isn’t necessary to do this! -
Don't worry about going over the edges of the glazed areas – they’re waterproof!
-
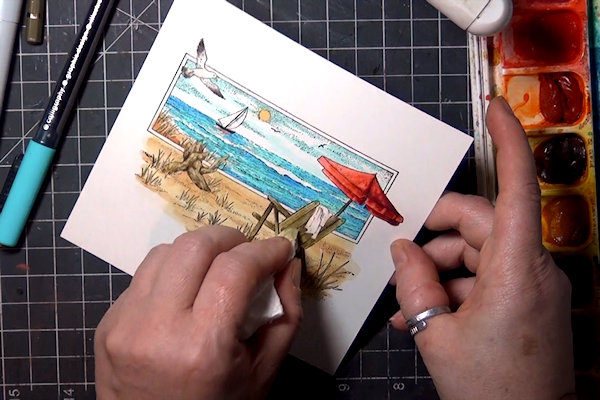
Step 8
Clean up any extra color that has stuck to the glaze.
-
Step 9
Use the panel to complete a card or other project.


Video!
Your Turn
You've seen the tutorial, now you try it! We've got a section of the gallery set aside for Glaze Pen Resist. Try this technique, then upload your artwork to the gallery. Show us your creations!
***Please note - Internet Explorer/Edge is not a supported browser, and will not allow you to see the videos. Please use Chrome, Firefox or Safari to view our tutorial videos.

Questions and Comments
We'd love to get your feedback or questions. Leave your comment below.
I will definitely look into this gel marker; it could be a game changer for me.
Page 1 of 1 pages