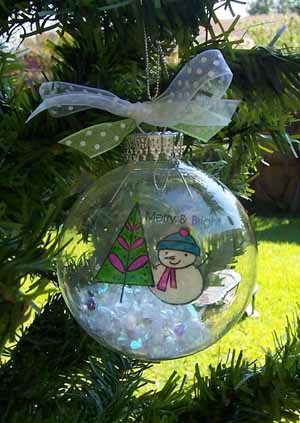
Glass Ornament
by Vickie Maduzia
Personalized ornaments are part of many family traditions. Why not make your own this year?
Supplies
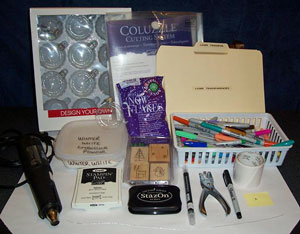
- Outline stamps of your choice
- 2 1/2" clear glass ball ornament
- Sheet of laser transparency film (heat resistant; available at office supply stores)
- Coluzzle® circle template, die, or other circle cutting system
- White embossing powder
- Heat tool
- 1/8" Hole Punch
- Small Sticky Notes
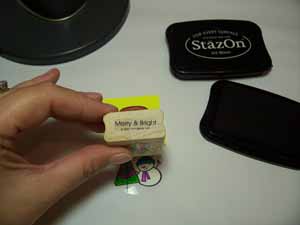
- Black Stazon™ Ink
- White Pigment Ink
- Blender Pen
- Silver Cording
- Mini Glue Dots
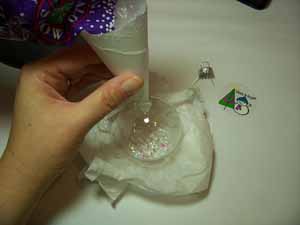
- Buffalo Snow, also called Iridescent Ice Flakes (available at craft stores)
Step-by-Step
-
Step 1
Using a Coluzzle cutting system, cut a circle from laser transparency film roughly ½" smaller than the diameter of the glass ball ornament.
For this 2 ½" size ornament, this will be the 3rd ring from the center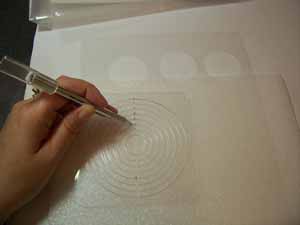
-
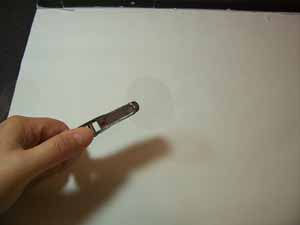
Step 2
Punch a hole in the top of the transparency circle with a 1/8" punch.
-
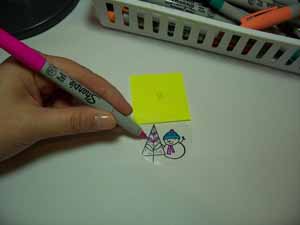
Step 3
Stamp image with Black Stazon. Affix a sticky note “handle” to the top to help reduce fingerprints and prevent messy product combinations.
This is Side A; write an "A" on the sticky note.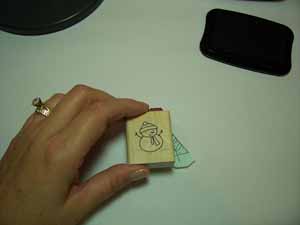
-
Step 4
Flip the transparency circle over, mark it with a "B" and color the image with Sharpie markers.
-
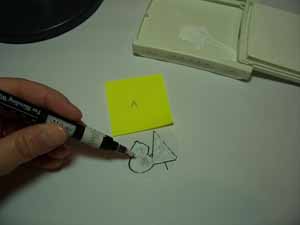
Step 5
Flip the circle back to Side A. Squeeze a little white pigment ink onto the lid of the ink pad and apply carefully with a blender pen. Stay within the black lines, and fill in the entire stamped image with pigment ink, until the back of the stamped image is wet and sticky.
-
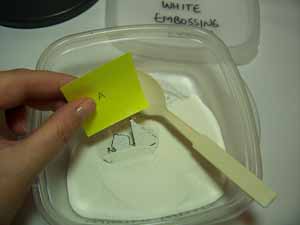
Step 6
Sprinkle the wet surface with white embossing powder.
-
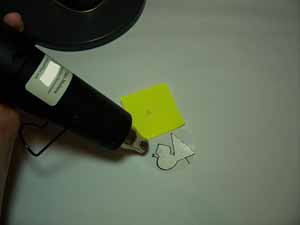
Step 7
Use heat tool melt the embossing powder. Do not overheat.
-
Step 8
If a sentiment is desired, stamp on Side B. Use Stazon write something memorable (like the year) with a Sharpie marker. Set the stamped transparency circle aside while the glass ornament is prepped.
-
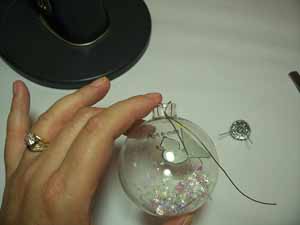
Step 9
Take the metal hanger and cap off the neck of the ornament and set it aside. With a small funnel made of scrap paper, stuff about 2 tablespoons of Buffalo Snow inside the ornament.
-
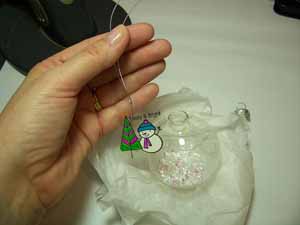
Step 10
Thread a 6-8" piece of silver cord through the hole previously punched in the transparency.
-
Step 11
Roll the transparency circle into a loose tube, with the shiny part out, being very careful to hold onto the silver cord at the top.
Stuff the tube down the neck of the ornament. Don't let go of that silver cord!!
The transparency circle will pop open and will dangle and turn around nicely inside the glass ball.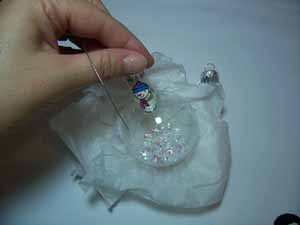
-
Step 12
Apply a mini glue dot to the outside neck of the ornament. Adhere silver cord to the glue dot and trim excess cord with scissors.
-
Step 13
Carefully replace metal cap. Finish ornament with ribbons and a hanging loop.
Your Turn
You've seen the tutorial, now you try it! We've got a section of the gallery set aside for Glass Ornament. Try this technique, then upload your artwork to the gallery. Show us your creations!
***Please note - Internet Explorer/Edge is not a supported browser, and will not allow you to see the videos. Please use Chrome, Firefox or Safari to view our tutorial videos.

Questions and Comments
We'd love to get your feedback or questions. Leave your comment below.
Can't wait to try these w/my beloved Frosty set. Hope it's not too big!
Thanks for sharing!!!!
Loved your extra tips - like using the post-it note handle and assembling the top using the silver cord and glue dot - very clever!
Page 1 of 2 pages 1 2 >