Gilding Polish Techniques

by Tina Wardell

Explore the different ways this shimmery water-soluble medium can be used.

Supplies

  • Metallic Gilding Pastes (Creative Expressions Cosmic Shimmer used here) or other water soluble metallic mediums
  • Sponge applicator
  • Cardstock (black and white used here)
  • Embossing folder (Stampin Up!® Cut & Emboss Seashells Embossing Folder used here)
  • Stamps (SU Friends Are Like Seashells clear stamp set used here)
  • Stencil and brush applicators
  • Water mister
  • Paint brush
  • Other supplies as needed to complete the project

Step-by-Step

  1. Step 1

    Gilding pastes can be used in a variety of ways! To create a shimmery background, apply the paste directly to cardstock with a sponge applicator and circular motion. If using multiple colors, apply randomly to different areas, then add in more colors, overlapping the edges.

    TIP:
    Pick up the medium and scrape the applicator against the rim of the jar to break up clumps and create an even distribution.

  2. Continue adding color until you have the coverage you wish.

  3. Step 2

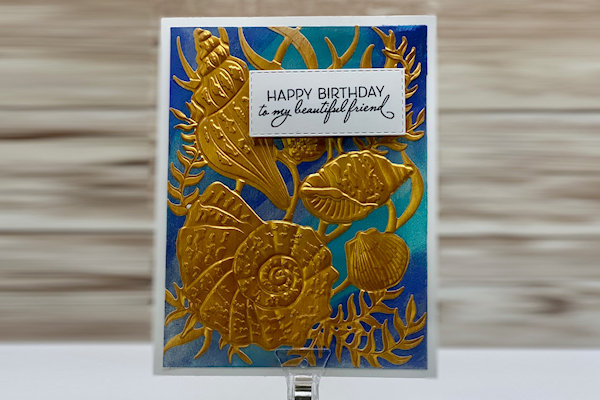
    Use the background as desired. In this sample the background was embossed and die cut.

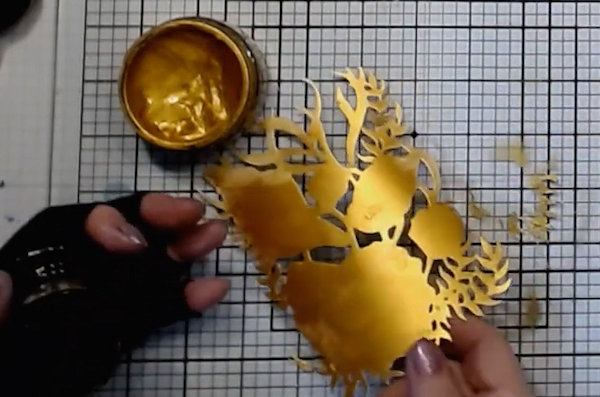
  4. Here a single metallic color was added to a die cut with a white cardstock base.

  5. Step 3

    Apply the polish directly to an embossing folder. Here polish was applied lightly to the side of the folder with the raised design. Mist lightly before running the folder through your machine, to activate any polish that has dried and soften the cardstock for embossing.

    TIP:
    For more detailed application, use a finger tip dauber.

  6. Here are the results when the polish is applied to the raised side of a 3D folder. Try the other side for a different look!

  7. Step 4

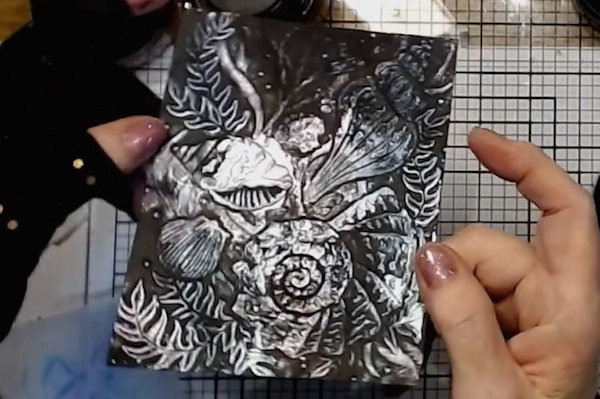
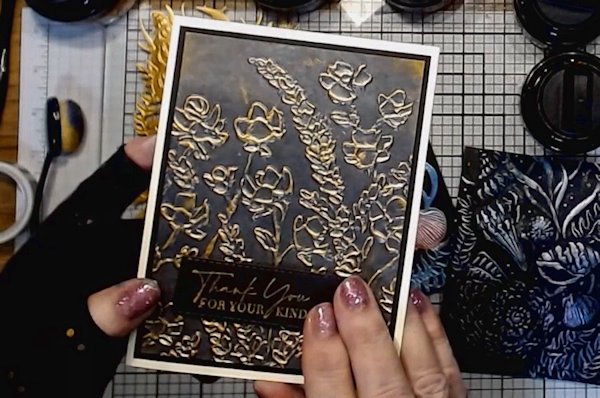
    For more controlled results with an embossed panel, emboss the cardstock first, and then lightly apply the polish to the raised areas of the cardstock.

  8. Step 5

    Stamping:
    Stamp an inked stamp over a polished background.

  9. Lightly apply the polish to your stamp and use it as an ink.
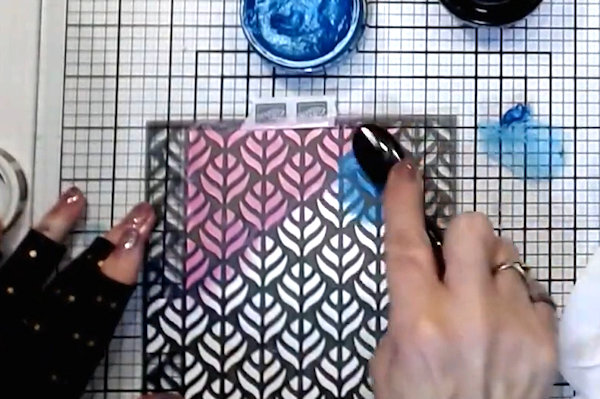
  10. Step 6

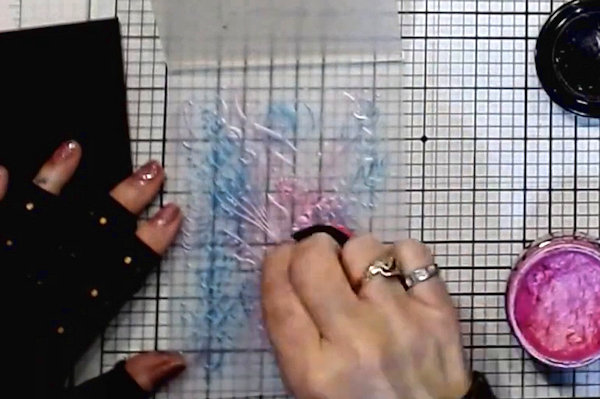
    Stencil with the gilding polish. Fix the stencil in place, and use a soft brush to apply the polish through the stencil openings. Overlap colors for a more blended look.
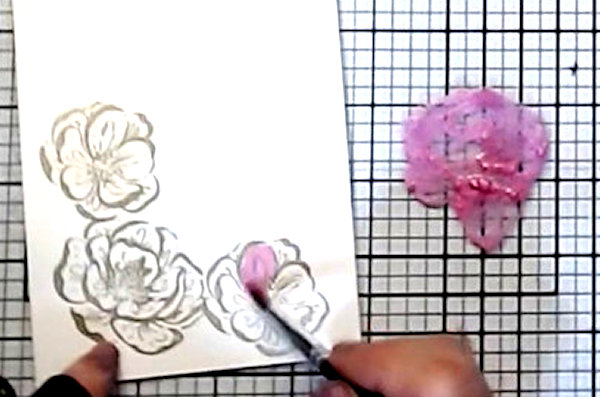
  11. Step 7

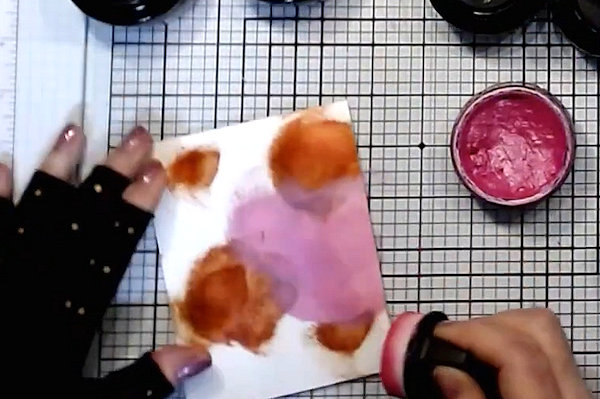
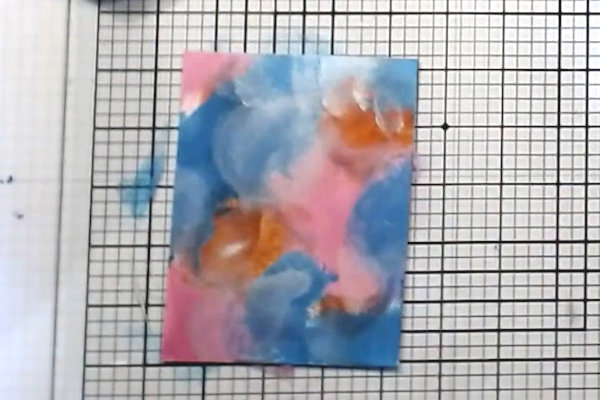
    Put a little of the polish onto a nonporous surface. Mix with water and use as a watercolor paint. Layer for more intensity of color.
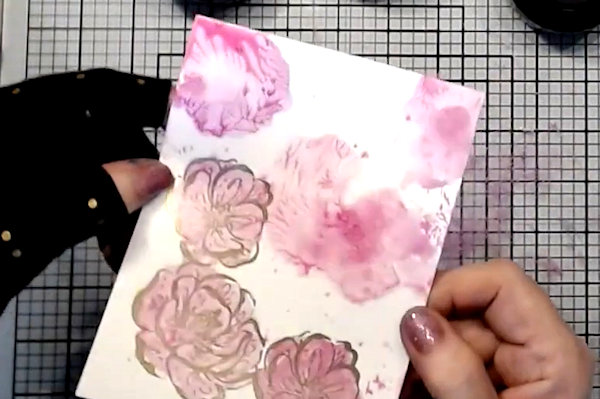
  12. Step 8

    Water down more polish and press your paper into it for some pearlescent ‘smooshing’.
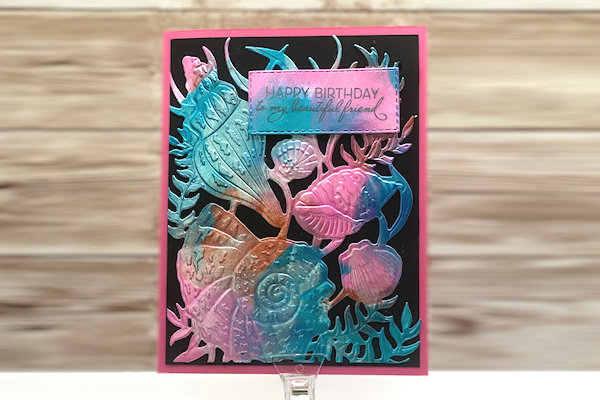
  13. Step 9

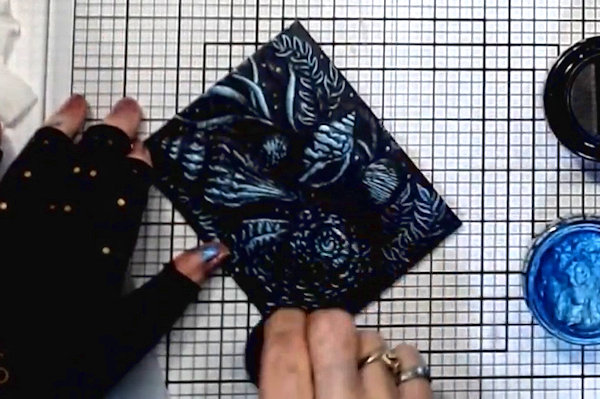
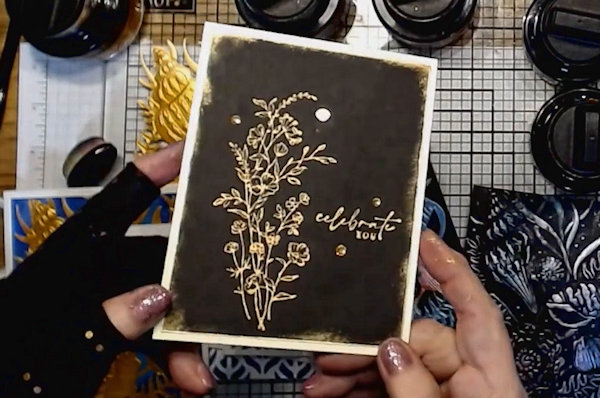
    Combine techniques! This sample began by adding metallic polish to the base panel. The panel was embossed, and then a contrasting color was used to highlight the raised outline.

  14. Here is the die cut from step 2b layered onto a polished background.

Video!

Your Turn

You've seen the tutorial, now you try it! We've got a section of the gallery set aside for Gilding Polish Techniques. Try this technique, then upload your artwork to the gallery. Show us your creations!

***Please note - Internet Explorer/Edge is not a supported browser, and will not allow you to see the videos. Please use Chrome, Firefox or Safari to view our tutorial videos.

Questions and Comments

We'd love to get your feedback or questions. Leave your comment below.

I have used this type paste before, but had not used it every way you have shown. Thank you for broadening my horizons showing SO MANY OPTIONS! I will be having a play with this again soon!
ozarkstamper  |  Wed Jul 26, 2023 at 5:56 AM
Thank you Tina for the variety of helpful techniques. I have two containers of gilding paste that have become dry, is there a way to bring them back?
sheltielover  |  Wed Jul 26, 2023 at 7:58 AM
sheltielover, what is the brand? are they water-soluble?
dini  |  Wed Jul 26, 2023 at 8:28 AM
If it's InkaGold (Viva Decor) they last forever - just mist them with a decent amount of water and leave the lid on for a while until they rehydrate
lydia  |  Wed Jul 26, 2023 at 8:33 AM
Thanks Dini and Lydia, the brand is Creative Expressions. It does not say water soluble, but only to prime the sponge in warm soapy water. I will try misting them, I have nothing to lose at this point.
sheltielover  |  Wed Jul 26, 2023 at 8:44 AM
I love this stuff. I have not used it in so many ways-smooshing! Cool!!! That has a lot of potential! I am loving the die cut shells and then embossed...I got that set just to do that with! :D thank you so much for this demo!
wavejumper  |  Wed Jul 26, 2023 at 11:38 AM
These remind me of Lunar Pastes by Simon Hurley. They look the same and seem to work the same, so I'm going to try your techniques with those and see what happens since I have all of those already. Love what you did today, especially that seashell embossing folder! Gorgeous! Thanks for all the tips. I never would have thought to use it to stamp a sentiment.
Desert Stamper  |  Wed Jul 26, 2023 at 1:30 PM
I LOVE this gilding polish…have 30+ colors. And you absolutely can reconstitute them should they dry out a bit. I add distilled water (to be sure no outside impurities enter the mix) a bit at a time and then stir, stir, STIR! At first it will seem clumpy. If it looks like cottage cheese then keep stirring. I like mine to be the consistency of pudding. I’ve never had one dry out COMPLETELY (as is hard hockey puck like some other brands) but even when pretty dry I just poke some holes in the mix, add a tbs or so of the water and let it sit over night. Then stir, stir stir. Since I have so many, and don’t get around to using some colors often, I occasionally do a check to see which ones need to be reconstituted. Stamplistic at one time had a YouTube video on the process. Again, I can’t say how much I love this product…esp with Autumn approaching. The golds, russets, etc are simply stunning. Don’t know how this compares to the lunar pastes and such but this is definitely my go to for subtle shimmer and shine🥰
Playbaby  |  Thu Jul 27, 2023 at 6:35 AM
Just picked up a third polish! Guess I'll try another one
muscrat  |  Mon Jul 31, 2023 at 2:40 PM
Wow, Tina, thank you so much for sharing your amazing techniques and suggestions! Your cards are gorgeous! I have a few tubs of Gilding Polish, but never really knew what to do with them. I do know, thanks to you!
LizBeth1976  |  Mon Aug 14, 2023 at 9:32 AM

Page 1 of 1 pages

You need to be logged in to comment

GET OUR NEWSLETTER


Splitcoaststampers's privacy policy