Gilded Faux Silk
by Melissa Kerman
Highlight textured tissue paper with embossing powder for an elegant background.

Supplies
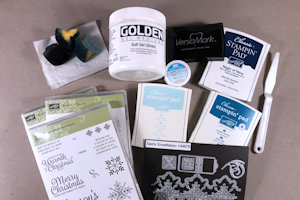
- Stamps (Stampin’ Up!® Snowflake Sentiments Stamp Set and Touches of Texture used here)
- Tissue paper
- Cardstock (SU Night of Navy and Whisper White Cardstock used here)
- Ink pads (SU Night of Navy, Island Indigo and Soft Sky used here)
- Versamark ink pad
- Silver embossing powder
- Heat tool
- Sponges
- Palette knife
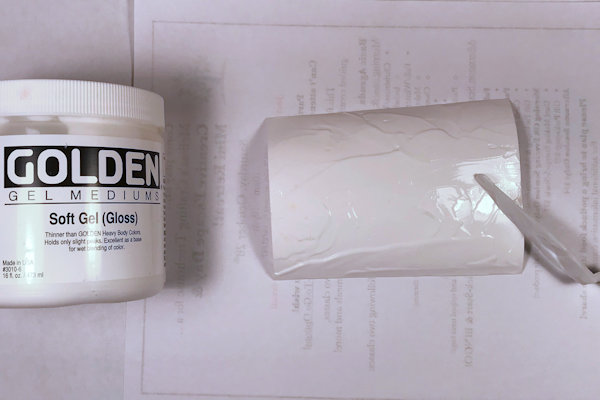
- Gel medium (Golden brand used here)
- Water mister (optional)
- Other supplies as needed to complete the card (used here: Silver Glimmer Paper, Swirly Snowflakes Thinlits dies, die cutting machine)
Step-by-Step
-
Step 1
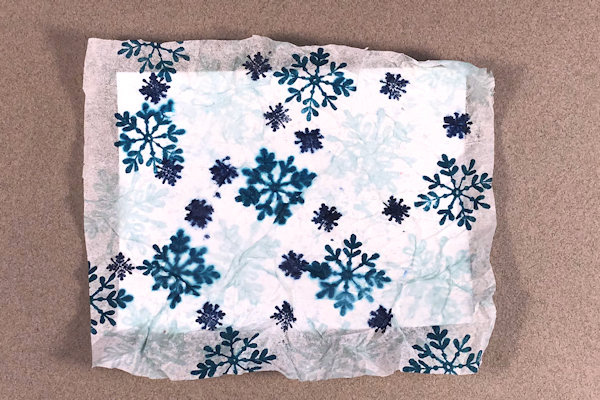
Stamp images of your choosing on a piece of tissue paper. For more depth, use a variety of inks.
-
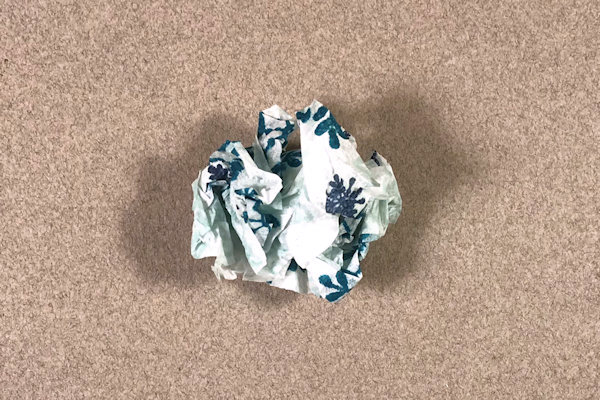
Step 2
Crumple the stamped tissue paper into a ball. Open up the tissue paper ball till it’s somewhat flat.
-
NOTE:
The more you stretch out the tissue paper, to make it flat again, the more subtle the wrinkles will be. If you leave the tissue paper more crumpled you’ll get bigger, deeper folds and shapes in the background. -
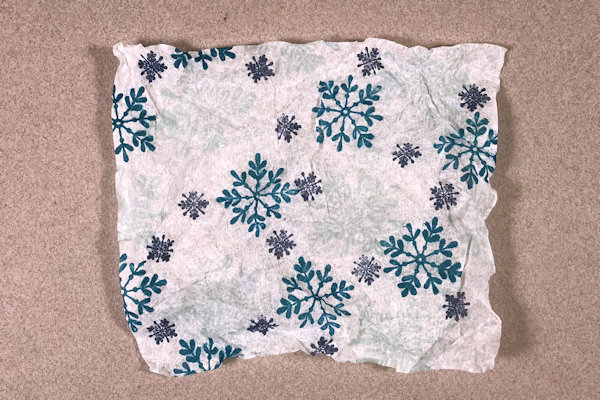
Step 3
Apply gel medium (or other adhesive if desired) all over a piece of white cardstock.
NOTE:
Gel medium may cause the ink on the tissue paper to bleed or move on the tissue paper. This makes the images blurry looking and helps to create a more blended look. -
Step 4
Place the stamped tissue paper onto the prepared cardstock. Tap down the tissue paper to cover the cardstock, leaving folds and texture as desired. Set aside to dry. Drying will take about 30 minutes depending on how much gel medium was applied.
NOTES:
Tap down carefully as the tissue paper will tear easily.
Do NOT place the tissue paper face down to flatten, as the gel medium may stick to your work surface and tear or pull up the tissue paper. -
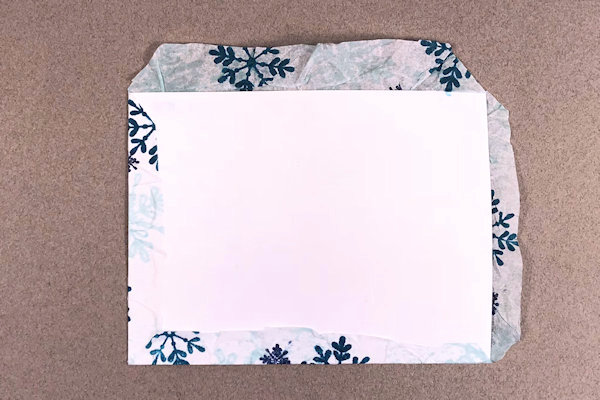
Step 5
When the piece is dry either cut off the excess tissue paper, or bevel the corners of the tissue paper as shown. If the corners are beveled, put adhesive on the edges of the cardstock and fold over to adhere tissue paper to the backside.
-
Step 6
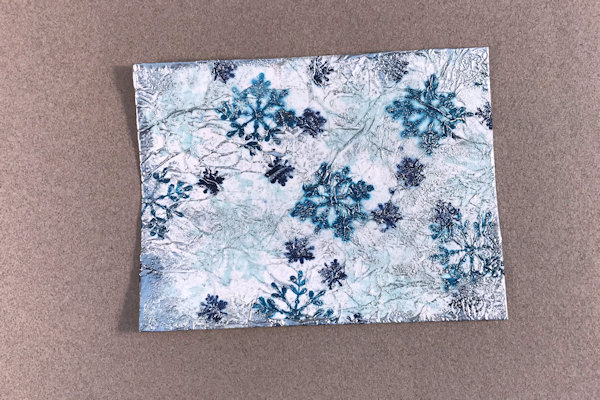
Lightly run a Versamark pad over the surface and on the edges of the dry tissue paper. The raised areas will pick up the Versamark ink.
Spoon metallic embossing powder over the surface rubbed with the Versamark. Cover the whole panel with powder and tap off the excess. Use your finger to rub off excess embossing powder as desired.
Use a heat tool to heat the embossing powder. -
Step 7
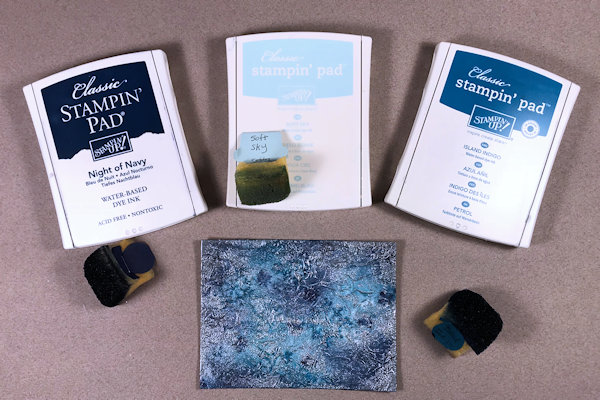
Sponge over your images to blend the colors.
(Optional) Spray with a little bit of water to blend the colors more. -
Step 8
Embellish the piece as desired.
-
Step 9
Complete the project.


Video!
Your Turn
You've seen the tutorial, now you try it! We've got a section of the gallery set aside for Gilded Faux Silk. Try this technique, then upload your artwork to the gallery. Show us your creations!
***Please note - Internet Explorer/Edge is not a supported browser, and will not allow you to see the videos. Please use Chrome, Firefox or Safari to view our tutorial videos.

Questions and Comments
We'd love to get your feedback or questions. Leave your comment below.
merci beaucoup!
I am going to try this technique as soon as my stamps arrive.
Page 1 of 1 pages