Gilded Die Cuts
by Chrissie Stokes
Add shimmer and dimension to your die cuts with gilding flakes and mica powders.
Supplies
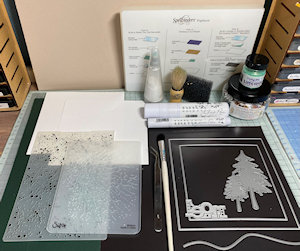
- Cardstock (deep green and linen textured 250 gsm from Papermill Direct (a UK-based company) used here)
- Focal dies (Impression Obsession Fir Tree dies used here)
- Gilding/foil flakes (Crafty Notions Variegated Gilding Flakes in Frosted Leaves used here)
- Pigment or mica powders (Indigo Blu Luscious Pigment Powder - Mermaid’s Tail used here, PanPastels or foiling sheets will also work)
- Burnishing sponge or soft cloth (Indigo Blu Scoochie used here)
- Embossing folder (Sizzix texture embossing folder
- Tacky-when-dry glue (Nuvo Glue Pen (Large) used here)
- Tweezers, soft fluffy paintbrush
- Die cutting machine
- Other supplies as needed to complete the project (used here: Foam Tape, Low Tack Tape, Presscut square nesting dies, Hillside die, Sizzix Noel die, Sheena Douglass Snow folder (retired))
Step-by-Step
-
Step 1
Die cut focal pieces from cardstock.
TIP:
Use a color that will enhance the die cut if it shows through the gilding flakes. -
Step 2
Cover all with a layer of glue using a two-way glue pen - other tacky-when-dry mediums and glues will also work.
-
Step 3
Using tweezers, select small fragments of the gilding flakes and apply randomly to all glued die cuts, leaving gaps between each piece. Tamp down without spreading the flakes.
-
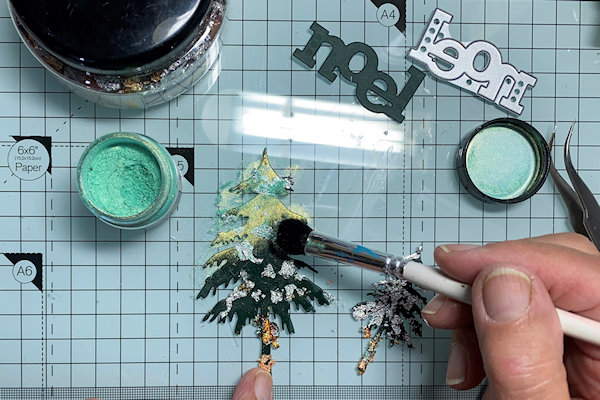
Step 4
Using the soft brush, apply some of the pigment powder, covering the whole of the remaining exposed glue, until all the die cuts are completely covered.
TIP:
Try foils, embossing powders or chalk pastels for different looks on this step! -
Step 5
Burnish with the Scoochie, soft cloth, or other burnishing tool.
-
Step 6
Emboss with a textured folder, using an anti-static tool if necessary to ensure that the die cuts are no longer tacky.
-
Step 7
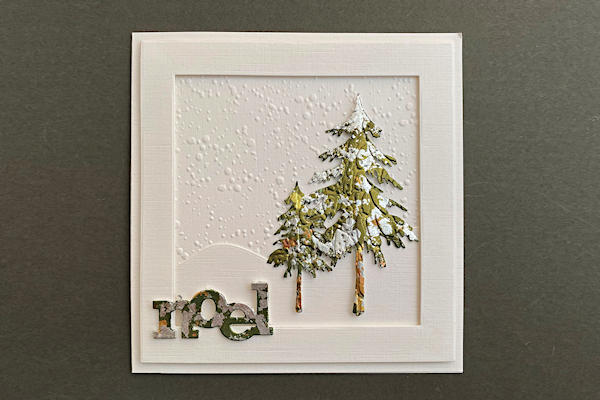
Assemble the card as desired. For the sample, a frame was die cut with 2 square nesting dies. White cardstock was die cut with a hillside die and the background was embossed with a snow embossing folder. Die cuts were attached to the card using foam tape.
-
Step 8
Complete the project.


Video!
Your Turn
You've seen the tutorial, now you try it! We've got a section of the gallery set aside for Gilded Die Cuts. Try this technique, then upload your artwork to the gallery. Show us your creations!
***Please note - Internet Explorer/Edge is not a supported browser, and will not allow you to see the videos. Please use Chrome, Firefox or Safari to view our tutorial videos.

Questions and Comments
We'd love to get your feedback or questions. Leave your comment below.
Page 1 of 1 pages