Gel Plate Stamping
by Jess Francisco
Use a mini gel plate and ink sprays for monoprinting. Tutorial courtesy of our friends at Ranger Ink!
Supplies
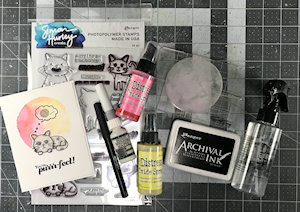
- White cardstock cut to desired size (Simon Hurley Stark White Cardstock used here)
- Small 3” Gel Plate (Ranger Gel Plate used here)
- Acrylic blocks
- Distress Oxide Spray (Picked Raspberry and Squeezed Lemonade used here)
- Mister or spray water bottle (Distress Sprayer used here)
- Other supplies as needed to complete the project (Simon Hurley Cool Cats Stamp Set, Ranger Archival Ink – Jet Black, Ranger Emboss It Pen – Black, Multi Medium Matte, Coloring medium of choice (alcohol markers used here), scissors)
Step-by-Step
-
Step 1
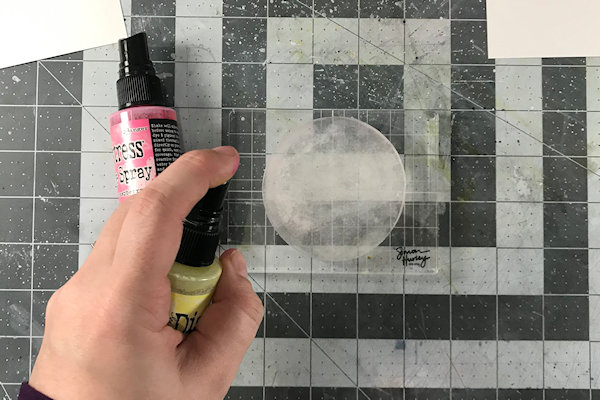
Place a small round gel plate on an acrylic block. Using Distress Oxide Sprays in your chosen colors, lightly mist the gel plate. (This works best if you concentrate one color on each half of the gel plate and the colors blend together in the middle.)
-
Step 2
Use the Distress Sprayer to lightly mist your Distress Oxide Sprays on the gel plate. This will help the color blend together nicely. A tiny bit of water is plenty!
-
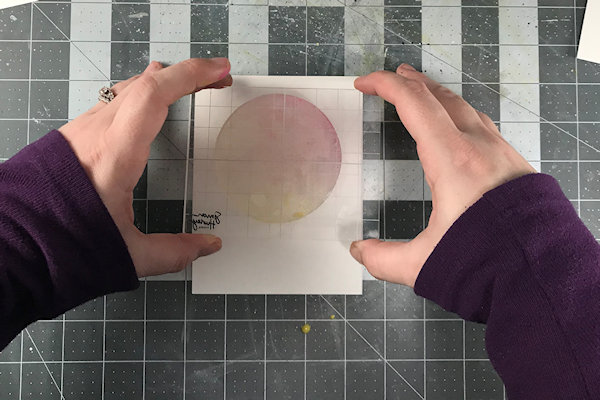
Step 3
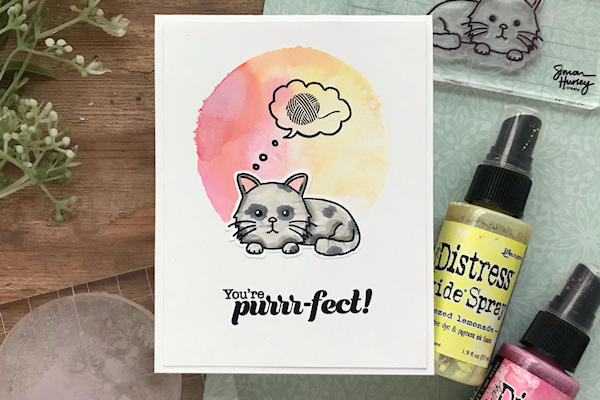
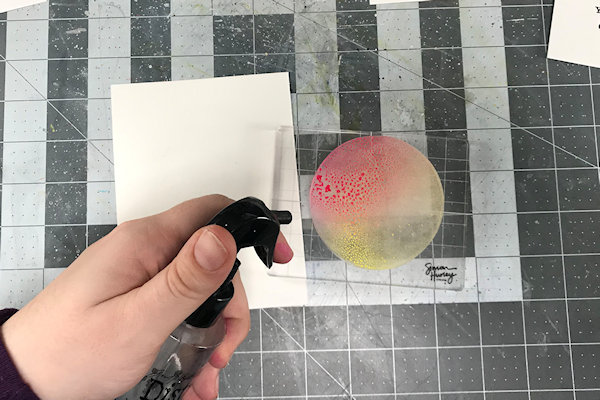
Flip the acrylic block over and carefully stamp the gel plate on to the card front (Card front measurement: 4” x 5.25” ). Don't press too hard or your ink will bleed outside of the gel plate shape on your cardstock.
-
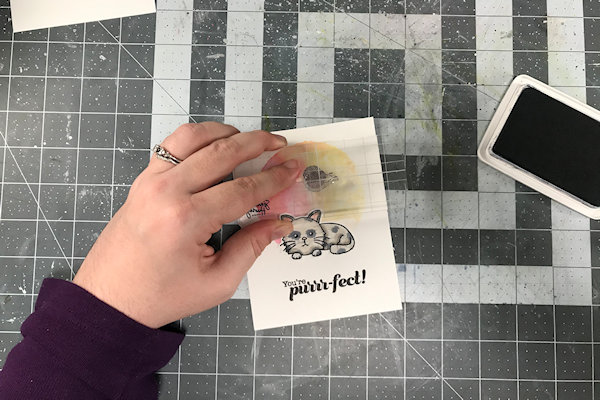
Step 4
Embellish the card as desired. For the sample, the cat image was stamped, colored with alcohol markers and fussy cut, then adhered to the card front with a sentiment.
-
Step 5
Complete the card.
Video!
Your Turn
You've seen the tutorial, now you try it! We've got a section of the gallery set aside for Gel Plate Stamping. Try this technique, then upload your artwork to the gallery. Show us your creations!
***Please note - Internet Explorer/Edge is not a supported browser, and will not allow you to see the videos. Please use Chrome, Firefox or Safari to view our tutorial videos.

Questions and Comments
We'd love to get your feedback or questions. Leave your comment below.
Page 1 of 1 pages