Four Way Card
by Dina Kowal
Create a standing dimensional card with a suspended ornament in the center.
Supplies
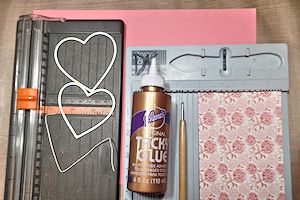
- Cardstock – full sheet
- Decorative paper , if desired
- Paper trimmer
- Scoring tool
- Die cutting machine
- Nesting dies (2) with a vertical line of symmetry (Quickutz/Lifestyle Dies Nesting Hearts and Spellbinders Labels 1 used here)
- Adhesive (Aleene's Tacky Glue used here)
- Twine or cording
- Other supplies as needed to complete the card (sequins, Impression Obsession products: DIE052-I Heart of Hearts, E13268 Grunge Heart Background, C13266 Do You Know; Versafine Onyx Black ink, Memento Angel Pink ink. Variation: Concord & 9th Let's Chat clear set, QoR watercolors)
Step-by-Step
-
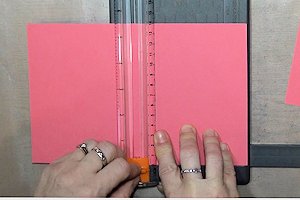
Step 1
Cut a sheet of cardstock into quarters, 4 1/4" x 5 1/2" each.
-
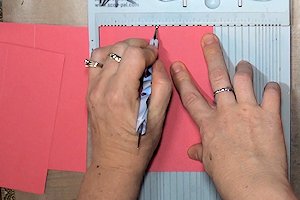
Step 2
Score each piece down the center from the short side at 2 1/8".
-
Step 3
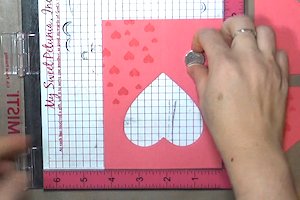
Center the larger of the nesting dies on a scored panel, lining up the scored line and the line of symmetry of the die. Secure the die in place and die cut.
NOTE:
Secure the die with a very low-tack adhesive, such as a Post-It Note. Multiple runs through the die cutting machine may begin to embed certain tapes, making them difficult to remove without tearing the card.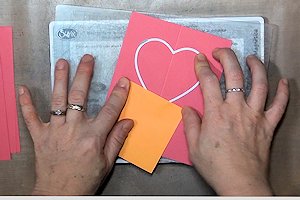
-
Keeping the die in place, remove the cut shape. Use the cut panel as a template for aligning the die on the remaining panels one at a time. Layer the panels together with the cut panel on top. Cut as usual.
NOTE:
Align the panels on the scored lines.The edges of the card panels may not meet exactly, but trimming can be done later.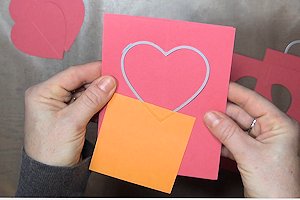
-
Step 4
Center the smaller of the nesting dies onto one of the die cut shapes. Secure in place and die cut.
Repeat for the remaining shapes.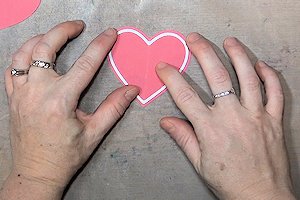
-
NOTE:
Smaller pieces can also be cut from other decorative paper. These pieces will need to be scored down the center line.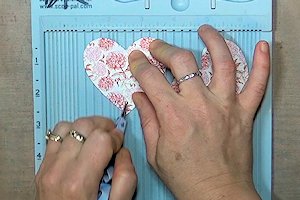
-
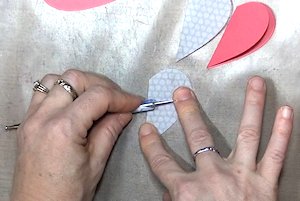
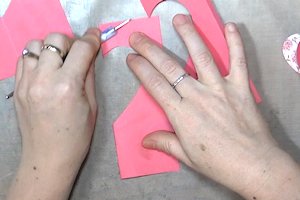
Step 5
Stamp or decorate the card panels and die cuts as desired.
-
Step 6
Fold and crease all the cut shapes on the score lines.
-
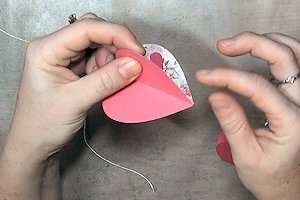
Step 7
Glue the back of one side of the first die cut shape to the opposite side of the next. Liquid glue is recommended, to give time for pieces to be adjusted once adhered.
-
Repeat until there is one side that remains to be glued.
-
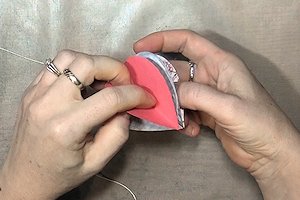
Step 8
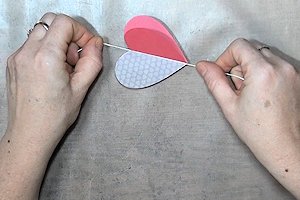
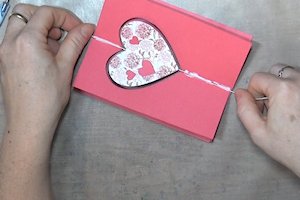
Run a line of glue along the center folds of the die cut shapes.
-
Lay a piece of twine or other fine cording in the center of the die cut pieces along the score lines. Hold the cording in place until the glue sets a little.
-
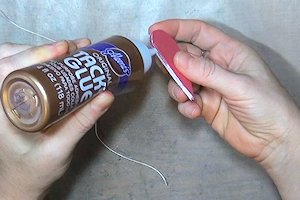
Step 9
Glue the remaining side to complete the center piece. Set the piece aside to dry completely.
NOTE:
The cording may shift from the center – adjust it as needed while the glue is still wet.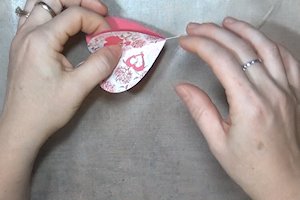
-
Step 10
The card will be assembled in the same way. Fold and crease all pieces along the score line.
-
Glue one side of the first card panel to the opposite side of the next.
NOTE:
Because there is a margin of human error in cutting and scoring, the edges of your card may not align exactly. Align the center folds and die cut shapes instead. Trimming can be done later.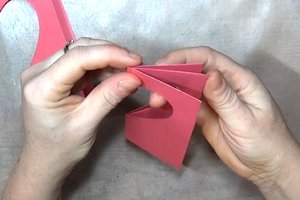
-
Step 11
Repeat until there is one side that remains to be glued.

-
Step 12
Run a thin line of glue down the center of the card where the folds all meet. Line up the center piece in the die cut opening of the card panels, and lay the twine along the center folds of the card. Wait a few moments for the cording to hold in the glue.
-
Glue the remaining side to complete the center piece. Allow to dry completely.
TIP:
To prevent warping, lay the card flat and press it under a heavy book until the glue dries.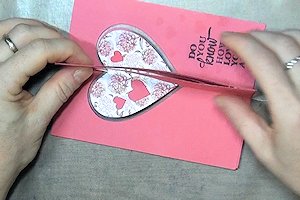
-
Step 13
Complete the project. The side panels and center piece can be adjusted for display - either at right angles or more closed, but in an 'x' formation.
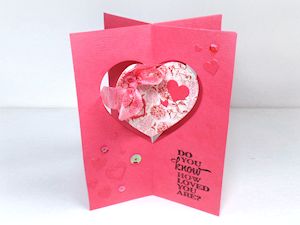
-
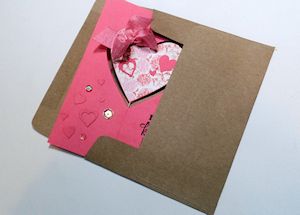
The card folds flat for mailing in a standard A2 envelope.
Video!
Variations
-
For a flat center piece, cut only 2 smaller shapes. Glue them together with the cording centered and sandwiched in between.
Make your card any size - just be sure to have 4 same-size panels, each scored exactly at center.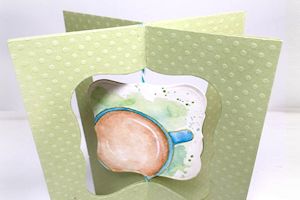
Your Turn
You've seen the tutorial, now you try it! We've got a section of the gallery set aside for Four Way Card. Try this technique, then upload your artwork to the gallery. Show us your creations!
***Please note - Internet Explorer/Edge is not a supported browser, and will not allow you to see the videos. Please use Chrome, Firefox or Safari to view our tutorial videos.

Questions and Comments
We'd love to get your feedback or questions. Leave your comment below.
I just love your tutorial and can't wait to try this myself! You make it look so easy.
Page 1 of 1 pages