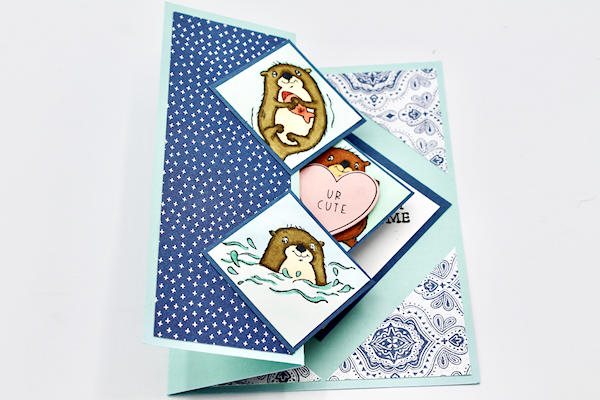
Fold Back Pop-Up Card
by Robyn Rasset
Several small layers peek out from this fun fold card.
Supplies
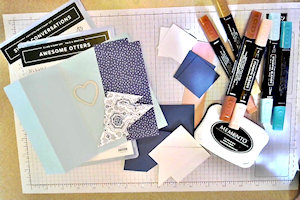
- Cardstock (Stampin' Up!® Pool Party, Misty Moonlight and Basic White cardstock used here)
- Patterned paper (SU Sunshine and Rainbows and Heart & Home Designer Series Paper)
- Stamps (SU Awesome Otters and Sweet Conversations stamp sets)
- Ink (Memento Tuxedo Black ink used here)
- Coloring medium (SU Stampin' Blends used here)
- Adhesive (Tombow mono adhesive used here)
- Other supplies as needed to complete the project (SU products used here: Sweet Heart Dies)
Step-by-Step
-
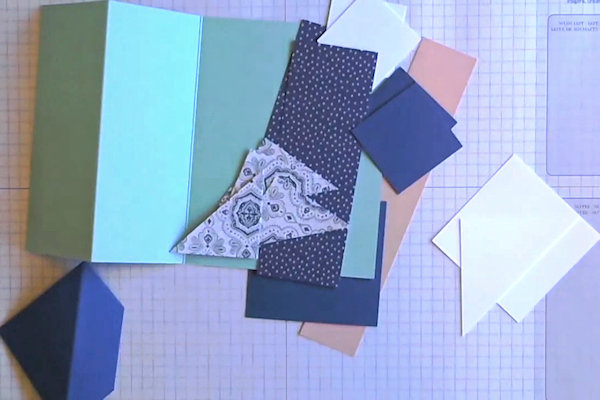
Step 1
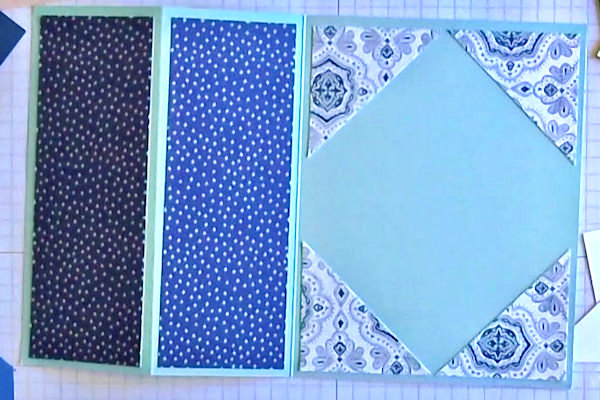
Prepare the cardstock and paper for the card design:
Cardstock base: 8 1/2" x 5 1/2", scored at 2 1/8" and 4 1/4"
Patterned paper #1: 2 pieces 5 1/4” x 1 7/8”
Patterned paper #2: 2 pieces 2”x 2” cut in half diagonally
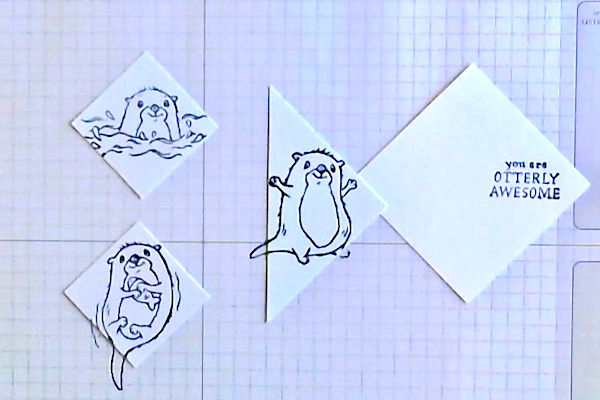
White cardstock: 2 pieces 1 5/8” x 1 5/8”
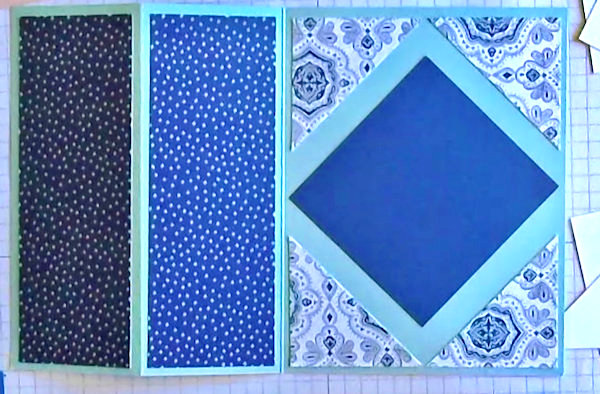
White cardstock: 2 pieces 2 5/8” x 2 5/8”, cut 1 in half diagonally
Coordinating cardstock: 2 pieces 1 3/4”x 1 3/4”
Coordinating cardstock: 2 pieces 2 3/4" x 2 3/4”, score 1 on the diagonal and cut off 1” of tip parallel to score -
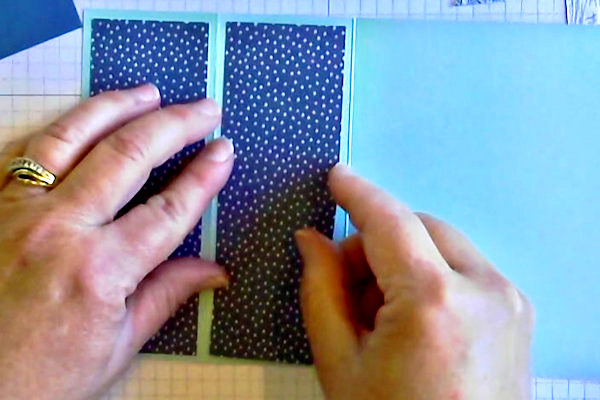
Step 2
Open the card flat and adhere patterned paper #1 to the left side, centered between score lines.
-
Adhere the patterned paper triangles to the corners on the right side.
-
Step 3
Adhere the 2 3/4” cardstock square centered between the triangles.
-
Step 4
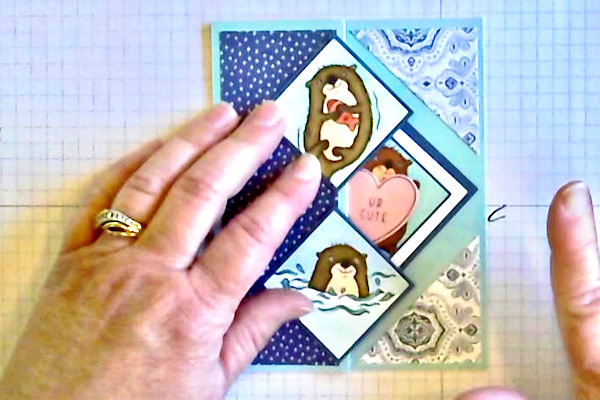
Stamp the images onto the white cardstock with the squares in diamond orientation.
-
Step 5
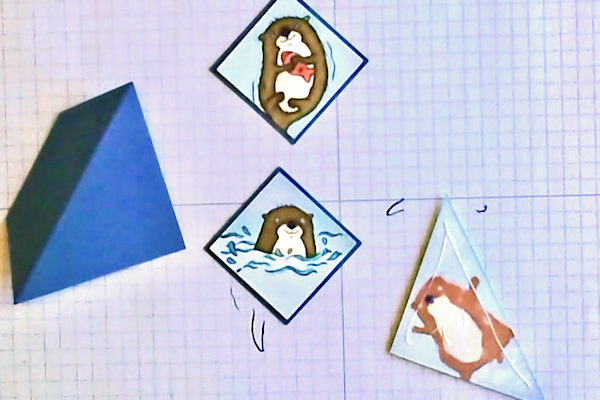
Color the images and prepare any other embellishments for your design.
-
Step 6
Adhere the colored images to cardstock layers.
-
Step 7
Adhere greeting layer to card.
-
Step 8
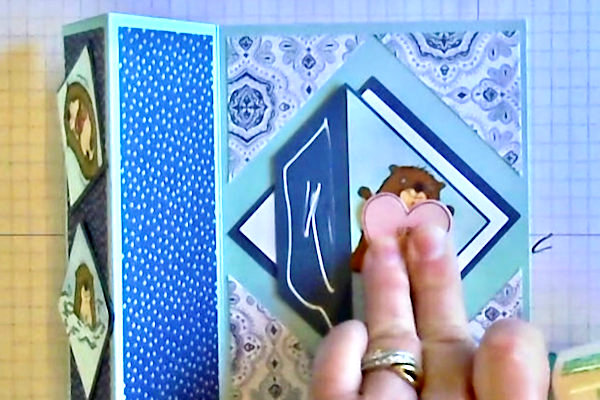
Without adhering, lay the images in place as a test for placement.
-
Step 9
Add strong adhesive to the scored tab. Hold in position.
-
Step 10
Close card onto the adhesive.
-
Step 11
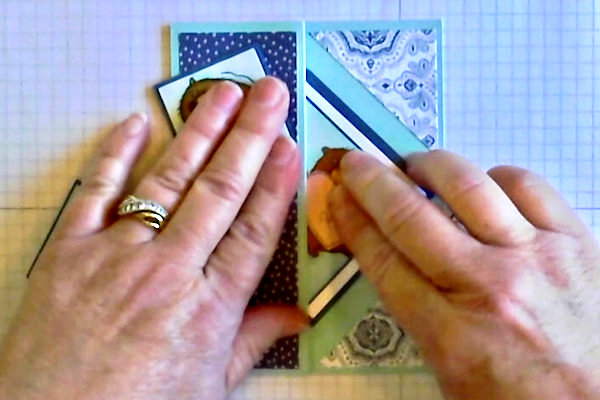
Position the tip of the first small square at the corner of the patterned paper on the front. Add adhesive only to the left side. Repeat with the bottom square, lining up with the bottom corner of the patterned paper.
-
Step 12
Complete the project.


Video!
Your Turn
You've seen the tutorial, now you try it! We've got a section of the gallery set aside for Fold Back Pop-Up Card. Try this technique, then upload your artwork to the gallery. Show us your creations!
***Please note - Internet Explorer/Edge is not a supported browser, and will not allow you to see the videos. Please use Chrome, Firefox or Safari to view our tutorial videos.

Questions and Comments
We'd love to get your feedback or questions. Leave your comment below.
Page 1 of 1 pages