Faux Wood Frame

by Kim Teasdale

Create a faux wood look by swiping and sponging ink over your cardstock.

Supplies
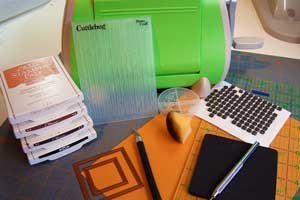
  • Cardstock (More Mustard used here)
  • Two or three ink pads in different shades of brown (Creamy Caramel, Close to Cocoa and Chocolate Chip used here)
  • White pigment ink (Whisper White Craft Ink used here)
  • Dimensionals
  • Die cutting machine
  • Stripe or wood grain embossing folder (Cuttlebug™ Embossing Folder – Distressed Stripes used here)
  • Foam mat and piercing tool
  • Mini brads
  • Spellbinder’s Nestabilities™ Standard Square - 2 sizes, or paper cutter
  • Craft Knife and Mat
  • Adhesive
  • Ruler
  • Sponges

Step-by-Step

  1. Step 1

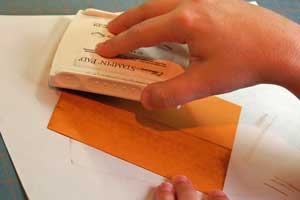
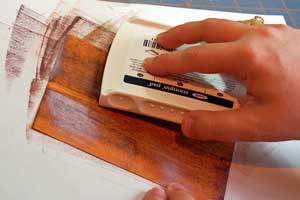
    Starting at the top of the cardstock , apply ink with the lightest brown pad.

    Let the edge of the pad touch the paper and drag it down in one direction covering all of the cardstock to start creating the grain.
  2. Step 2

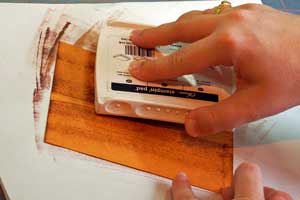
    Repeat step one, this time with a medium brown ink.
  3. Step 3

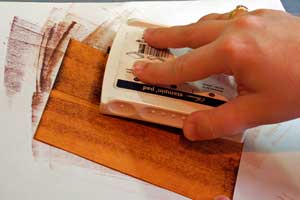
    Repeat step one with the darkest brown pad.
  4. Step 4

    Go over again with Whisper White Craft Ink using the same method.

    If you are just creating the wood grain paper then skip to steps 7 & 8.
  5. Step 5

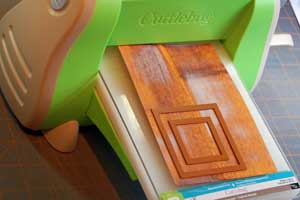
    Take 2 different sizes of Nestabilities™ Square Dies and place them ridge side down in your die cutting maching(Cuttlebug™ used here) to create a frame.

    Alternative:
    If you don't have Nestabilities dies, just cut a square frame with your paper cutter or with punches.
  6. Step 6

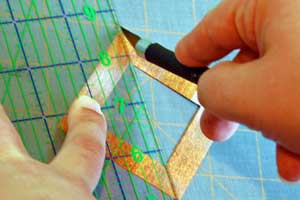
    Take your craft knife and ruler and cut diagonally across the frame as shown to create four mitered pieces.
  7. Step 7

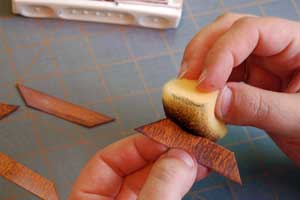
    Sponge all the edges of the edges with the darkest brown ink.
  8. Step 8

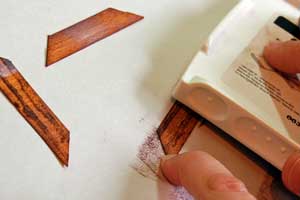
    Place all four pieces in the Cuttlebug folder and emboss.

  9. Step 9

    Using the direct to paper technique, gently glide your inkpad across the embossed lines to darken them.
  10. Step 10

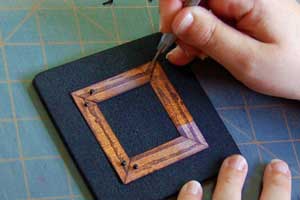
    Using a piercing tool to pierce one hole on either side of the mitered edges for the mini brads.
  11. Step 11

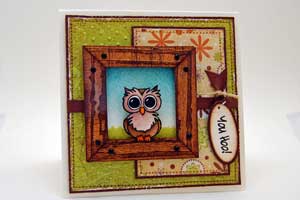
    To finish up, just tape the back side of the frame together, and use dimensionals to adhere it to your image.
Video!

Your Turn

You've seen the tutorial, now you try it! We've got a section of the gallery set aside for Faux Wood Frame. Try this technique, then upload your artwork to the gallery. Show us your creations!

***Please note - Internet Explorer/Edge is not a supported browser, and will not allow you to see the videos. Please use Chrome, Firefox or Safari to view our tutorial videos.

Questions and Comments

We'd love to get your feedback or questions. Leave your comment below.

Wow...thanks for the fabulous tut...your card is absolutely and definitely magnificent!
~amy~  |  Wed Jul 8, 2009 at 3:27 AM
I have a question for you. I tried this the other day and I got the craft white on my soft suede. Wont this lighten up the ink and mess up the shade or should I wait until the white is dry some.
Jeannette  |  Wed Jul 8, 2009 at 3:44 AM
Very cool tutorial! Really gives a framed art look with very easy steps.
Cheri Wenger  |  Wed Jul 8, 2009 at 3:51 AM
Love this tutorial! Thanks for sharing this technique with us : )
Barbara  |  Wed Jul 8, 2009 at 4:50 AM
Lovely tutorial, instead of using inks I use metallic rub-on creams to create the illusion of a wooden frame. I've also created a tutorial on my blog.

I really like your technique as it seems more fun ! Thanks for sharing.
Fabrizio  |  Wed Jul 8, 2009 at 4:58 AM
I started to read this and view the pics and thought wow is this alot of work and it wouldn't work for me. By the time I got to the end, a light came on in my brain and I was awed! Great Great possibilitiies Thanks
Julianne  |  Wed Jul 8, 2009 at 5:25 AM
HI. This is an adorable tutorial. Could you please tell me the name of that owl stamp set? He is adorable.
Sara  |  Wed Jul 8, 2009 at 5:38 AM
Awesome Idea! Gotta try this for sure. TFS:)
Rhonda  |  Wed Jul 8, 2009 at 5:48 AM
I love this card- it is in my favorites : ) My daughter is in a sorority where the owl is the mascot, so I always notice owl cards- and I did have to buy this owl set from Clear Dollar Stamps. Anyway, thanks for this great tutorial- love the look of this frame- i will use it for the sorority Make a Wish scrapbook that I donate each year- it will certainly dress up any page!
Shelly Schmidt  |  Wed Jul 8, 2009 at 5:56 AM
I haven't tried this yet, but I don't see where the white ink pad is necessary or showing. and yes, Is is a lot of work, TFS.
Gin  |  Wed Jul 8, 2009 at 6:06 AM
I was so excited to see this tutorial, I have been trying to figure out how to do a wood grain. Thanks for the tips!!
Jody  |  Wed Jul 8, 2009 at 6:35 AM
Wowwwwww, the power of suggestion! Thanks for sharing that really BRIGHT idea. I am clicking almost uncontrollably!
hotflashhazel  |  Wed Jul 8, 2009 at 7:25 AM
Fabulous Kim!! smile
BevMom  |  Wed Jul 8, 2009 at 8:09 AM
Thanks for the awsome tutorial! Great idea!
Viki  |  Wed Jul 8, 2009 at 8:51 AM
Jeanette: The craft ink should be your last ink step and you can apply it with a sponge if you would rather not drag your inkpads over other ink. You can also heat set it with a heat gun in between smile

Sara: The owl set is called What a Hoot and is by Clear Dollar Stamps smile
Kim Teasdale  |  Wed Jul 8, 2009 at 9:11 AM
WOW..this is awesome...love the tutorial! TFS such a great idea!
Danielle  |  Wed Jul 8, 2009 at 9:27 AM
Thanks Kim. I used my heat gun in between the layers and that worked. This is such a great idea. I really love the "wood" look.
Jeannette  |  Wed Jul 8, 2009 at 9:34 AM
very cool. Gonna use my bigshot distressed textures plate. Thanks for the idea. smile
Shelly  |  Wed Jul 8, 2009 at 10:12 AM
which cuttlebug embossing folder did you use? I loved this!!!
eyestitch  |  Wed Jul 8, 2009 at 10:29 AM
What a great tutorial, Kim! Thanks!!
Stamps'nCoffee  |  Wed Jul 8, 2009 at 11:14 AM

Page 1 of 3 pages  1 2 3 >

You need to be logged in to comment

GET OUR NEWSLETTER


Splitcoaststampers's privacy policy