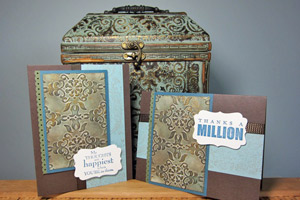
Faux Patina

by Angie Leach

Create a faux patina look with an embossing folder and ink.

Supplies
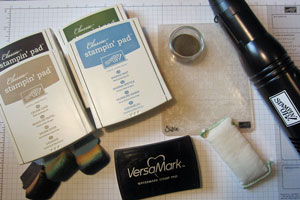
  • White cardstock
  • Big Shot, or other die cutting machine
  • Embossing folder
  • One light, neutral color ink (Stampin' Up! Crumb Cake used here)
  • Two medium colors of ink (Stampin' Up! Marina Mist & Always Artichoke used here)
  • One dark color of ink (Stampin' Up! Early Espresso used here)
  • Sponges
  • VersaMark™ Ink, or other embossing ink
  • Embossing Buddy™
  • Heat tool
  • Gold or silver embossing powder

Step-by-Step

  1. Step 1

    Lightly ink one side of the embossing folder with a light, neutral color ink.
    (Stampin' Up! Vintage Wallpaper Embossing Folder and Crumb Cake ink used here)
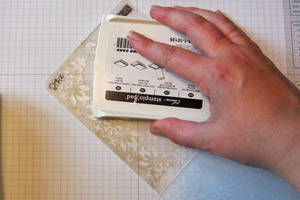
  2. Place white card stock inside the inked folder and run it through the Big Shot.
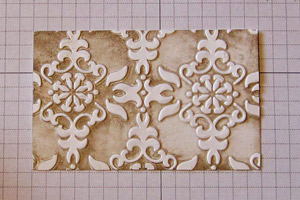
  3. Step 2

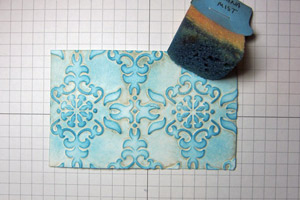
    Sponge a medium shade of ink over the piece to bring out the embossed details.
    (Stampin' Up! Marina Mist used here)
  4. Step 3

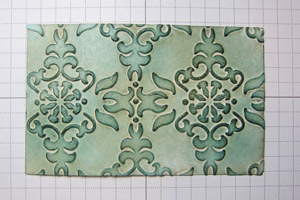
    Sponge on a darker ink to accentuate the embossing even more. Leave some of the in-between areas a little lighter to vary the depth of the colors.
    (Stampin' Up! Always Artichoke used here.)
  5. Step 4

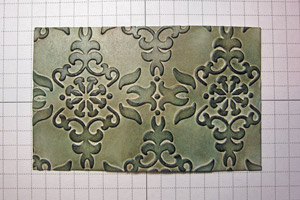
    Sponge on the darkest color ink to bring out the rich, deep tones and textures.
    (Stampin' Up! Early Espresso used here,)
  6. Step 5

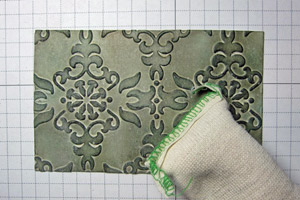
    Soak up any remaining ink moisture by rubbing an Embossing Buddy over the card stock, or let dry naturally
  7. Step 6

    Lightly and randomly rub the VersaMark™ Ink Pad over the top of the embossed design.
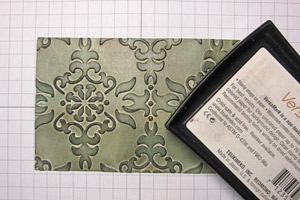
  8. Step 7

    Sprinkle on gold embossing powder, then heat set with the heat tool.
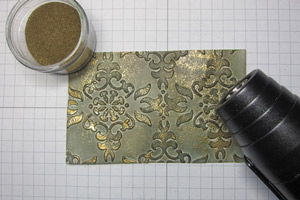
  9. Step 8

    Finish Your Card.

Video!

Variations

  1. Add some shimmer
    For a shimmery variation, try sponging on Shimmer Paint over the whole piece instead of gold embossing.
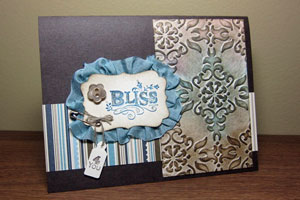
Your Turn

You've seen the tutorial, now you try it! We've got a section of the gallery set aside for Faux Patina. Try this technique, then upload your artwork to the gallery. Show us your creations!

***Please note - Internet Explorer/Edge is not a supported browser, and will not allow you to see the videos. Please use Chrome, Firefox or Safari to view our tutorial videos.

Questions and Comments

We'd love to get your feedback or questions. Leave your comment below.

You did a really nice job with this video! I will definitely be giving it a try! Thank you.
Beth S  |  Mon Apr 16, 2012 at 4:41 PM
Great tutorial, really made me want to try this. Your finished cards are beautiful, thanks so much for sharing this idea.
Chris M  |  Wed Apr 18, 2012 at 2:42 AM
Fabulous technique and a great tutorial. I will definately be giving this a try. Your cards are so rich and regal!
Viv  |  Wed Apr 18, 2012 at 2:57 AM
I will definitely try this one. Great tut, thanks
Scrappin Annie  |  Wed Apr 18, 2012 at 3:10 AM
Great look.... will be using this!
Thank you...
Linda Gilliam  |  Wed Apr 18, 2012 at 3:43 AM
Love the look of patina. Can't wait to try this one!! Thanks for the tut!!
Michela  |  Wed Apr 18, 2012 at 4:27 AM
This is so cool....I will definitively trying this...thank you so much!!!!
Gloria Westerman  |  Wed Apr 18, 2012 at 5:15 AM
need to contact a stampin' up demonstrator and get some stamp pads and folders
Bonnie Isabelle  |  Wed Apr 18, 2012 at 5:50 AM
Thank you so very much. I am not just a keen stamper but a full-time fine art student as well, this technique will be just perfect for adding decorative touches to maps of London I am making. Your hard work here is much appreciated.
Tonie-Carol Patchett  |  Wed Apr 18, 2012 at 6:14 AM
Oh WOW! This will make a GREAT addition to my techniques class. Thank for sharing!
Christyne Richardson  |  Wed Apr 18, 2012 at 6:21 AM
Great project, I can't wait to try it
Susan Merrell  |  Wed Apr 18, 2012 at 6:41 AM
Really Beautiful I plan to do this today! thank You!!!!
Jan  |  Wed Apr 18, 2012 at 6:43 AM
Awesome technique, must try!!! Excellant video!!!
Kris  |  Wed Apr 18, 2012 at 7:00 AM
Angie, GREAT tutorial, and I can't wait to try it! I hope you can do MORE tutorials here in the SCS Resource section! I'm an SU demo, so I have all the supplies in the video - thanks for doing such a great job and inspiring us all! grin
Susan  |  Wed Apr 18, 2012 at 7:18 AM
This is just brilliant, must really give this a try, the finished product just looks amazing. Thanks so much for the tutorial, they always amaze me with the different idea...
Ursula  |  Wed Apr 18, 2012 at 7:19 AM
Did you use dye or pigment ink? Does it matter?
Sandra Dowling  |  Wed Apr 18, 2012 at 7:29 AM
Beautiful technique! Can't wait to try it out! Thanks so much for sharing!
Glenda Witt  |  Wed Apr 18, 2012 at 7:34 AM
I can't wait to try it out! Beautiful, and looks so simple!
Kay Oxford  |  Wed Apr 18, 2012 at 7:35 AM
Wow! This looks like it will be a fun technique. I've already got colour combos going in my head. Thanks for sharing this brill technique!
Jeanne  |  Wed Apr 18, 2012 at 7:48 AM
For Sandra Dowling, the ink used is Stampin' Up! Classic, which is a dye ink. It does matter because the dye ink will dry quickly and prevent a lot of color transfer during the layering process. The Versamark ink IS pigment and will stay wet long enough to hold a nice layer of embossing powder to give the soft sheen.
Joni Kelly  |  Wed Apr 18, 2012 at 8:00 AM

Page 1 of 5 pages  1 2 3 >  Last »

You need to be logged in to comment

GET OUR NEWSLETTER


Splitcoaststampers's privacy policy