Faux Stitching
by Sharon Harnist
Connect the holes pierced in paper to form a faux stitched look.
Supplies

- Paper piercing pad or mousepad
- Paper piercing template
- Paper piercing tool
- Marker or gel pens
- Cardstock
Step-by-Step
-
Step 1
Place cardstock piece on top of the paper piercing pad.
Next, place the clear paper piercing template over the cardstock piece to be stitched.
Use the paper piercing tool to poke holes in cardstock, using the piercing template as a guide.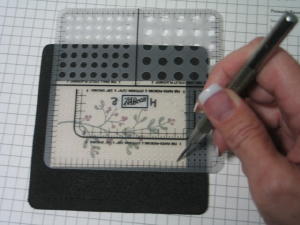
-
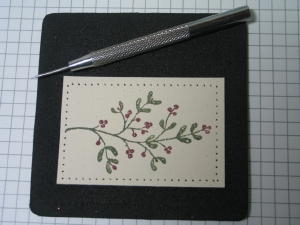
Pierced cardstock should look like this.
-
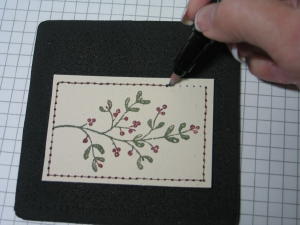
Step 2
Use a marker or gel pen to connect the pierced holes in your cardstock. This will form stitch marks. Make sure to pause at each hole so the hole is highlighted with marker. This helps to form a more realistic stitched look.
-
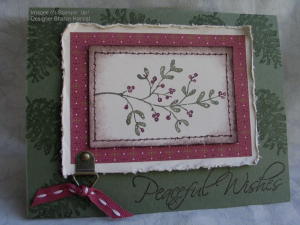
Step 3
Finish your card.
Video!
Variations
-
Other Stitches
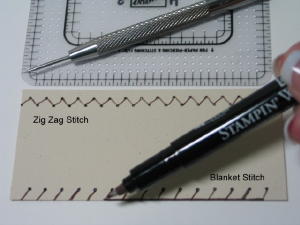
Zig-Zag Stitch
Poke alternating holes in two rows of the piercing template. Connect the holes, back and forth to form a zig-zag stitch.
Blanket Stitch
Poke every other hole in one row of the piercing template. Draw a line from the hole to the edge of the cardstock, then draw a line along the edge of the cardstock.
-
Cross Stitch
Poke every hole in two rows of the piercing template. Make "X" marks between the rows, using four of the holes. Continue making "X" marks along the row.
Note: A gel pen may be used to make the "stitch" marks which will produce a raised line and give your faux stitch a more realistic feel.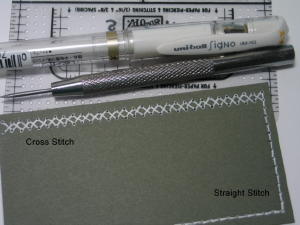

Questions and Comments
We'd love to get your feedback or questions. Leave your comment below.
Thanks!
dth
canvas for the sticthing .
Where find < Paper piercing template > to make holes on the paper ?
thanks,
Pat
Page 1 of 2 pages 1 2 >