Fan Fold Flower

by Bonnie Szwalkiewicz

Create these darling embellishments in just a few steps.

Supplies

  • 12" wide Patterned Paper
  • Decorative Edge Punch (here, Scallop Edge Punch from Stampin' Up!)
  • Paper Trimmer
  • Adhesive
  • Circle Punch

Step-by-Step

  1. Step 1

    Use a scalloped punch to add a border to a 12” strip of patterned paper.

    The finished flower will be twice as wide as your paper strip when finished, so cut the strip accordingly.

    Tip: Try experimenting with other edges, too.
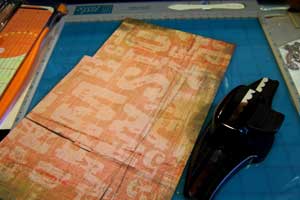
  2. Step 2

    Place patterned paper on the paper trimmer.

    Here, the strip measures ¾” including the measurement of the scallops.
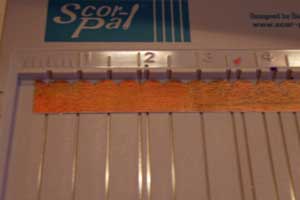
  3. Step 3

    Score the scalloped strip between each of the scallops.

    Fan fold at each crease.
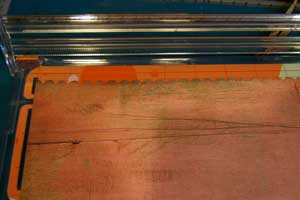
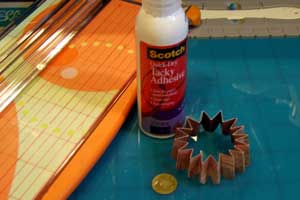
  4. Step 4

    Join the patterned paper ends with glue or double sided tape.

    Punch or cut a small base piece of card stock to glue the flower to.
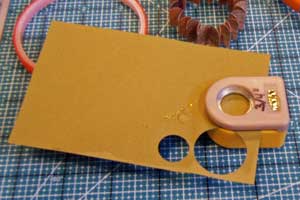
  5. Step 5

    Add glue to the punched base.

  6. Step 6

    Adhere the fan folded ring to the base, pushing flat to create a flower.

    Hold flower in place until dry.
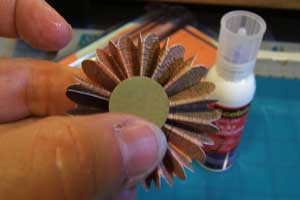
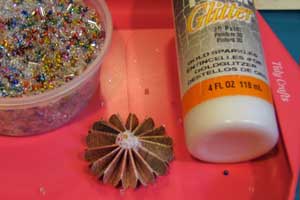
  7. Step 7

    Fill in the center gap with a button or brad.

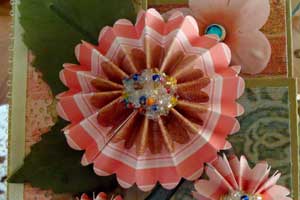
  8. Here, the center was filled with Tulip white glitter puffy paint. While the paint was still wet, various colored seed beads were sprinkled on.

Video!

Your Turn

You've seen the tutorial, now you try it! We've got a section of the gallery set aside for Fan Fold Flower. Try this technique, then upload your artwork to the gallery. Show us your creations!

***Please note - Internet Explorer/Edge is not a supported browser, and will not allow you to see the videos. Please use Chrome, Firefox or Safari to view our tutorial videos.

Questions and Comments

We'd love to get your feedback or questions. Leave your comment below.

Great tutorial...where did you purchase the double sided adhesive sheets.

Thanks

INKredibly,
Carolyn
C Lowe  |  Wed Jul 29, 2009 at 8:25 AM
I was with you until the end. I can't seem to get the flower to lay flat. Did you glue the bottom side down first, THEN push the center part down with another circle?
Lisa  |  Wed Jul 29, 2009 at 2:36 PM
Thank you so much, I have two friends that are sick that this card will put a SMILE on there face.
Susie  |  Thu Jul 30, 2009 at 11:18 AM
I was fine making the flowers until it came time to place it on the round base. Mine didn't want to lay down. I don't know what I did wrong but I will keep playing with it until I get it right. I love the idea. Thanks so much, this is my first try at any of the samples.
Lois Byers  |  Thu Jul 30, 2009 at 2:01 PM
I am up for all new ideas Not always successful but loving experimenting
Olive  |  Sat Aug 1, 2009 at 1:22 AM
BEAUTIFUL! Love it. Can't wait to try it. Thanks for showing more samples. Oh . . . the possibilities for holiday ornaments. Thanks for sharing!
Michelle  |  Sat Aug 1, 2009 at 9:47 AM
Thanks for showing tutorial video. I like to know what to purchase double sided adhesive sheet. TFS.
Rebecca  |  Sun Aug 2, 2009 at 4:13 AM
Great tutorial. Thank you.
Taava  |  Sun Aug 2, 2009 at 5:12 AM
What a fun tutorial. I sat and made one right away!!! Love it! Thank you for sharing!!!
Lourae  |  Sun Aug 2, 2009 at 5:29 PM
Bonnie: Tks for the tut! I also felt compelled to try this flower. I have one question: to make a double flower, do u glue the smaller one into the larger before attaching to the adhesive? Please clarify tks!
Rosetta  |  Sun Aug 2, 2009 at 6:28 PM
What an awesome creation!
Virginia  |  Sun Aug 2, 2009 at 6:36 PM
Lisa and Lois,
Getting the flower to lay down flat does require a bit of patience and "wrestling". Keep on pushing part of the inner edge down until you have the flower completely flat. I push mine down all the way, then add the circle with the adhesive.

Rosetta,
I finished the bigger and smaller flower. Then placed the smaller flower over the bigger one fold by fold. Last I topped it with grommet and eyelet (you can use just another cardstock circle with adhesive instead).

Hugs and smiles
Beate  |  Mon Aug 3, 2009 at 5:34 AM
Fabulous tutorial Beate! Going to make a few right now!
Bonnie Sharp  |  Mon Aug 3, 2009 at 10:12 AM
THANK YOU.

I have just found a use for all my scrapbook papers that have fancy pre-ct edges.

I just couldn't bear to cut them up before, but the edges were punched and for journaling with lines on.

I made 2 flowers using the top and bottom edges of the page, and joined the sides to make one large 10cm flower.
Gail  |  Tue Aug 4, 2009 at 1:31 PM
I have made some of these flowers for my scrapbook page and they are brilliant and not that hard to do.You can make whatever size you want just by the size of the paper.The scor pal is such a handy tool.
Thanks Jacquie.
Jacquie  |  Fri Aug 14, 2009 at 8:12 AM
Thank you so much for the tutorial I just can't wait to make the flower.
Terry  |  Fri Aug 14, 2009 at 3:16 PM
yes i have a question it is 12 inch long how wide do you make them if you dont have the punch how can you make them are these silly question
janet dycus  |  Thu Aug 20, 2009 at 7:09 AM
Janet,

You can keep the strip 3/4" or you can make it thinner or thicker. It's up to you. The finished flower is a bit bigger then twice the width of your strip.
Hugs and smiles
beate  |  Thu Aug 20, 2009 at 8:07 AM
This tutorial is awesome. I actually believe I can do this. Thank you so much!
Suzy Que  |  Mon Sep 7, 2009 at 1:34 PM
What a beautiful idea-I can't wait to try it!
Patti  |  Sat Sep 12, 2009 at 6:57 PM

Page 1 of 3 pages  1 2 3 >

You need to be logged in to comment

GET OUR NEWSLETTER


Splitcoaststampers's privacy policy