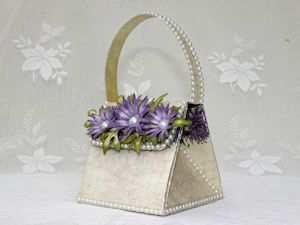
Exploding Handbag
by Liz Walker
Make an exploding paper purse.
Supplies
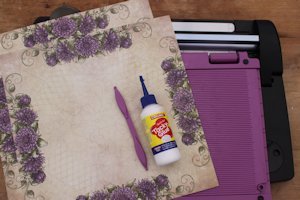
- Score board
- Scoring tool
- Double-sided paper, two 12" x 12" sheets (Heartfelt Creations Burst of Splendor paper pad used here)
- Adhesive
- Paper trimmer
- Adhesive Velcro
- Other supplies as needed to complete the project (Heartfelt Creations Delicate Aster stamp set and die and adhesive pearls used here)
Step-by-Step
-
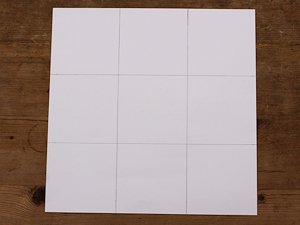
Step 1
Score at 4" from all sides of the first 12" sheet of patterned paper.
-
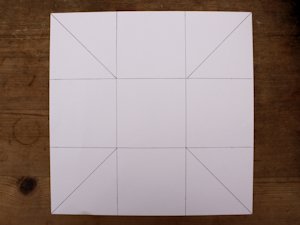
Step 2
Score diagonally in each of the four corner sections.
-
Step 3
In the outer center squares mark the center. Score from the inner corners of the square to the outer edge center as shown in the photo.

-
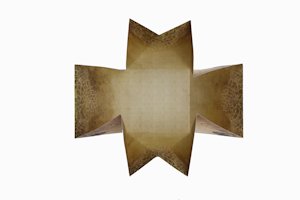
Step 4
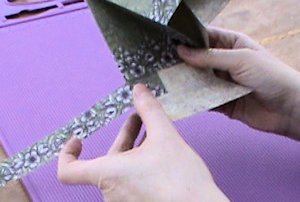
Crease along the score lines and fold as shown in the photo.
-
Step 5
From the second sheet of paper cut a piece 7" x 4".
Score at 4" and 5" from the left edge.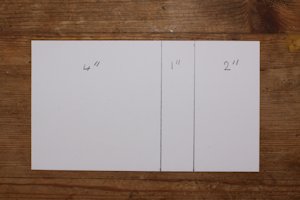
-
Step 6
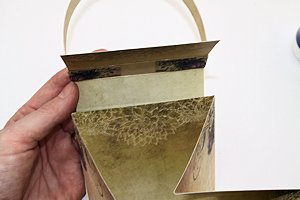
Adhere the 4” section of the scored piece of paper to the back of the bag. The 2" section is the front flap of the bag.
-
Cut a strip of paper 12" x 3/4", and score 1 1/2" from each end. This is the handle. Adhere the scored ends to the underneath of the 1" scored part of the bag flap.
-
Step 7
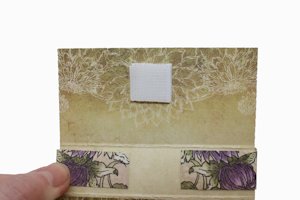
Cut a small piece of self-adhesive Velcro to the inside of the bag flap and close in place, securing the bag.
-
Step 8
Decorate the bag to finish the project.
Video!
Your Turn
You've seen the tutorial, now you try it! We've got a section of the gallery set aside for Exploding Handbag. Try this technique, then upload your artwork to the gallery. Show us your creations!
***Please note - Internet Explorer/Edge is not a supported browser, and will not allow you to see the videos. Please use Chrome, Firefox or Safari to view our tutorial videos.

Questions and Comments
We'd love to get your feedback or questions. Leave your comment below.
Mary x
I lined up a ruler with one of the grooves on the Scor-Pal, and used it to line up the points for scoring.
I can get the corner diagonals fine but the "sharper" ones that go in towards the 2" mark.. how do you do those? best wishes, Anniwa
For the center diagonals, I used a ruler to mark the center point, then lined up a ruler with one of the grooves on the Scor-Pal and used it to line up the points for scoring.
Page 1 of 2 pages 1 2 >