Evergreen Tree
by Kittie Caracciolo
Use dies or punches to create a miniature paper tree.
Supplies
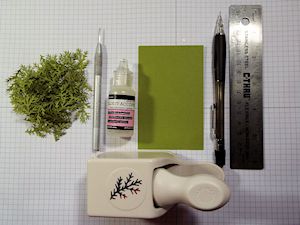
- Cardstock
- Punched or die cut branches (Martha Stewart Branch Punch)
- Ruler
- Scissors
- Glossy Accents
- Paper Piercer
- Other supplies as needed to complete the project (used here: red, green, white, yellow, and kraft cardstock; dies from Impression Obsession: Bare Christmas Tree (ornaments), Pine Sprig Cluster, Window with Shutter, Cat Set, Border Duo 1; craft knife, mounting tape, ATG Adhesive, markers, metallic string, Distress Inks)
Step-by-Step
-
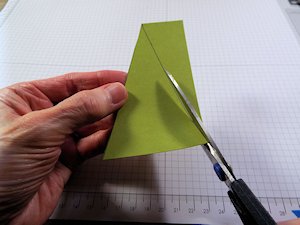
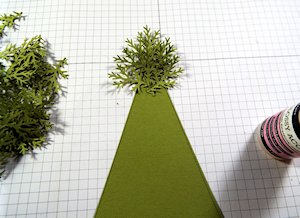
Step 1
Cut a 4” x 2 1/2” piece of cardstock. Mark the top center of the cardstock at 1 1/4”. Draw lines from the top center to the bottom corners.

-
Step 2
Cut both sides of the cardstock to form the triangle for the tree.
-
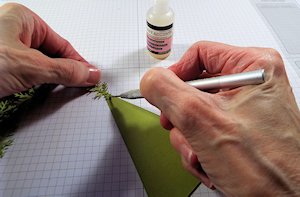
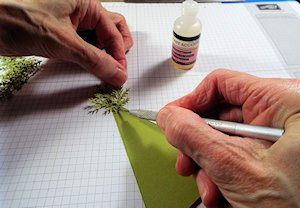
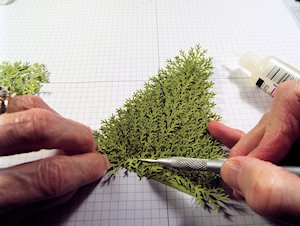
Step 3
Start at the top of the tree and attach the first punched branch straight up using Glossy Accents.
-
Step 4
Attach the second branch to the left.
-
Step 5
Attach the third branch to the right.
-
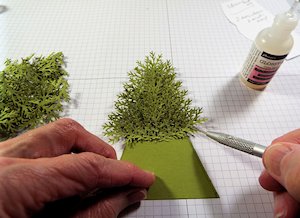
Step 6
Repeat the pattern - one center, one left and one right - for three rows down.
-
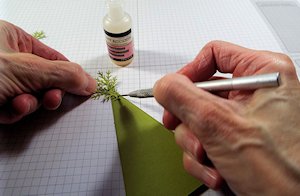
Step 7
Continue the one center, but add equal additional branches left and right on each side as the tree widens.
-
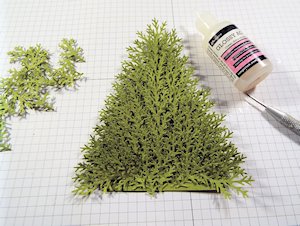
Step 8
Stop the pattern at the bottom of the tree.
-
Step 9
Turn the last row of branches down and tuck the ends in behind the upper row of branches.
-
The tree is now ready to decorate with small die cuts, flowers, ribbon, etc.

-
Step 10
Use the completed tree to decorate a card or other project.

Video!
Your Turn
You've seen the tutorial, now you try it! We've got a section of the gallery set aside for Evergreen Tree. Try this technique, then upload your artwork to the gallery. Show us your creations!
***Please note - Internet Explorer/Edge is not a supported browser, and will not allow you to see the videos. Please use Chrome, Firefox or Safari to view our tutorial videos.

Questions and Comments
We'd love to get your feedback or questions. Leave your comment below.
Page 1 of 1 pages