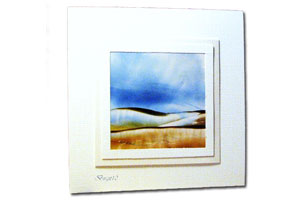
Encaustic

by Birgit Edblom

Use wax blocks and a hot iron to create beautiful backgrounds.

Supplies
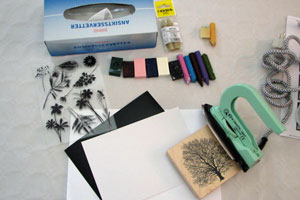
  • Glossy paper or special paper for Encaustic

  • Wax Blocks

  • Stamps

  • Scissors

  • Tissues

  • Iron - craft or encaustic iron, or any iron without steam holes

Step-by-Step

  1. Step 1

    Set the iron on low temperature.

    Optional:
    Stamp image with Stazon™.
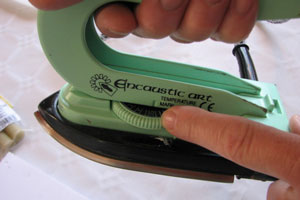
  2. Step 2

    When the iron is warm, turn it over and coat the surface with wax in the colors you want to use.
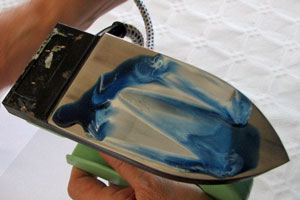
  3. Step 3

    Place the iron on the paper and move it around lightly. Explore different movements and lifts. Don´t worry about the result, you can go over it as many times as you want. When you are satisfied with the result, clean the iron on some scrap paper.
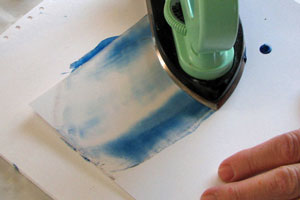
  4. Step 4

    Choose some other colors and move the iron over the paper in both directions without lifting it till you´re satisfied with the result.
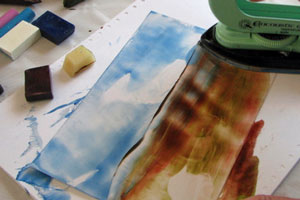
  5. Step 5

    Wipe the painting with a tissue to make it shiny.
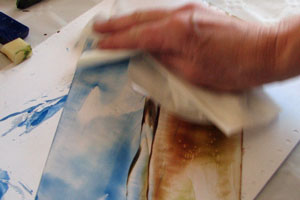
  6. Step 6

    Select the part of the painting you like and cut it out. The rest can be used for another project.
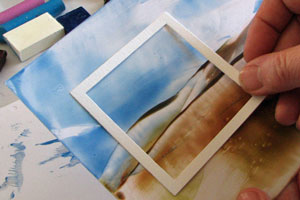
  7. Step 7

    Finish your card.

Video!

Variations

  1. Printed background
    Try the technique on glossy magazine pages for a different look.
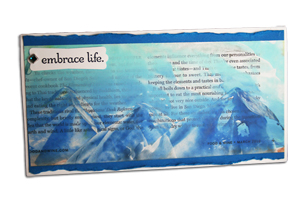
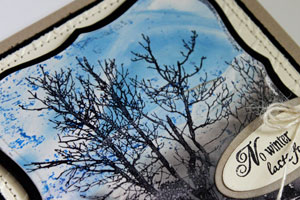
  2. Stamp it!
    Stamp images with Stazon or Jet Black Archival ink on your finished background.

    Or for more advanced Encaustic painting...create your background, stamp your image and then cover it with clear wax. Next color your image with wax and stylus tool.

    Don't have any Encaustic Wax yet?
    Try our Melted Crayon Background tutorial.
Your Turn

You've seen the tutorial, now you try it! We've got a section of the gallery set aside for Encaustic. Try this technique, then upload your artwork to the gallery. Show us your creations!

***Please note - Internet Explorer/Edge is not a supported browser, and will not allow you to see the videos. Please use Chrome, Firefox or Safari to view our tutorial videos.

Questions and Comments

We'd love to get your feedback or questions. Leave your comment below.

Thank you Birgit for this amazing tutorial and for getting us all hooked on this FUN technique.
Hugs and smiles
Beate
beate  |  Wed May 19, 2010 at 4:28 AM
Thank you for the wonderful tutorial on encaustic painting. I can't wait to try it. I am retiring soon and am looking forward to learning new techniques to try.
constance  |  Wed May 19, 2010 at 4:34 AM
Birgit this is amazing.. I love the way you created this beautiful card. What a great video too.. Thanks for sharing this with us.
Dawn Burnworth (flowergal36)  |  Wed May 19, 2010 at 5:15 AM
I haven't been able to find encaustic wax...do you know anywhere in the U.S. where I can purchase it? Ever since I saw this card I've been itching to try this technique.....HELP!
glendatoo  |  Wed May 19, 2010 at 5:25 AM
Hi Glenda,
I purchased wax at this site. They also carry the iron and if you really get into it a stylus tool.

I haven't received yet received my order, but I only placed it on Monday.

I like that they have the smaller wax pieces kit. That way you don't have to break your bank to try this technique.

Hugs and smiles
Beate
beate  |  Wed May 19, 2010 at 5:32 AM
Wow - the effect! Thank you for going to all the trouble of sharing this awesome technique! Since I don't have any encaustic wax yet I will be playing with the crayons for now. You're the best!

Ms M
Ms M  |  Wed May 19, 2010 at 6:05 AM
Birgit, thanks for such a wonderful tutorial! I've often wondered how you used the encaustic wax. You're an amazing artist!

I also enjoyed hearing your Swedish accent on the video....like getting crafting instructions from Ingrid Bergman! Thanks, again! Hugs!!
LeisaJane  |  Wed May 19, 2010 at 7:23 AM
I have been doing the Encaustic painting and do big scense which I love.
I don't know how to send you some of my work.
I order from a Company in WI. and they are so good. Also a few books can get a person started. Barbara jardine
Barbara Jardine  |  Wed May 19, 2010 at 7:49 AM
OHHHHHHH!! I cannot wait to try this!!
Starla  |  Wed May 19, 2010 at 8:21 AM
Thank you for the great tutorial. It is a real help to see the video and to spot things that I am doing wrong. I have always admired your work so please keep creating.
Mrs Noofy  |  Wed May 19, 2010 at 8:35 AM
Thanks so much Birgit for the tutorial. You have produced amazing cards with this technique and I hope to try it too.
Glenda Giguere  |  Wed May 19, 2010 at 8:44 AM
This is really beautiful!! Thanks for the wonderful tutorial, Birgit!
Joanne (sleepyinseattle)  |  Wed May 19, 2010 at 8:51 AM
Thank you so very much for the tutorial. I have so enjoyed your cards over the past few years.
Marg  |  Wed May 19, 2010 at 8:57 AM
Birgit, thanks so much for the tutorial! I've been playing around with this technique using Crayola crayons and it works too! But I love how you lay it all out step by step and also the variations. Lots of inspiration here!
Ina (yellowrose46)  |  Wed May 19, 2010 at 9:05 AM
Birgit, I knew right away when I saw the word encaustic, that you would be the one giving the tutorial. I have loved seeing all the wonderful works of art that you create using this technique.
MariLynn  |  Wed May 19, 2010 at 9:23 AM
Birgit, this is wonderful! I can't WAIT to watch your video...I remember being so enthralled with the whole encaustic thing years ago and never following through with the expense. I think now I may have to bite the bullet, lol, and try it. Thank you SO much! ~Betsy
MSBetsyZ  |  Wed May 19, 2010 at 9:40 AM
Thanks for this tutorial! I had never heard of this wax before, so I learned a lot! Thanks again
Jessica  |  Wed May 19, 2010 at 10:21 AM
Thanks so much. I can't wait to try this!
Joanne Beck  |  Wed May 19, 2010 at 10:50 AM
This is awesome, I just love this, never heard of it or seen it but I am sure going to try this.
Thanks.
Rebekka  |  Wed May 19, 2010 at 12:57 PM
Tack Birgit f�r denna tutorial. Ska absolut f�rs�ka mig p� detta:)
Kram Tesa
Tesa/Therese  |  Wed May 19, 2010 at 4:22 PM

Page 1 of 2 pages  1 2 >

You need to be logged in to comment

GET OUR NEWSLETTER


Splitcoaststampers's privacy policy