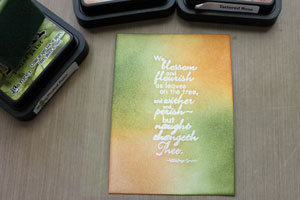
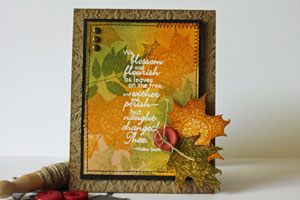
Embossing Resist

by Beate Johns

Emboss images on light colored cardstock, then apply darker ink to make them "pop".

Supplies
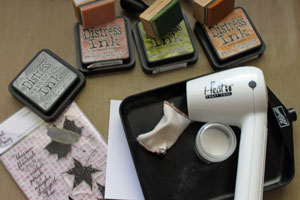
  • Embossing ink
  • Clear embossing powder
  • Embossing Buddy™
  • Heat Tool
  • Powder Tray, or paper to catch embossing powder
  • Stamps (Sweet 'n Sassy Stamps Season of Change used here)
  • Light colored cardstock
  • Waterbased Dye Ink darker then your cardstock color ( Wild Honey, Tattered Rose and Peeled Paint Distress Inks used here)
  • Blending Tool,Sponge, Stipple brush or sponge brayer
  • Paper towel

Step-by-Step

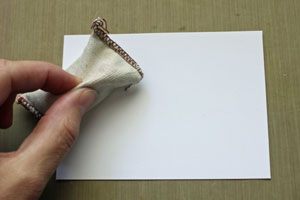
  1. Step 1

    Rub Embossing Buddy over entire piece of cardstock.
  2. Step 2

    Ink stamp with Embossing Ink and stamp on cardstock.
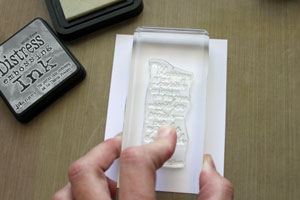
  3. Step 3

    Pour embossing powder over stamped image, making sure everything's completely covered.
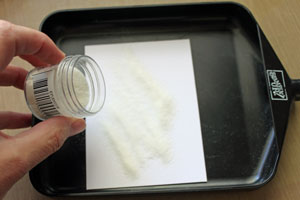
  4. Step 4

    Tap excess powder off. Collect remaining powder in either the Powder tray or on a piece of scrap paper and pour it back into the container.
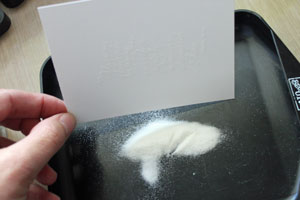
  5. Step 5

    Heat powder with heat tool until it melts into a shiny cover. Let cool.
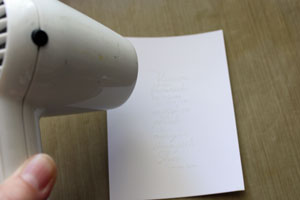
  6. Step 6

    Sponge ink over your cardstock. You can also use a stipple brush or the sponge brayer for this step.
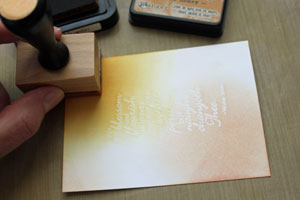
  7. Cover your entire piece of cardstock.

  8. Step 7 (Optional)

    To add more depth to the stamped images, try adding more in the same color used for sponging.
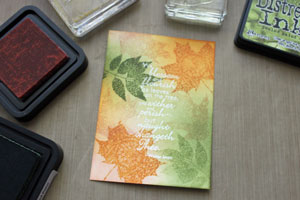
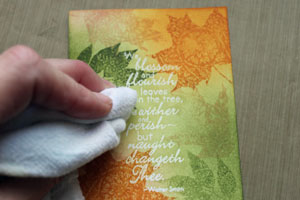
  9. Step 8

    Use a paper towel or rag to buff ink off embossed images. The embossed images will resist the sponged ink.
  10. Step 9

    Finish your card.

Video!

Your Turn

You've seen the tutorial, now you try it! We've got a section of the gallery set aside for Embossing Resist. Try this technique, then upload your artwork to the gallery. Show us your creations!

***Please note - Internet Explorer/Edge is not a supported browser, and will not allow you to see the videos. Please use Chrome, Firefox or Safari to view our tutorial videos.

Questions and Comments

We'd love to get your feedback or questions. Leave your comment below.

Is it absolutely necessary to use the embossing buddy before doing the emboss resist technique?

Thanks,

Kat
Kim  |  Fri Jan 11, 2008 at 7:43 PM
VERY COOL! This looks like it's pretty easy to do. Do you think it could be used in a workshop as a demonstration, or do you think it might be too time consuming coloring in the image?
Kari  |  Tue Jan 22, 2008 at 8:07 PM
Where do I finding the embossing buddy? I went to a Hobby Lobby and Michaels here and no one seemed to know what I meant. I scoured the stamping shelves and found nothing.
Vickie Doswell  |  Thu Jan 31, 2008 at 10:39 AM
You can use talcum powder on a pad of cotton wool.
Eileen  |  Thu Jan 31, 2008 at 10:48 AM
You can order an Embossing Buddy from any Stampin' Up! demonstrator for $4.95 plus shipping and taxes.
beate  |  Thu Jan 31, 2008 at 10:50 AM
anyone who can help me getting a buddy, i have he little problem i can only pay with paypal or swop for sumthin.

ps, i v tried it and its way cool
nina  |  Mon Feb 4, 2008 at 12:50 PM
This sounds like fun I'll let you know how it turns o ut! Thanks Thanks 4Cats Lady
Ines Harriss  |  Thu Feb 7, 2008 at 2:08 PM
Can someone help me with this project??? I have done it 3 different times now and still cannot get it the embossed stuff to "pop". I even tried it on glossy paper, but when I put the heat gun on the glossy paper it didn't work so well. I have even opened a new Versamark to make sure that it is sticky enough for the embossing powder. Anyone have any ideas to make it work better?? Thanks.
Julie  |  Sun Feb 10, 2008 at 1:26 PM
What kind of products are you using? are you using a cloth to remove the ink in the end?
nina  |  Sun Feb 10, 2008 at 1:31 PM
Julie,
The darker your colors are that you use with the resist , the more it will pop.

Nina,
I am not sure what products you mean. Click on the link to the emossing resist gallery. You will find this card there with a list of everything I used.
I usually use napkins or paper towels to wipe the excess ink of my embossed image.
beate  |  Sun Feb 10, 2008 at 2:15 PM
I have never used and embossing buddy. This may sound crazy, but what is the purpose for
them? Thank you
Joyce  |  Fri Feb 15, 2008 at 4:03 AM
Joyce,

The embossing buddy removes static cling from the cardstock. It prevents the embossing powder from sticking on the part of the cardstock that hasn't been stamped on. If you don't use it, you might get little speckles of embossing powder everywhere.
beate  |  Fri Feb 15, 2008 at 4:33 AM
Love this! Thanks for the Tutorial. I read somewhere that you can use Cling Free dryer sheets on your cardstock before embossing to prevent static cling. Never tried it myself, but it's worth a shot if you can't buy or find the embossing buddy.
MarshHen  |  Wed Mar 19, 2008 at 5:47 AM
I have also tried this technique with an additional step of ironing off the embossing at the end. Place the embossed piece on top of a clean rag (I use a cut up old bath towel) on your ironing board or heat safe surface. Put a clean piece of scratch paper (ex: printer paper) over the whole embossed piece then hold iron over it (NO steam, press gently and don't move the iron much) until the embossing comes off on to the scratch paper (move the scratch paper around and iron until you can't see anymore embossing come off. You can also add more layers & hues by stamping and embossing again after you sponge (or stipple or brayer) then sponge again using same or slightly darker ink. This preserves the original paper color where you stamped the first time and also the background color after the first sponging where you stamp the second time. sponging yet again for a darker background. If you iron the embossing off - make sure it is your last step since it will no longer resist afterwards!
Sarah  |  Wed Apr 2, 2008 at 1:29 PM
Hey folks, just an FYI...
The dryer sheets don't really work, I'm cheap so I tried it - get the embossing buddy, it really is worth it! (See Beate's comment.) They're cheap too, the embossing buddies, that is.
Happy stampin'!
Laurie  |  Wed Apr 2, 2008 at 4:03 PM
RE: Chalkboard Technique. To really accent narrow stems, petals, etc. try outlining with a fine gold or silver pen. It is very dramatic with pastels on dark paper.
Kathy  |  Wed Apr 9, 2008 at 9:58 AM
I have heard that if you don't have embossing supplies, you can do this same technique using clear wax or a white crayon on white cardstock...and just doodle your own designs...then finish as it says...
lisabeepianolovin  |  Mon May 5, 2008 at 2:42 PM
I've had horrible luck with the embossing buddy. After I use it, there is always the white powder residue leftover. It's such a disappointment when using ummmm, black cardstock with silver embossing powder.

If anyone has a solution for this-you get a gold star for the day! :}
Julie  |  Wed Sep 17, 2008 at 10:39 AM
What a neat idea!

Someone in another blog..(cant remember which blog) said to use a USED dryer sheet. I've tried it before with regular embossing and it does work for me.
Yaneri  |  Sat Jan 17, 2009 at 7:00 AM
I bought a similar thing at archiver's and was told all that is in it is baby powder, so I got some premee baby socks, filled them with baby powder & hand sewed them closed, they work just as well as the one I bought smile
Jackie  |  Sun Jul 11, 2010 at 1:21 PM

Page 1 of 2 pages  1 2 >

You need to be logged in to comment

GET OUR NEWSLETTER


Splitcoaststampers's privacy policy