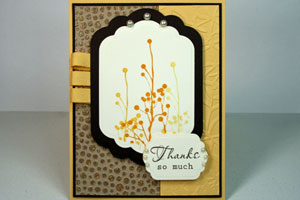
Embossed Embossing

by Beverly Gerard

Learn how to heat emboss dry embossed layers for a unique background.

Supplies
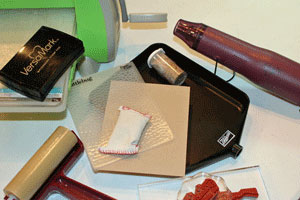
  • Cardstock
  • Die cutting machine
  • Embossing folder
  • Versamark™, or other embossing ink
  • Embossing powder
  • Anti-static puff
  • Powder tray, or paper to retrieve embossing powder
  • Brayer
  • Heat gun
  • Stamps, cardstock, embellishments to complete your project

Step-by-Step

  1. Step 1

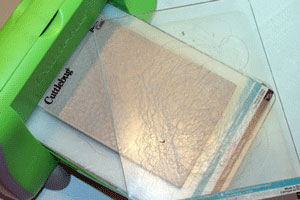
    Place cardstock inside the embossing folder and emboss with a die cutting machine per manufacturer instructions.
  2. Step 2

    Apply the anti-static powder over the entire dry embossed cardstock. This step makes a significant difference in the finished product.
  3. Step 3

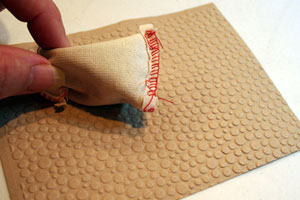
    Ink up the brayer with clear embossing ink. Using gentle pressure, carefully roll the ink onto the raised surfaces of the cardstock. Your goal is to apply ink only to these raised areas. Reink the brayer as necessary during ink application.
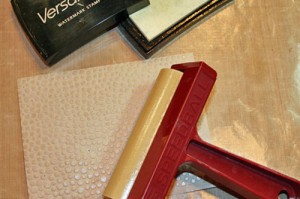
  4. Step 4

    Sprinkle embossing powder onto the entire inked surface - clear embossing powder used here. Tap off all excess powder before applying heat.
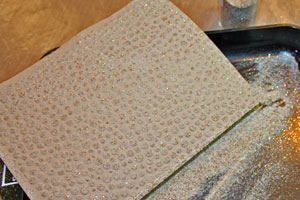
  5. Step 5

    Gently heat the embossing powder, being sure to keep the heat tool moving during this process. Do not overheat the powder.
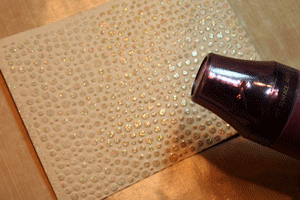
  6. Step 6

    Trim or die cut the embossed piece to the size needed for your creation.
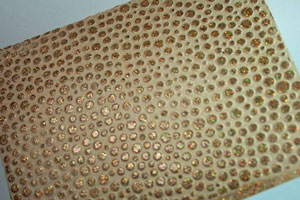
  7. Complete your project.

Video!

Your Turn

You've seen the tutorial, now you try it! We've got a section of the gallery set aside for Embossed Embossing. Try this technique, then upload your artwork to the gallery. Show us your creations!

***Please note - Internet Explorer/Edge is not a supported browser, and will not allow you to see the videos. Please use Chrome, Firefox or Safari to view our tutorial videos.

Questions and Comments

We'd love to get your feedback or questions. Leave your comment below.

Great tutorial, Bev!
Kittie  |  Tue Jun 21, 2011 at 6:02 PM
Love this tutorial. As ever, it's the simplest of ideas which create the most effective results. Thanks for sharing. x
Sally  |  Wed Jun 29, 2011 at 4:42 AM
any way to do this if you don't have a brayer?
Gill  |  Wed Jun 29, 2011 at 5:09 AM
This is great it is so simple and so effective, right now I am wrestling with ways to add to cricut cut outs because I am new to them this will be a great addition, thank you.
dotty  |  Wed Jun 29, 2011 at 5:31 AM
Beautiful cards Bev!
Lois  |  Wed Jun 29, 2011 at 5:46 AM
I was wondering if this would work on embossed die cuts if you used a Versamark pen to color the embossed die cut, then heat embossed. Have you tried that? Did it work?
Jinglesmom  |  Wed Jun 29, 2011 at 5:51 AM
Great tutorial! I will try the technique soon.
Shirley  |  Wed Jun 29, 2011 at 6:10 AM
Very nice tutorial, Bev. The cards are very pretty using this technique.
Benzi  |  Wed Jun 29, 2011 at 6:11 AM
Really a great technique, Bev. It's a good way to use some of those "not-so-used" EPs for great effects. Sometimes I gently just take my VM pad and swipe over the embossed paper. (I hate cleaning brayers! : ) )
hobbydujour  |  Wed Jun 29, 2011 at 6:15 AM
Beautiful and simple.
Patti  |  Wed Jun 29, 2011 at 6:18 AM
Sorry, left a question on the page notifying of this tutorial. Have just joined SCS so will no doubt make similar mistakes.
My question was; Is there any way of making the tutorials into a printable format?
Would love to print off these fantastic information tutorials to make myself a book. No sooner have I watched/read the turorial then I have forgotten most of the instructions.
craftyvron  |  Wed Jun 29, 2011 at 6:26 AM
Forgot to say how much I enjoyed this tutorial...see what I mean about the memory???
Bev, Thank you for a really clearly set out and easy to understand tutorial. Even the thick and bewildered like myself am able to follow your instructions.
Thank you for your time and talents.
craftyvron  |  Wed Jun 29, 2011 at 6:30 AM
I always worry about putting too much of the puff on my cards. Thank you so much for that tip! I shall go back to being generous with the anti-static powder!
Di  |  Wed Jun 29, 2011 at 6:41 AM
What is the purpose of the anti static powder and doesn't it affect the way the ink sticks to the paper? Also, where do you purchase it?
annhunting  |  Wed Jun 29, 2011 at 6:43 AM
wow, luv this idea....thanks so much Bev!
Teresa Kline  |  Wed Jun 29, 2011 at 6:45 AM
Bev, thanks for the great tutorial! I think that will be the "new technique" at my next Stamp Club! Thanks so much for putting this video & tutorial together and for sharing with us all!
Karen Roquet  |  Wed Jun 29, 2011 at 6:53 AM
Thank you for sharing that tutorial was great. Good Job!
Pat Turner  |  Wed Jun 29, 2011 at 7:06 AM
Thanks for the tutorial it's reminded me of it and how I used to use it.. BTW, did you know that the link to the gallery is broken/or linking to a different gallery. It links to the Dry Embossing Cards and More Gallery. Should there be a seperate gallery?
SusieMuslie68  |  Wed Jun 29, 2011 at 7:09 AM
Thanks for the tutorial. I have to try this today! I haven't used heat embossing for quite awhile so today's the day! I have always used the antistatic puff. It makes for a neater look without little pieces of embossing where you don't want them.
JoanneO  |  Wed Jun 29, 2011 at 7:09 AM
Great idea! I can't wait to give it a try.
Linda Jo  |  Wed Jun 29, 2011 at 7:12 AM

Page 1 of 4 pages  1 2 3 >  Last »

You need to be logged in to comment

GET OUR NEWSLETTER


Splitcoaststampers's privacy policy