Elf Shoe Treat

by Sarah Wills

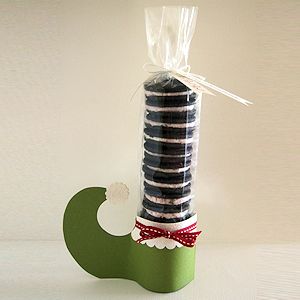
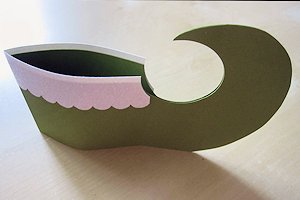
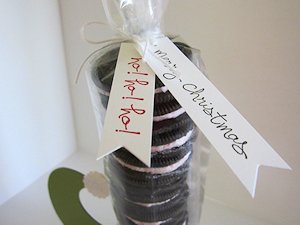
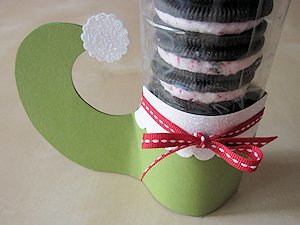
Use this elf shoe template for a sweet holiday gift.

Supplies
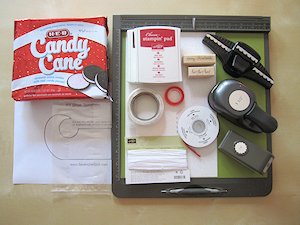
  • Printable Elf Shoe Template
  • 5" x 12" Cardstock (green here)
  • 1" x 12" Cardstock (white here) for border decoration and tags
  • Score board
  • Punches (1 1/2" circle, border, small scalloped circle)
  • Adhesive
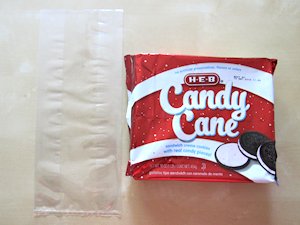
  • Sandwich cookies
  • Other supplies as needed to complete the project (stamps, twine, ribbon, tape)

Step-by-Step

  1. Step 1

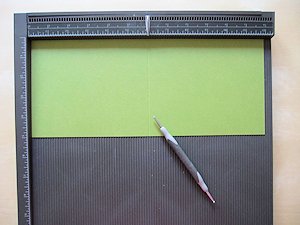
    Cut a piece of cardstock to measure 12" x 5". Score halfway along at 6" and fold along the score line.

  2. Step 2

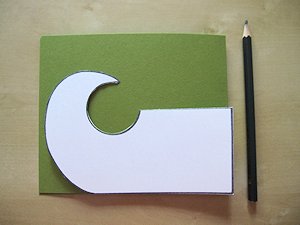
    Print the Elf Shoe Template and cut it out. Trace the template onto the folded cardstock with the straight side along the fold. Cut around the pencil lines, being sure to hold the two layers firmly together as you go.

    TIP:
    Use a 1 1/2" circle punch or die to cut the circular shape.

  3. Step 3

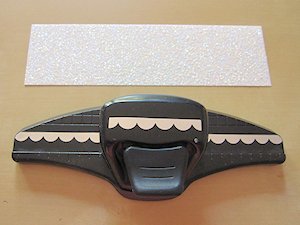
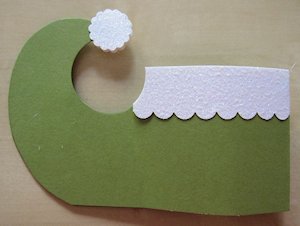
    To make the trim around the top of the shoe, cut a piece of white or glittered cardstock to 6" x 1 1/4" and shape one edge using a border die or punch.

  4. Step 4

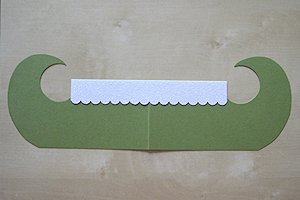
    Attach the trim to the top edge of the shoe using strong adhesive tape.

  5. Turn over and use 1 1/2" circle punch to trim edges of the border to match the shape of the shoe.

  6. Step 5

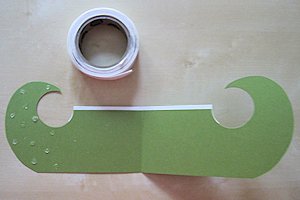
    Use Glue Dots or strong adhesive tape to adhere the ‘toe’ sections together.

  7. NOTE:
    Remember to leave the ‘foot’ section free of adhesive for the cookie tube to slip into.

  8. Step 6

    Cut two circles to make the pom pom at the end of the shoe, and adhere in place.

  9. Step 7

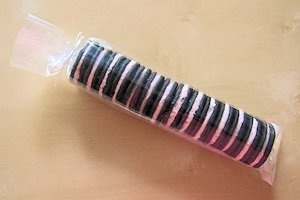
    Take a food safe cello bag and pop a stack of sandwich cookies inside – seasonal colors such as red or green work really well.

  10. Roll the cello bag into a tube shape and secure at the back with tape. Tie top to close.

  11. Step 8

    Embellish or label the top of the bag as desired.

  12. Tie a piece of ribbon tightly around the trim of the shoe and finish with a bow – pulling tight will ensure that your shoe sits nice & flat on a surface.

  13. Step 9

    Complete the project.

Video!

Your Turn

You've seen the tutorial, now you try it! We've got a section of the gallery set aside for Elf Shoe Treat. Try this technique, then upload your artwork to the gallery. Show us your creations!

***Please note - Internet Explorer/Edge is not a supported browser, and will not allow you to see the videos. Please use Chrome, Firefox or Safari to view our tutorial videos.
Questions and Comments

We'd love to get your feedback or questions. Leave your comment below.

I love the Elf Shoe/Sock! Now I know what to give my husband for Christmas. Thank you Sarah for sharing your creation!
Angela Maine  |  Fri Nov 14, 2014 at 8:50 AM
Awesome, Sarah Willis! Your elf is a hit!
Diane Lethbridge  |  Fri Nov 14, 2014 at 10:31 AM
Adorable, I love it. Although, I can't print the pattern...it prints over four pages. Any suggestions?
Tracey  |  Fri Nov 14, 2014 at 3:39 PM
Tracey, check your printer settings. Mine printed fine. The actual image is only about half of one sheet. It sounds like you have enlarged the template or a setting on your printer. That's about as much techy help I can give you! LOL!!
Diane Lethbridge  |  Fri Nov 14, 2014 at 3:53 PM
I switched the file to a PDF Tracey - please try and see if that works better for you!
lydia  |  Fri Nov 14, 2014 at 4:16 PM
This is beyond adorable.defiantly going to make one. Great tutorial. What adorable gifts these would make.
Betsey  |  Fri Nov 14, 2014 at 8:14 PM
What a lovely idea and so cute and looks straight forward thank you
Lee Gysberts  |  Fri Nov 14, 2014 at 11:51 PM
Fantastic! Can't wait to make one or two or....
Anita O'Connor  |  Sat Nov 15, 2014 at 7:11 AM
This is so darn cute! Thanks for sharing it! Where do you get your cell bags?
Nancy Williams  |  Sun Nov 16, 2014 at 5:36 AM
This is so stinking cute and adorable!!! I love it. Thanks for sharing such a do-able project with us.
Meg McAlister  |  Sun Nov 16, 2014 at 2:37 PM
Nancy- I just got bags with ties at Michaels. S U sells them also but with no ties...Michaels are the same, plus your coupon..
Betsey  |  Sun Nov 16, 2014 at 2:59 PM
Thanks for the fun tutorial! I had fun making these! Your tutorial is great too!
Shelia  |  Mon Nov 17, 2014 at 4:09 PM
Shelia- did you find your template was too big for the card stock size in the tutorial? Mine was by 1".Wondered if anyone else had that issue.
Betsey  |  Mon Nov 17, 2014 at 5:55 PM
If you use the jpg template in step 2, you can resize it to meet your needs. For the oreo treat, size the shoe to 6" wide. To make a card that was 5.5" wide, I used that same size, and let the end hang over the fold. I made some cute tags with the template that were 2"x3".
dina  |  Mon Nov 17, 2014 at 6:03 PM
Dina. Thank you so much. You helped tremendously. So making the shoe I" shorter works just fine also. They couldn't be cuter. Did yours come out cute? Any ideas other than Oreos, something good to fill them with?
Betsey  |  Tue Nov 18, 2014 at 6:26 AM
My card is in the gallery, and I made a dozen yesterday that I haven't posted... the tags are sooo cute - I will try to get a picture in the gallery today.

In a Youtube comment, someone suggested wrapping one around a pillar candle... at 5.5", they could make a cute gift card holder.
dina  |  Tue Nov 18, 2014 at 6:51 AM
Going to look for your card...is it under Dina ? Wow a dozen yesterday,awesome. I'm wanting to make 20 for my daughters 2 nd grade students..think they'd love 'um. ?
Betsey  |  Tue Nov 18, 2014 at 7:08 AM
Just use the gallery link under the video on the tutorial page - you'll find it there. My username is dini.
dina  |  Tue Nov 18, 2014 at 7:14 AM
Oh my word. Beautiful,so creative...
Betsey  |  Tue Nov 18, 2014 at 7:56 AM
Dina..I couldn't find a step 2 in big JPEG to increase size..I'm not that savvy in that department ,but nothing indicated step 2
Betsey  |  Tue Nov 18, 2014 at 8:27 AM

Page 1 of 2 pages  1 2 >

You need to be logged in to comment

GET OUR NEWSLETTER


Splitcoaststampers's privacy policy