Eggshell Mosaic Background
by Trudy Sjolander
Create a beautiful and simple mosaic with eggshells....YES...EGGSHELLS!
Supplies
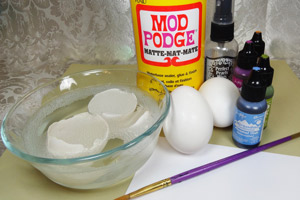
- Shells from raw eggs
- A few drops of antibacterial soap or bleach
- Decoupage glue, Matte Mod Podge used here
- Assorted Alcohol Inks, Ranger Alcohol Inks used here
- Mist bottle of water or a purchased mist product, Perfect Pearl Mist used here
- Old paint brush
- Heavy cardstock
Step-by-Step
-
Step 1
Soak uncooked eggshells in water with a few drops of antibacterial soap or bleach overnight, then carefully remove the membrane from the inside. (If you do not remove it, the shells will not stick as well)
Allow shells to dry overnight on a paper towel.
Hint:
Whenever you cook with eggs, soak, clean, dry and put in a baggy so you will have shells ready to go when you want them.
-
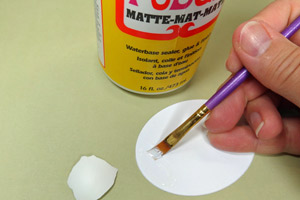
Step 2
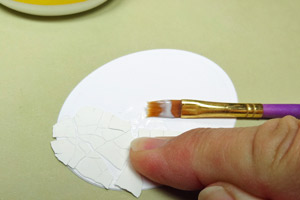
Create a shape from heavy white cardstock and working in small areas at a time, brush on some matte decoupage medium.
-
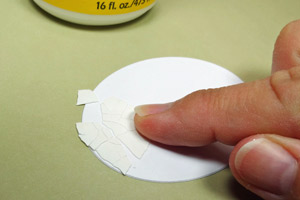
Step 3
Place a piece of eggshell, outside up, onto the glue, then press down with fingers to break into pieces. If some of the pieces pull up with your finger, just put them back in place as best you can with the brush. Don't worry if there are gaps...it just adds to the look.
-
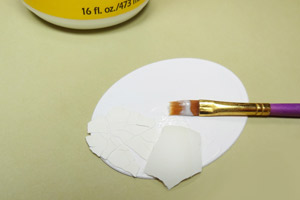
Step 4
Continue to add glue then puzzling in shells until the cardstock is covered.
-
Step 5
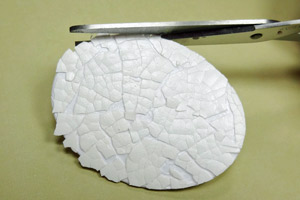
Press down and crack shell pieces as you go. Continue until entire shape is covered. Don't worry about pieces overhanging. They will be cut off later.
-
Step 6
Allow glue to dry for an hour, or carefully dry with a heat gun, making sure not to get it too hot or your glue will bubble.
Add a thin coat of decoupage glue over the entire piece and let dry again.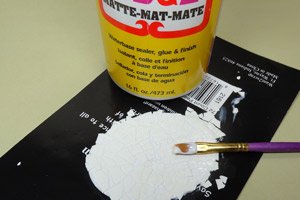
-
Step 7
After completely dry, trim any shell that is hanging over your shape.
-
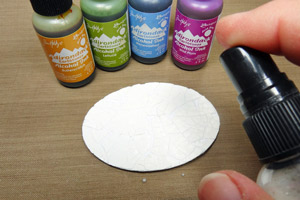
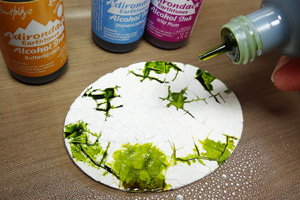
Step 8
Lightly spray the shell with water or craft mist.
-
Step 9
While mist is still wet, add several drops of your first color of ink, and have fun watching it spread.
-
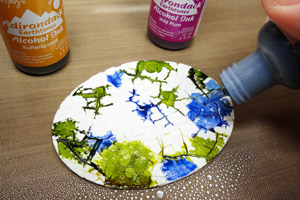
Step 10
Continue to add drops of assorted inks. Use as many or few as you like but try not to overlap too much because the colors will start to get "muddy".
-
There should be some white showing at this point.
-
Step 11
Add more mist to blend the colors, being careful to not over do it.
-
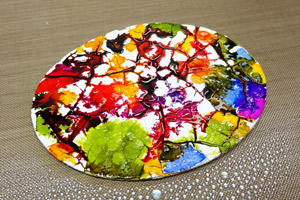
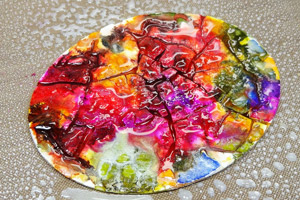
Step 12
Allow to dry. You can now add a coat of your favorite glaze or sealer if you would like, and allow to dry again. It makes the piece more durable. (I used Gloss Mod Podge)
You can see by the photo the shimmery effect the Perfect Pearl Mist adds to the piece.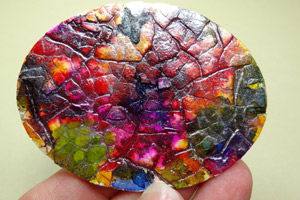
-
Step 13
Finish your project.
Video!
Variations
-
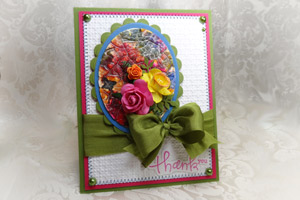
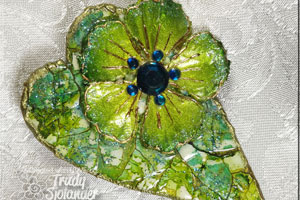
Use this same technique on heavier surfaces such as wood shapes or canvas covered chipboard coated with gesso, to create pieces suitable for jewelry. You can also add glitters and other products to create different looks.
Your Turn
You've seen the tutorial, now you try it! We've got a section of the gallery set aside for Eggshell Mosaic Background. Try this technique, then upload your artwork to the gallery. Show us your creations!
***Please note - Internet Explorer/Edge is not a supported browser, and will not allow you to see the videos. Please use Chrome, Firefox or Safari to view our tutorial videos.

Questions and Comments
We'd love to get your feedback or questions. Leave your comment below.
your projects are beautiful. Thank you for the tutorial!
Susanne, Colored eggs work awesome too! You can even use assorted colors the just a brown ink for a natural colored project.
Hugs,
True :D
You actually can use cooked too. It's just much easier to get the membrane out with the raw ones. If cooked is all you have....go for it.
Page 1 of 5 pages 1 2 3 > Last »