Direct To Paper (DTP)

by Lydia Fiedler

Add ink directly on to your cardstock with your ink pad.

Supplies

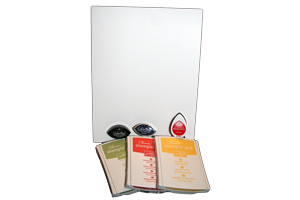
  • Neutral colored Cardstock
  • Dye and pigment inks, large and small
  • Chipboard pieces (optional)
  • Stamps
  • Embossing folders and die-cutting machine (optional)

Step-by-Step

  1. Step 1

    Direct to paper just involves using your ink pad as a stamp.

    Apply the lightest color you are working with to the paper first, so you don't contaminate your ink pads.

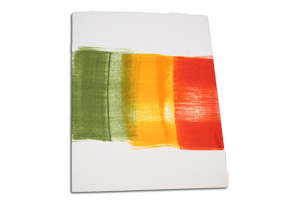
    Make a stripe with one end of the narrowest side of the dye based ink pad, pressing firmly and dragging the ink pad about two inches across the center of a white card front.
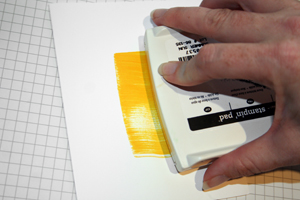
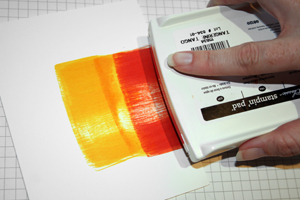
  2. Step 2

    Using a second, darker color, and overlapping slightly, press and drag the narrow end of your ink pad in a stripe next to your first stripe.

  3. Step 3

    Repeat step two with your third color. If the edge of your inkpad is curved or leaves voids, you can go over each stripe multiple times if needed.

  4. Step 4

    This is the finished background.

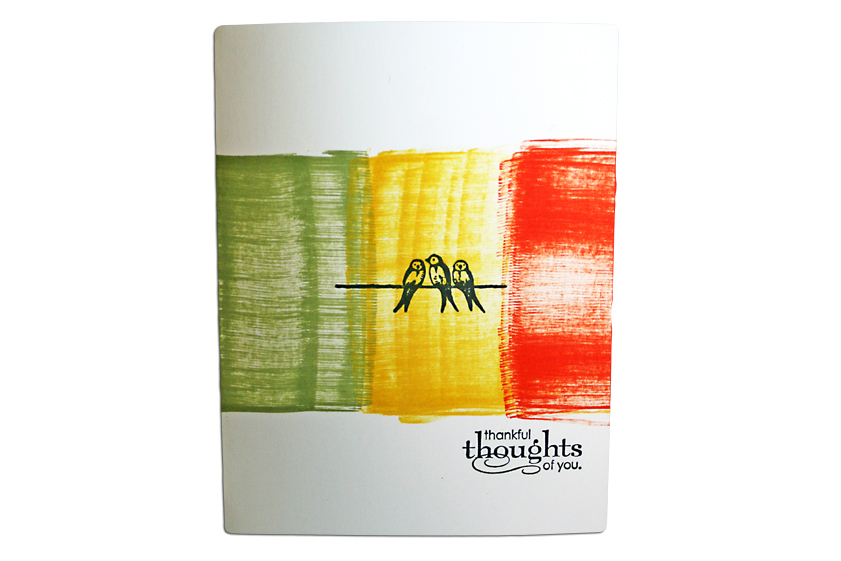
  5. Finish your card with stamps.

  6. Step 5

    Direct to paper can also be used to create faux textures, like wood. Start with a base color of dye ink (grey used here) - and make rough stripes vertically on the card. Layer additional dye colors and pigment inks (aqua used here) to create a distressed, pickled wood look.

    Hint:
    The background of this paper was created with the Faux Barn Board technique.
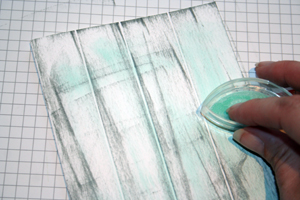
  7. Step 6

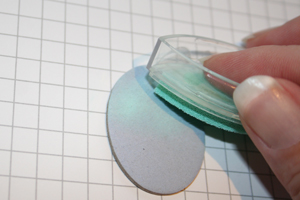
    Pigment inks are perfect for creating opaque colors on chipboard elements.
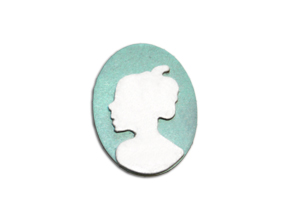
  8. Step 7

    Use the DTP technique to apply aqua pigment ink to the base of a cameo chipboard, and white pigment ink for the silhouette piece for a beautiful vintage element.
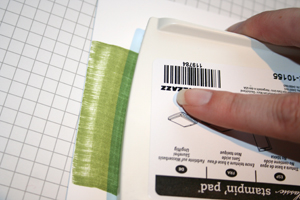
  9. Step 8

    Using small dye based ink pads, rub the raised part of dry embossed cardstock to get dramatic contrast or a distressed, faux tin look.
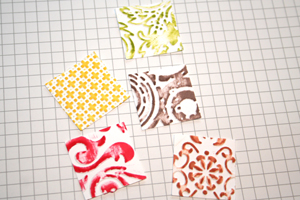
  10. Step 9

    Use punches or dies to create small accents.
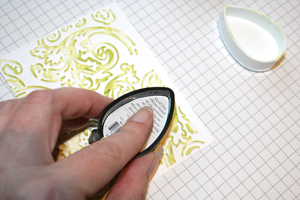
  11. Step 10

    Use a variety of ink colors and embossing folders for unique looks with this technique.

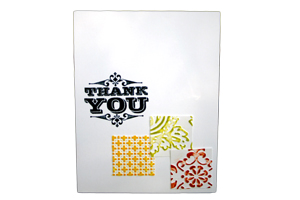
  12. Arrange these pieces on a finished card.

Video!

Your Turn

You've seen the tutorial, now you try it! We've got a section of the gallery set aside for Direct To Paper (DTP). Try this technique, then upload your artwork to the gallery. Show us your creations!

***Please note - Internet Explorer/Edge is not a supported browser, and will not allow you to see the videos. Please use Chrome, Firefox or Safari to view our tutorial videos.

Questions and Comments

We'd love to get your feedback or questions. Leave your comment below.

This is AWESOME!!!! Love CAS and intricate all in one. Great tutorial...thank you so much. smile
Lisa Minckler  |  Wed Jun 8, 2011 at 5:26 AM
OMG, so easy and simple and basic and wonderful! Why can't I think like this?
Jane Harrah  |  Wed Jun 8, 2011 at 5:43 AM
wow, I love, love ,love this technique. I never would have thought to do this.... thanks so much for the inspiration. I can't wait to try this out myself.
cheers!!!
liza  |  Wed Jun 8, 2011 at 5:53 AM
Nice technique - I'm definitely trying it soon.
Donna B.  |  Wed Jun 8, 2011 at 6:56 AM
Love these techniques!!! Will use one of these techniques today when I make a thank you card. Video was excellent!!
Barbara  |  Wed Jun 8, 2011 at 7:05 AM
What an inspiring tutorial video! I love the way you've shown so many different ways to showcase one technique. Using the little stamping spot inkpads to get the funky circle is a new one to me! Can't wait to try it out. Thanks so much for the inspiration!
Marie Taylor  |  Wed Jun 8, 2011 at 7:22 AM
Great tutorial, thanks for all the inspiration and CAS ideas Lydia grin.
Karan  |  Wed Jun 8, 2011 at 7:46 AM
Well done! This is one of my favorite techniques - I love doing DTP!! Great versatility of samples there also
vicki dutcher  |  Wed Jun 8, 2011 at 8:01 AM
What an inspirational video. I learned so many different techniques from watching these tutorials. Thank you so much for sharing your great ideas.
Mary Ann Huntington  |  Wed Jun 8, 2011 at 9:21 AM
Not only is the technique great but I LOVE the first bird card. So cute.
June K.  |  Wed Jun 8, 2011 at 10:09 AM
this is great! I esp love the wood look. Thank you for more ideas!
diane  |  Wed Jun 8, 2011 at 10:53 AM
I love this video so mich I am subscribing to your blog. COOL COOL COOL!

Gail
Gail  |  Wed Jun 8, 2011 at 11:47 AM
Oh Thank you for such a great embossing idea. keep them coming it is wonderful
marlene
marlene geiger  |  Wed Jun 8, 2011 at 12:49 PM
Love the video......I can see me using this so much...Love it...
Debbie Webb  |  Wed Jun 8, 2011 at 12:54 PM
Oh gosh, I love the embossed pieces...love all of them. Great tutorial and one that I actually have everything to create at my fingertips. Thanks!
Pam Crusberg  |  Wed Jun 8, 2011 at 2:14 PM
Very nice. The possibilities are endless. Thnx for sharing these great techniques.
Hugz
Dottie
Dottie Watson  |  Wed Jun 8, 2011 at 4:47 PM
Linda, I enjoyed your tutorial, especially the worn wood technique. Is there some way to repost your tutorial (if that is allowed). I'd like mydaughter to be able to view it.
Janet Nelson  |  Wed Jun 8, 2011 at 4:53 PM
Hi Janet - you can just email her this link: http://www.splitcoaststampers.com/resources/tutorials/dtp/ - it's viewable by anyone smile

Thanks for your kind words! smile
lydia  |  Wed Jun 8, 2011 at 5:16 PM
Awesome tutorial! I can't wait to try it! Thank you so much! Patti
Patti Olson  |  Wed Jun 8, 2011 at 7:59 PM
Thanks for the wonderful techniques, Lydia. I am a lover of Potter's Clay ink, also...just beautiful!
Benzi  |  Wed Jun 8, 2011 at 8:15 PM

Page 1 of 2 pages  1 2 >

You need to be logged in to comment

GET OUR NEWSLETTER


Splitcoaststampers's privacy policy