Dry Debossing
by Beate Johns
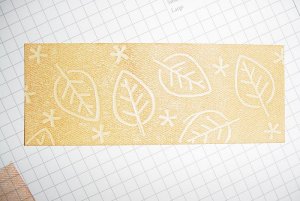
Use the reverse side of a dry embossed image for a wow effect background.
Supplies
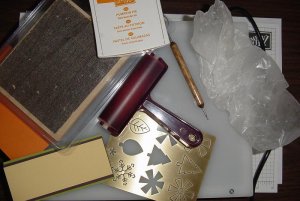
- Light table (or window)
- Brass template
- Stylus tool
- Wax paper
- Cardstock
- Background stamp
- Brayer (optional)
- Dye Ink (darker than your cardstock color)
Step-by-Step
-
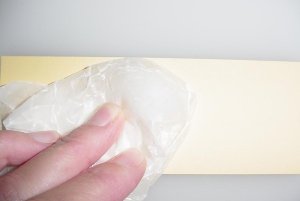
Step 1
Start by rubbing wax paper over your cardstock. This step makes the stylus tool glide easier over the paper.
-
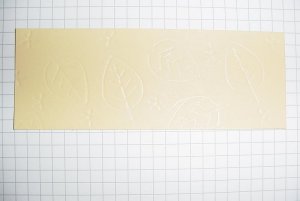
Step 2
Turn your light table on and place the brass template on the surface of the table.
Lay your cardstock over the template and start tracing the open areas of your template with your stylus.
Hint: if you don't have a light table, tape your template to a window and hold your cardstock over the template
-
Step 3
Add more images as desired.
-
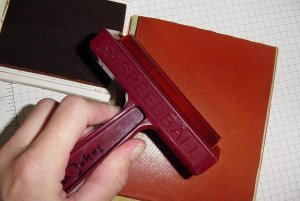
Step 4
Ink up your background stamp. I always use the brayer to help me get an even coverage.
-
Step 5
With the raised images facing down, stamp the background stamp over it. The ink won't stay on your debossed image, leaving it the same color as the cardstock.
-
Step 6
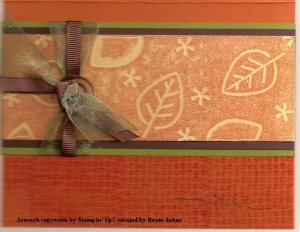
Finish your project.
Your Turn
You've seen the tutorial, now you try it! We've got a section of the gallery set aside for Dry Debossing. Try this technique, then upload your artwork to the gallery. Show us your creations!
***Please note - Internet Explorer/Edge is not a supported browser, and will not allow you to see the videos. Please use Chrome, Firefox or Safari to view our tutorial videos.
Questions and Comments
We'd love to get your feedback or questions. Leave your comment below.
Another GREAT tutorial by the way! I can't wait to try it!
Melissa
Marilyn
The background stamp is called Linen. It is a retired stamp from Stampin' Up!
Thanks!
Sponging or brayering ink directly over the dry embossed images should work as well.
Thank you for the tutorial. Do you know how to do the vellum debossing I have seen on this website? I can't find the tutorial for it. Also, where do you get your templates? The only ones I can find are with stampinup. I am looking for one that has a holiday scene, a farm house or house with snow or a manager scene. Any suggestions of where to look?
Thank you for your help.
Darlene
Page 1 of 1 pages