Double Gate Fold Card
by Dawn Olchefske
Score, cut and fold to create this card that opens in the center.
Supplies
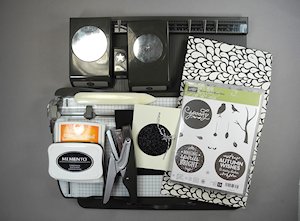
- Double-sided patterned paper cut to 12" x 5-1/2"
- Scoring board
- Paper trimmer
- Bone folder
- Adhesive
- Pencil
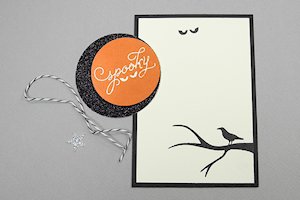
- Other supplies as needed to complete the card (Stampin' Up!® Supplies used here: Among The Branches stamp set, Tuxedo Black Memento Ink Pad, Vanilla card stock (3-1/4" x 4-3/4"), Black card stock (3-1/2" x 5"), Tangelo Twist Classic Stampin' Pad Paper, Happy Haunting Designer Series Paper (12" x 5-1/2"), Black and Silver Glimmer Paper, 2" and 2 1/2" Circle Punch, Itty Bitty Accents Punch Pack (star), Handheld Stapler and staples )
Step-by-Step
-
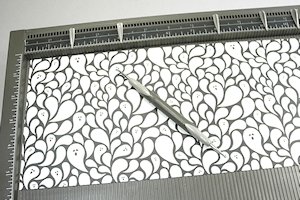
Step 1
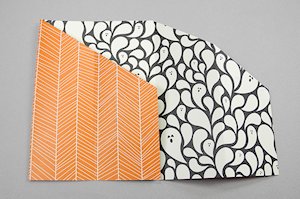
Place 12" x 5-1/2" piece of patterned paper onto the scoring board. Score at 2", 4", 8" and 10".
-
Step 2
Rotate the paper 90 degrees. With a pencil, mark at 2-3/4" on each short end.
NOTE:
You may need to mark the top of the 4" and 8" score lines so you can see them better for the next step.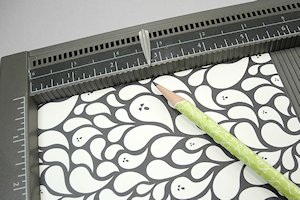
-
Step 3
With a paper trimmer, make a diagonal cut from the top of the 4" score line to the side 2-3/4" mark. Repeat from the top of the 8" score line to the 2-3/4" mark on the other side. Erase pencil marks.
NOTE:
Save triangle cut-outs for step 5.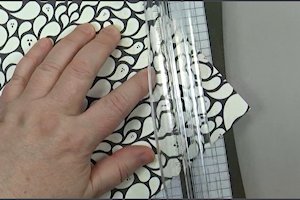
-
Step 4
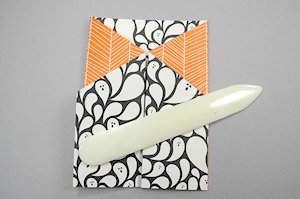
Fold inward on the 4" score line, then fold back outward on the 2" score.
-
Repeat on the other side.
-
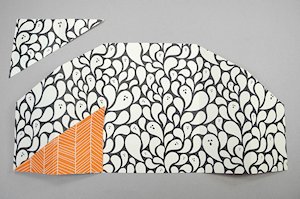
Step 5
Reopen card and place cut-outs from step 2 back into place (like a puzzle).

-
Flip cut outs over and move to opposite lower corner of the card.
-
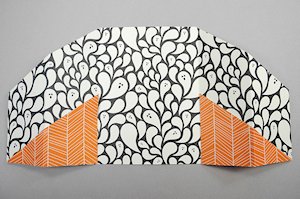
Step 6
Adhere the triangles in place and refold.
-
TIP:
Adhere the larger end of the triangle first. Fold the card in, and then glue down the tip.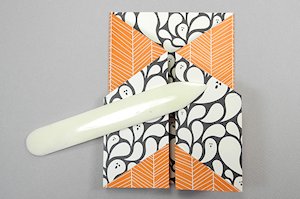
-
Step 7
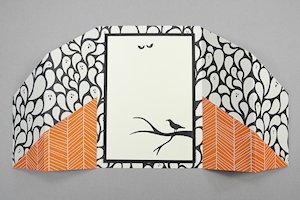
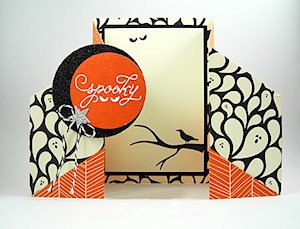
Decorate the card as desired.
-
The inside panel of the card is 3 1/4" x 4 3/4" (vanilla), layered on a 3-1/2" x 5" black panel.
-
Step 8
Finished card size is 4" x 5 1/2".

-
It will fit in an A2 envelope.
Video!
Your Turn
You've seen the tutorial, now you try it! We've got a section of the gallery set aside for Double Gate Fold Card. Try this technique, then upload your artwork to the gallery. Show us your creations!
***Please note - Internet Explorer/Edge is not a supported browser, and will not allow you to see the videos. Please use Chrome, Firefox or Safari to view our tutorial videos.

Questions and Comments
We'd love to get your feedback or questions. Leave your comment below.
I have a retirement and 2 birthdays this month for which I will use this idea for cards.
Many thanks!
Page 1 of 2 pages 1 2 >