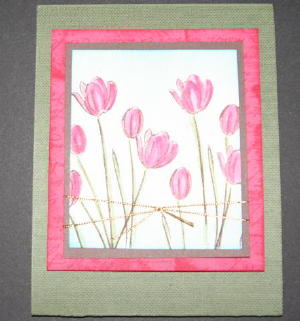
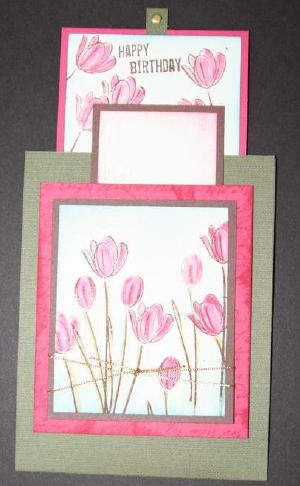
Double Slider Card
by Beate Johns
Susanne Moyer's idea for the Word Window tool punch makes this fun card possible.
Supplies
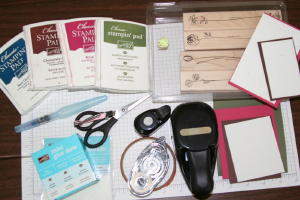
- Stamps
- Word Window tool punch
- 1/2" circle punch
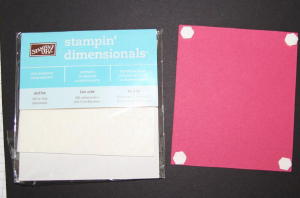
- Dimensionals
- Glue dots
- Sticky Strip™
- Regular adhesive
- Ink
- One 4 1/4" x 11" piece of cardstock, scored at 5 1/2" for card base (Always Artichoke)
- One 2" x 3 1/2" piece of neutral cardstock for front slider
- One 3 1/2" x 5" piece of neutral cardstock for back slider
- One 3" x 3 1/2"piece of neural cardstock for main image
- Cardstock scraps for layering
Step-by-Step
-
Step 1
Stamp and decorate all neutral cardstock. Layer on colored cardstock if desired.
The main image will be shown in full, but only the tops of the sliders will show.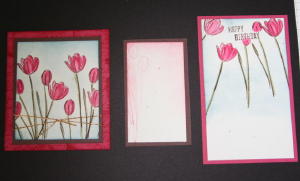
-
Step 2 (Optional)
Add a background to the card front.
-
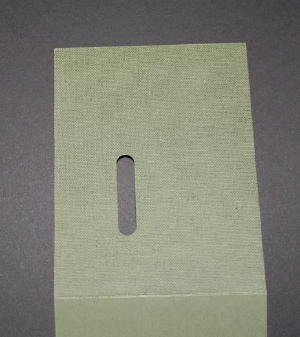
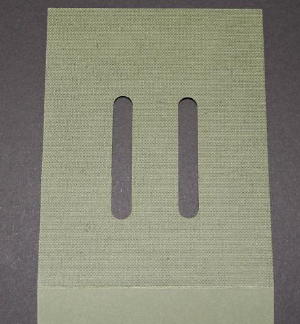
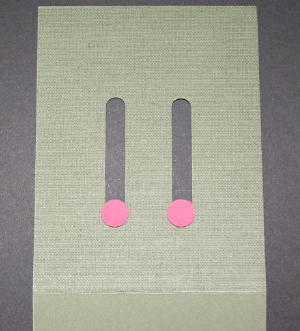
Step 3
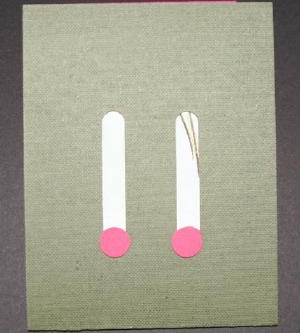
Slide the Word Window punch in from the card front's long side until it doesn't go any further and punch.
-
Step 4
Move the punch over a bit and punch again. You will have made a slot approximately 1 1/2 times the original length of the punch. Repeat on the other side to create two equal, parallel slots on the card front.
-
Step 5
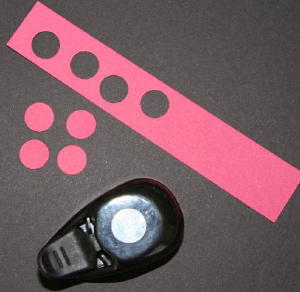
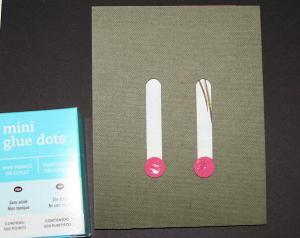
Punch out four circles from scrap cardstock with the 1/2" circle punch.
-
Step 6
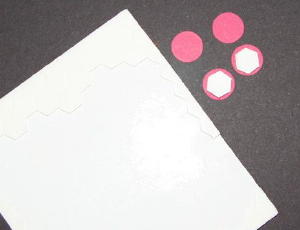
Add a dimensional on two circles.
-
Step 7
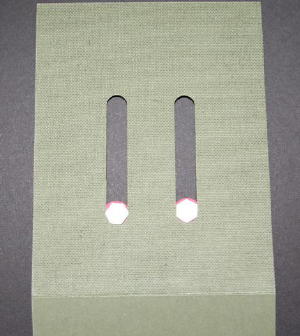
Position the circles at the bottom of each slot behind the card front.
-
Step 8
Add the last two cardstock circles on top of the dimensionals.
-
Step 9
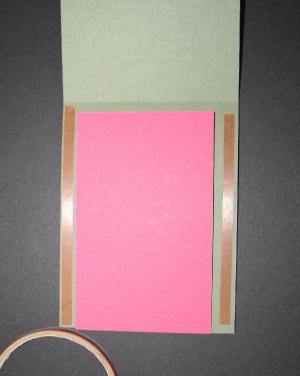
Open the card. Center the back slider in the middle of the card and line up the top of the slider and top of the card.
Make sure that the image is facing you.
Add a glue dot to the 1/2" circles.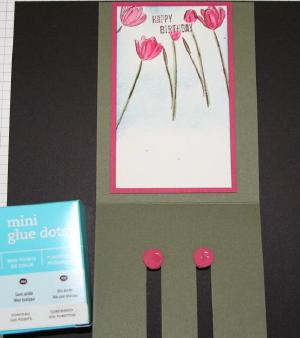
-
Step 10
Fold the card. The back slider will adhere to the 1/2" circles.
-
Step 11
Open the card, and add a glue dot to each 1/2" circle on the front of the card.
-
Step 12
Center the front slider over the 1/2" circles.
Make sure the main image will still cover the front slider!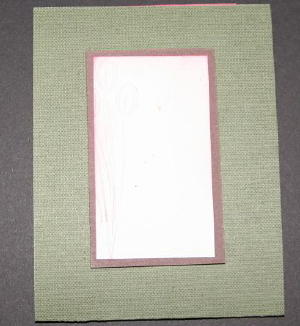
-
Step 13
Add a dimensional to each corner of main image's back.
-
Step 14
Position the main image over the front slider. Make sure the slider won't be stopped by one of the dimensionals.
-
Step 15
Reopen card and add Sticky Strip™ to both long sides of the card. Peel off liner of the Sticky Strips™. Close card to adhere.
-
Step 16
Add a little tab to pull up the card. I used one of the punch outs from the card front.
Variations
Try a different size
You can make the sliders any size you want. Just make sure the main image will cover the front slider.
Rotate the layout
Try making it a horizontal card vs. a vertical one like in this sample
Use a circle punch
Punch a half circle to add a slot to pull out the sliders, instead of using the tabs.
Your Turn
You've seen the tutorial, now you try it! We've got a section of the gallery set aside for Double Slider Card. Try this technique, then upload your artwork to the gallery. Show us your creations!
***Please note - Internet Explorer/Edge is not a supported browser, and will not allow you to see the videos. Please use Chrome, Firefox or Safari to view our tutorial videos.
Questions and Comments
We'd love to get your feedback or questions. Leave your comment below.
I am going to be trying in several ways, including small books etc
thank you again
Jenny
6th avenue stampers
Where did you get you word window punch?
Stampin' Up! sells the Window Word Punch in the US. You can order it from any SU demonstrator.
In the Uk the word window is not available. Please can you possibly explain an alternative way of creating the gap/hole required without this tool-measurements etc? Thank you-it's a stunning card!
Hope mine look as lovely as yours!
This tutorial is also awesome! Will try it.
Thanks!
TIA MARGGIE
Page 1 of 1 pages