Die Cut Card Duo
by Becky Roberts
Use positive and negative die cuts to create a set of matching cards.

Supplies

- Stamps with coordinating dies (Concord & 9th Big Thanks Stamp Set and Dies used here)
- Ink (Memento Tuxedo Black and Versamark used here)
- Cardstock (Concord & 9th White, Black, Poppy, Sorbet, Grapefruit, Aqua Sky, Oceanside & Peacock cardstock used here)
- Adhesive (Tombow Multi-Purpose Liquid Glue, Small and Large Foam Squares, double stick tape used here)
- Other supplies as needed to complete the project (used here: White Embossing Powder, Heat Tool
Step-by-Step
-
Step 1
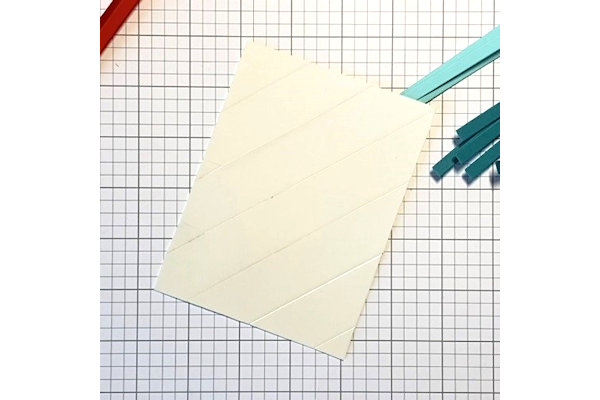
Cut cardstock to 5 1/2” x 8 1/2” for a base. Score at 4 1/4” and fold in half.
Cut a quarter sheet of white cardstock and trim to 4” x 5-1/4”.
Place double stick tape across the entire card, or add one strip at a time. -
Step 2
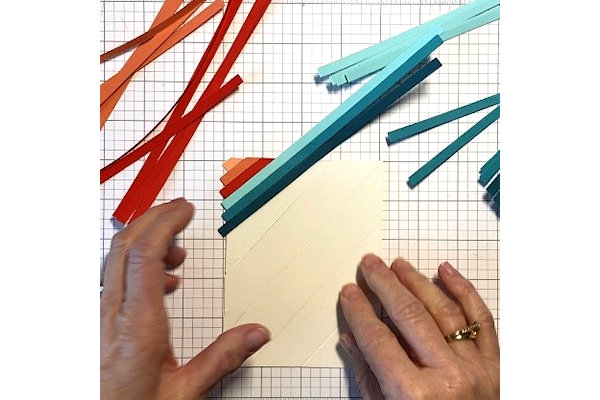
Cut strips of 1/4” cardstock in six colors. You will need 5 strips of each.
Peel back the double stick tape and place the cardstock strips on at a diagonal. You can do any pattern you like or just be random. -
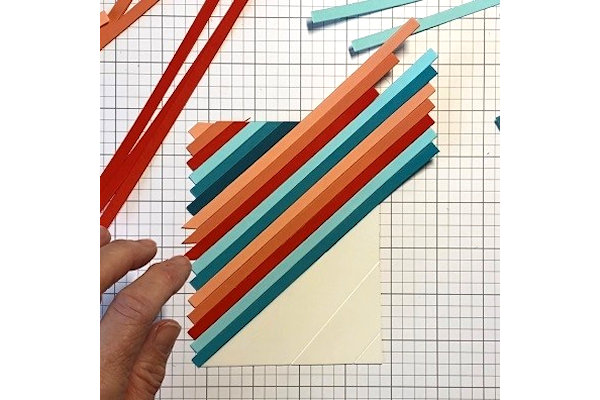
Continue to add strips side by side, repeating the pattern and removing pieces of double stick tape as you go.
-
Step 3
Once the entire card front is covered, turn it over and trim everything that is hanging off.
-
-
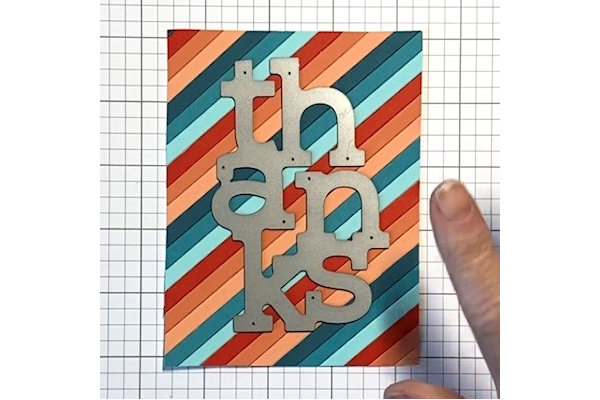
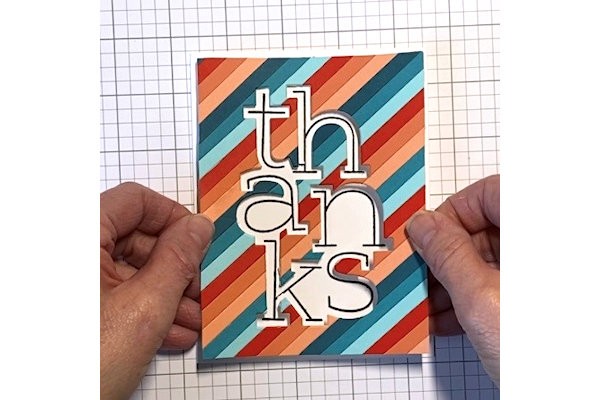
Step 4
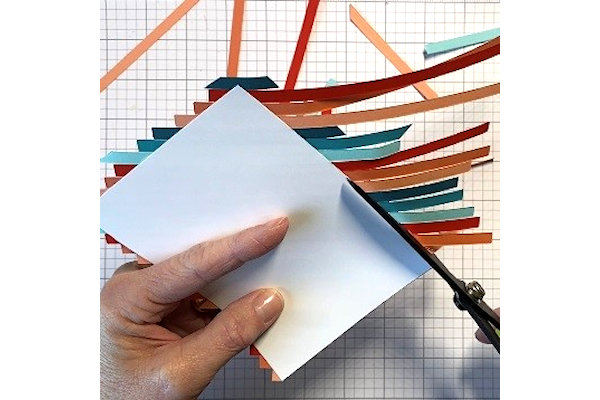
Position your die in the center of the newly striped card front.
NOTE:
It is important to get the die straight because you will use this piece for a card.
-
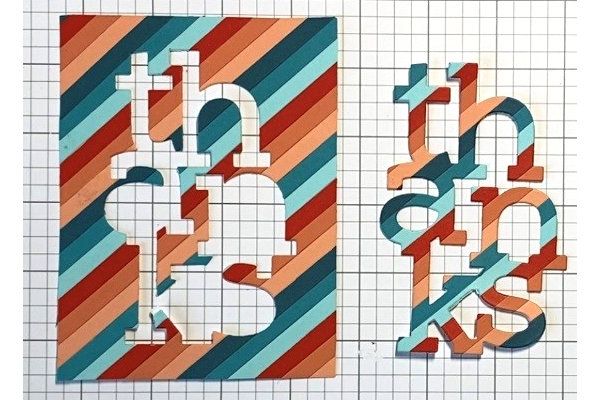
Run the panel through your die cut machine and then carefully remove the image. Keep any little cut out parts as well.
-
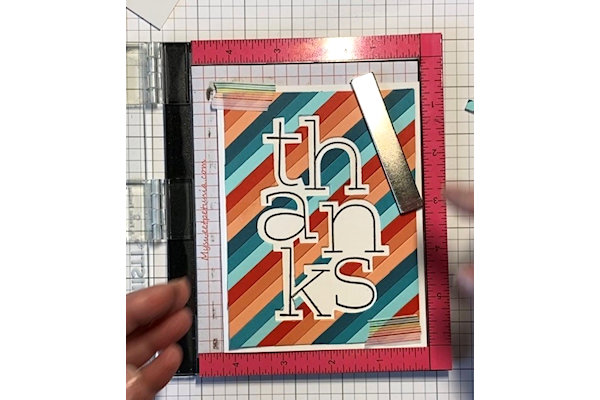
Step 5
Using the negative piece first, position the striped card front over the folded card base as if you were going to adhere it down. Gently place a couple pieces of Washi Tape to hold the front to the base. Put the card in your MISTI or stamp positioner. Line up the coordinating stamps and stamp into the die cut opening. Remove the card from the stamp positioner.
-
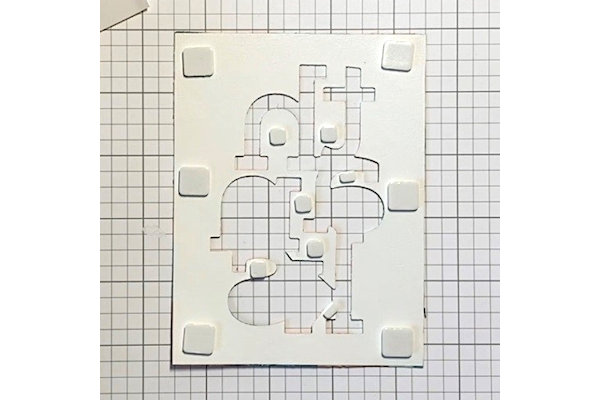
Step 6
Turn the card front over and place Foam Squares in the corners and sides AND on all parts that will likely sag. You want the entire card front to be level.
-
Peel all the backings and place the striped card front over the stamped card base. Replace any cut out pieces that you saved earlier (not pictured).
-
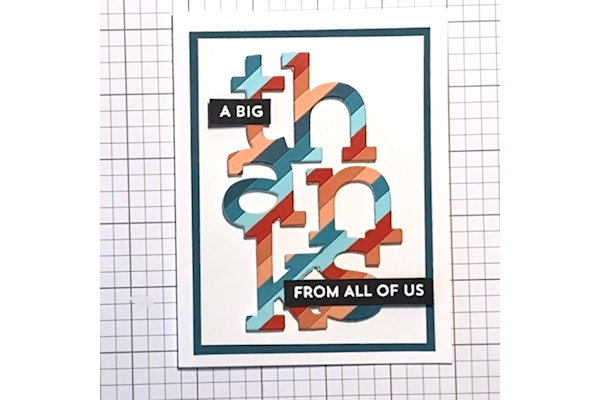
Step 7
Place Foam Squares all over the back of the die cut piece. Peel the backings and adhere to the second card, layering and embellishing as desired.
-
Step 8
Complete the two cards.

Video!
Your Turn
You've seen the tutorial, now you try it! We've got a section of the gallery set aside for Die Cut Card Duo. Try this technique, then upload your artwork to the gallery. Show us your creations!
***Please note - Internet Explorer/Edge is not a supported browser, and will not allow you to see the videos. Please use Chrome, Firefox or Safari to view our tutorial videos.

Questions and Comments
We'd love to get your feedback or questions. Leave your comment below.
Does this technique work for electronic die cutting machines too?
Page 1 of 1 pages