Decoder Card
by Shirley Durell
Hide a secret message with this decoder card.
Supplies
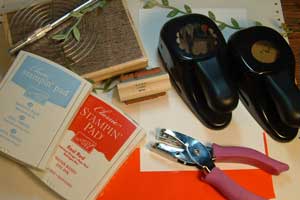
- White Cardstock
- Red Cellophane
- Canvas Background Stamp, or other mesh looking background stamp
- Ink in Red and Light Blue (Real Red and Bashful Blue used here; Certainly Celery works well, too)
- 1 1/4" Circle Punch
- Scallop Circle Punch
- 1/8" Circle Punch
- Circle Cutting Tool (to cut cellophane to 1 3/8")
- Two-Way Glue
- Ribbon
Step-by-Step
-
Step 1
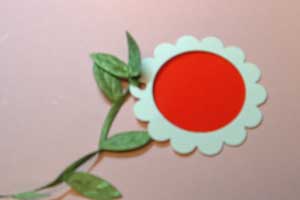
To create a decoder piece, cut two identical-sized pieces of white cardstock.
Punch a 1 1/4" circle from one, then match corners with the second sheet and punch again so the circle is in the same position on both pieces of cardstock.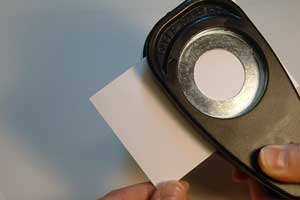
-
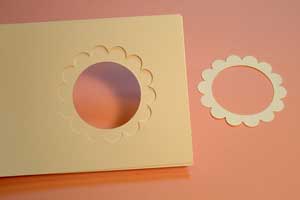
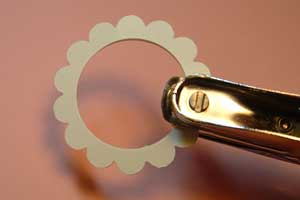
Step 2
Center the scalloped circle punch over the cut out circle and punch.
-
Match up the corners of both papers and use this as a guide to punch the second scalloped circle to ensure that the two finished pieces are a match even if they are a little off-center.
-
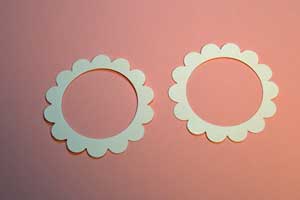
Step 3
Line the two scalloped circle pieces up and punch a 1/8" hole for your ribbon.
-
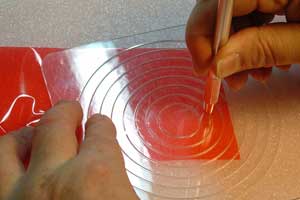
Step 4
Cut a 1 3/8" circle from cellophane with a Coluzzle™ circle template.
-
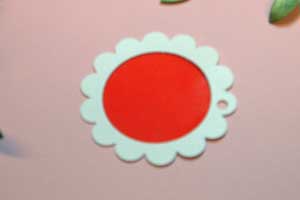
Step 5
Use Two-Way glue to adhere the cellophane circle to one of the scalloped circles.
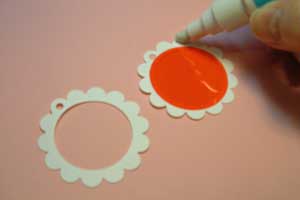
-
Glue the second scalloped circle over top, carefully aligning the ribbon hole as well as the scallops.
-
Step 6
Add ribbon to the decoder piece, leaving enough ribbon to reach the secret message on your card.
-
Step 7
For the secret message, stamp words or an outline image on white cardstock using light blue ink.
Ink the canvas background with red ink and stamp over the top of the image or message stamped in blue.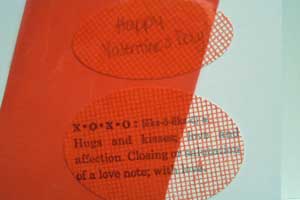
-
Hints:
Fine lined images will show through the background less, making it harder to read without the decoder piece.
Hand write a message using a light blue marker for a more personal touch.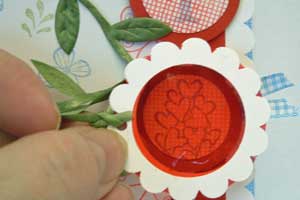
-
Step 8
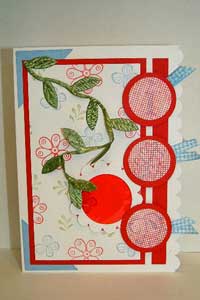
Finish your card.
Your Turn
You've seen the tutorial, now you try it! We've got a section of the gallery set aside for Decoder Card. Try this technique, then upload your artwork to the gallery. Show us your creations!
***Please note - Internet Explorer/Edge is not a supported browser, and will not allow you to see the videos. Please use Chrome, Firefox or Safari to view our tutorial videos.

Questions and Comments
We'd love to get your feedback or questions. Leave your comment below.
I love, love the idea of the flower as the decoder...great job on the card!!
Neat card
I had read this technique in my Stampin' Success but was frustrated with the words showing through with the solid red being brayered on top. I think having both the white and the red make it harder for the eyes to see the blue. (That's when I grabbed my Canvas BG.)
At this time, I don't know of another stamp that would cover evenly enough to produce the same results. I had tried a few things but have not come up with anything that works as well. If you find something that works, please share! : )
Page 1 of 2 pages 1 2 >