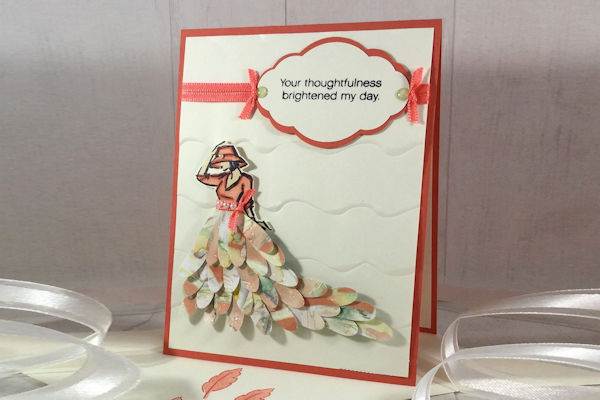
Daisy Punch Dress Card
by Shannon Cole
Use daisy petals to make a fancy skirt.
Supplies

- Cardstock for base (Stampin’ Up!® Calypso Coral and Very Vanilla cardstock used here)
- Daisy shaped punch or die (SU Daisy Punch used here)
- Stamp image with a dress or skirt (SU Daisy Delight and Beautiful You stamp sets used here)
- Decorative paper (SU Delightful Daisy DSP used here)
- Adhesive (Liquid Multipurpose Glue, Glue Dots, Stampin' Dimensionals, and Snail Permanent Adhesive used here)
- Other supplies as needed to complete the project (SU products used here: Pretty Label Punch, Calypso Coral Sheer Ribbon, Ruffled Textured embossing folder, Glitter Enamel Dots, Pearls Basic Jewels, Stampin' Blends Marker Collection, Memento ink)
Step-by-Step
-
Step 1
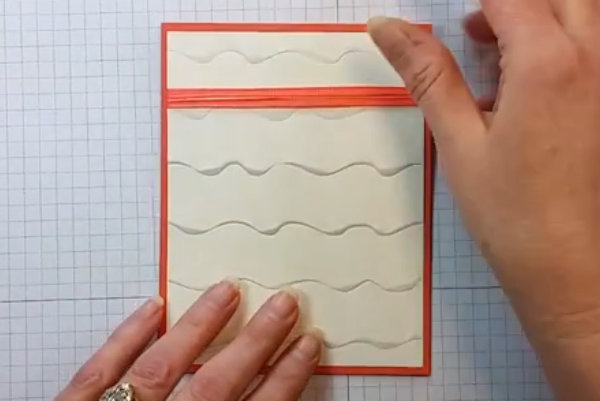
Start with an A2 size cardstock base, cut at 11″ x 4.25″. Score and fold in half at 5.5″. Layer a 5.25″ x 4″ cardstock panel on the card front. (Here the panel was embossed first using a Ruffled Texture folder.)
Prepare the card base as desired. -
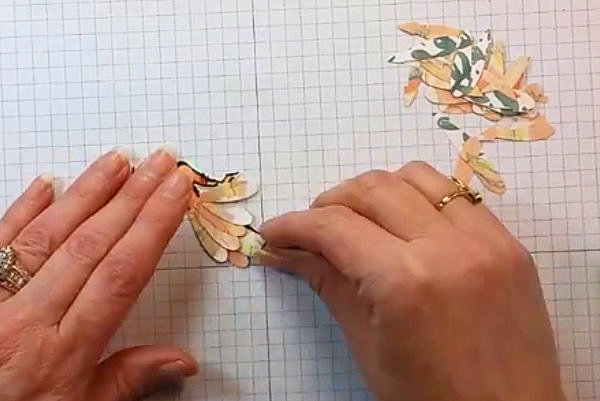
Step 2
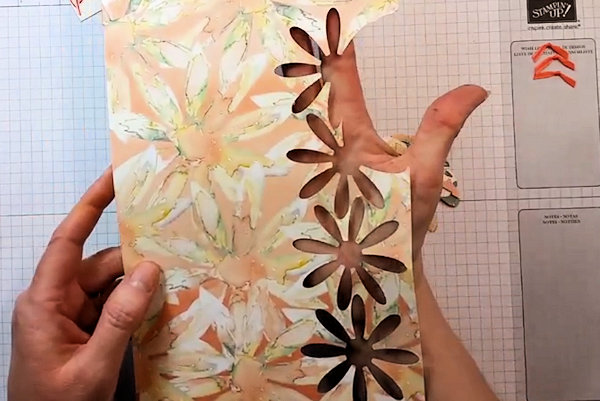
Punch or die cut about 3-4 daisies.
-
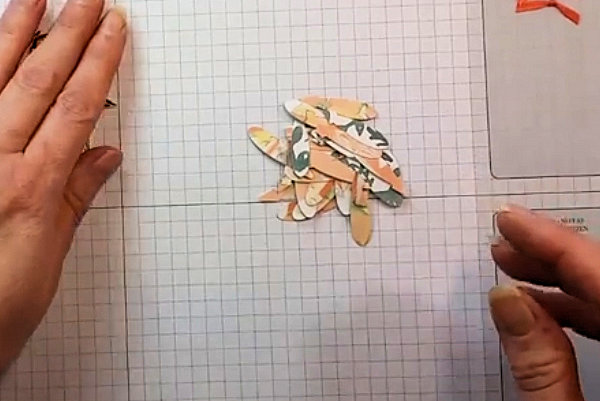
Cut apart the individual petals.
-
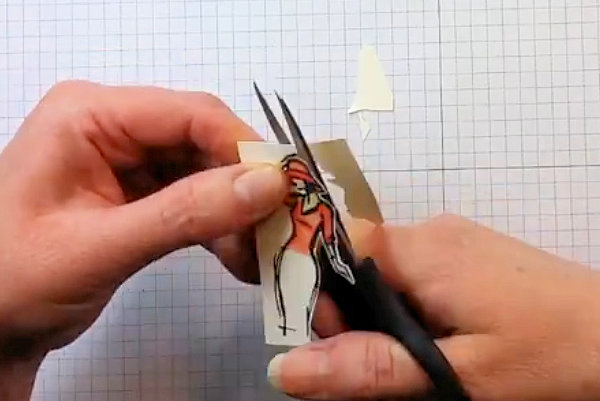
Step 3
Stamp a dress image. Color as needed.
-
Fussy cut the image.
-
Step 4
This gives a base to start attaching the flower petals (video shows the process). Using liquid glue, keep layering the petals from the waist down, tucking them behind previous layers.
-
Step 5
Add Wink of Stella glitter to the dress for a pop of shimmer. Embellish the waist of the dress with a ribbon or pearls. Use a bone folder to lift the petals for more dimension.
-
Step 6
Complete the card.


Video!
Your Turn
You've seen the tutorial, now you try it! We've got a section of the gallery set aside for Daisy Punch Dress Card. Try this technique, then upload your artwork to the gallery. Show us your creations!
***Please note - Internet Explorer/Edge is not a supported browser, and will not allow you to see the videos. Please use Chrome, Firefox or Safari to view our tutorial videos.

Questions and Comments
We'd love to get your feedback or questions. Leave your comment below.
Thank you so much for the tutorial. I don�t have the daisy puch but will definitely be seeing what i do have that will work
Page 1 of 1 pages