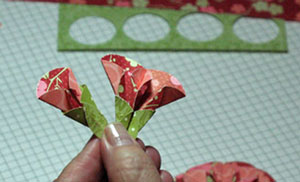
Dahlia Fold

by Donna Moore

Add beautiful paper bouquets to your cards, scrapbooks, and other projects.

Supplies
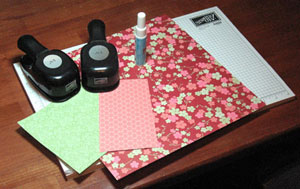
  • Circle punches

  • Double sided patterned paper

  • Cardstock

  • Adhesive


  • Note: To make folding more visible, a larger 3” circle was used for most of this demonstration.

Step-by-Step

  1. Step 1

    Punch one 1 1/4" cardstock circle and fold in fourths. Petals will be mounted on this base.

    For a full dahlia flower, punch eight circles from double-sided patterned paper for petals.
  2. Step 2

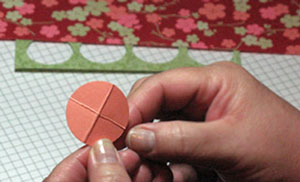
    Fold first patterned paper circle in half, trying to only crease the lower half to prevent folds in the upper part of the finished flower.

    Fold in half again and open.

    Decide which side should be the main background color (here, the red patterns is the main color). Flip over to show back side.
  3. Step 3

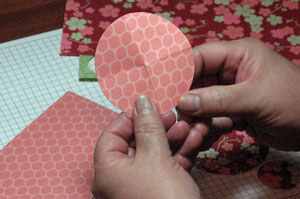
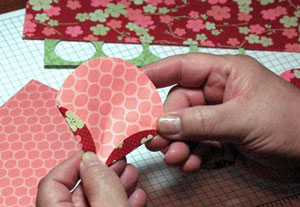
    In the lower two quadrants, fold a small petal shape upward using the fold marks as a guide.

    Turn over to the front side.
  4. Step 4

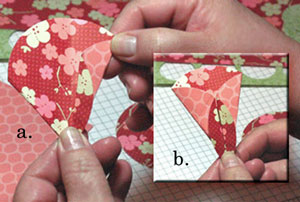
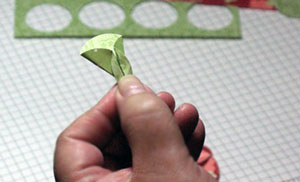
    Fold petal inward to the center like a paper airplane. (Picture A)

    Repeat for the other half. (Picture B)

    Repeat steps one through four to create seven more petals. This will make a full dahlia.
  5. Step 5

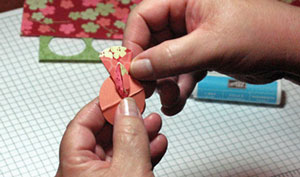
    Using the cardstock base from Step 1 as an evenly spaced mounting guide, adhere the first petal, aligning it at the center and at the fold line.
  6. Step 6

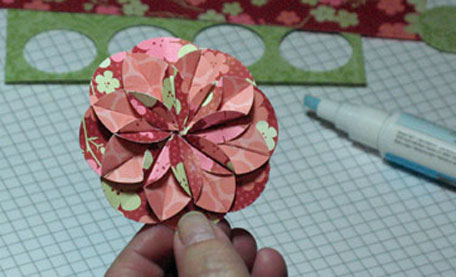
    Repeat process and adhere all 8 sections for a full dahlia.
  7. Step 7

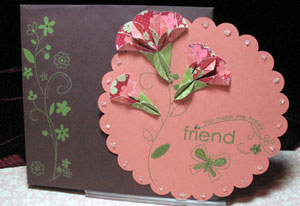
    Finished project.

    Try creating flowers with one to eight petals.
Video!

Variations

  1. To create a flower bud, use slightly smaller single petals made from green paper for a stem base.

    For a frillier flower, use a scallop punch instead of plain circles.
Your Turn

You've seen the tutorial, now you try it! We've got a section of the gallery set aside for Dahlia Fold. Try this technique, then upload your artwork to the gallery. Show us your creations!

***Please note - Internet Explorer/Edge is not a supported browser, and will not allow you to see the videos. Please use Chrome, Firefox or Safari to view our tutorial videos.

Questions and Comments

We'd love to get your feedback or questions. Leave your comment below.

This looks cool. It seems from the examples in the gallery that the pattern paper can make all the difference in the look of the flower. I also like many of the color combinations of the examples in the gallery.

I take it that the ones in the gallery with scalloped edges, are just done with a scallop punch instead of a plain circle punch?

Patti
Patti Ward  |  Wed Mar 19, 2008 at 7:19 AM
Fantastic Tutorial Donna !!! Great pics too...I actually feel like I could do this where before it seemed too daunting !!! Thanks so much !!!
Corinne  |  Wed Mar 19, 2008 at 8:35 AM
Great tutorial!!! I still have not tried one...but now I might just do so!!!

Beautiful card you created - very pretty!!!

~Silke~
Silke Ledlow  |  Wed Mar 19, 2008 at 9:09 AM
This is so beautiful, and I must try it soon! Thanks for the awesome tutorial!!
Rose Ann  |  Wed Mar 19, 2008 at 9:22 AM
o how cute & really nice is that ?!
It seems to be my first "I´m-tryin´-to get-back-my-fingers-action" after this endless year with that d*** cast on my right hand.
Thank you for sharing it with us!

Greetings from over the ocean,
hühnchen
stephanie  |  Wed Mar 19, 2008 at 9:30 AM
Wow! so pretty, I can't wait to try it. Thanks for sharing!
lindsay  |  Wed Mar 19, 2008 at 9:57 AM
Very beautiful!
Thanks so much for the inspiration!
Deborah  |  Wed Mar 19, 2008 at 10:25 AM
That is beautiful can't wait to go home from work and try it Thanks for a great tutorial.
Cheryl  |  Wed Mar 19, 2008 at 10:40 AM
Thanks for the kind comments! To answer your question, Pattie, yes -- the scallop punch can be used as well with this fold.
Donna  |  Wed Mar 19, 2008 at 10:57 AM
Absoultely Beautiful. This card can be used for Spring, Summer, Get Well cards and many other cards. I am going to attempt to make this card ASAP. It's a very detailed tutorial. Thanks!
Barbara  |  Wed Mar 19, 2008 at 11:13 AM
Your card is beautiful. I really like folding.
Thanks for the great tutorial. Now I must
give it a try.
Pat  |  Wed Mar 19, 2008 at 11:17 AM
A beautiful card and tutorial. Thank you for sharing.
linda a pierce  |  Wed Mar 19, 2008 at 11:30 AM
I am so excited to see this.. I have been sitting on my hand for oh so long waiting for it come. Thank you
Penni Howard  |  Wed Mar 19, 2008 at 1:02 PM
Wow Donna! What can I say? You are one talented lady!! Beautiful tutorial. Even I can do this. Stampin' Up! ought to hire you to be one of their artists. Can't wait to try your Dahlia fold!
Lou  |  Wed Mar 19, 2008 at 1:21 PM
This tutorial is as good as it gets! There's no way even I cant do it! Thanks so much for sharing your skills.
Anne Ryan  |  Wed Mar 19, 2008 at 2:41 PM
WOW!!!!!!!!!!!!!!!!!!!!!!!!!!!
kahoogstad  |  Wed Mar 19, 2008 at 3:28 PM
Your tutorial is definitely complete. Thanks so much. Will have to add this to my list.
Barb  |  Wed Mar 19, 2008 at 4:28 PM
I have found the first folds near the edge of the circle to be the hardest, especially if I'm folding a small circle, but here's a trick. Put the circle on top of a large stamp, rubber side down, and line up the two endpoints of your guide folds right at the sharp edge of the stamp. Push your paper down over the edge and you'll get the fold started in a nice straight line that you can then finish with a bone folder. Of course, you can use any block of wood or table with a nice sharp edge, but my stamps are usually handy!
Kathryn  |  Wed Mar 19, 2008 at 4:40 PM
I love it...I love playing with paper and I'm making a copy to send to a friend who is not on the internet, but loves paper playing.
Penny  |  Wed Mar 19, 2008 at 5:10 PM
That's a great tip about using a block for the little folds, Kathryn. Thanks. The smaller the circle (the smallest I've done is 3/4") the trickier it is to get the folds right. But the little ones are so cute!
Donna (Shadow Mill)  |  Wed Mar 19, 2008 at 5:17 PM

Page 1 of 5 pages  1 2 3 >  Last »

You need to be logged in to comment

GET OUR NEWSLETTER


Splitcoaststampers's privacy policy