Cutting with Detailed Dies
by Lori Craig
Learn tips for getting the best cuts using intricate dies.
Supplies
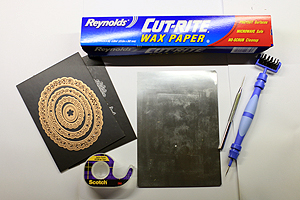
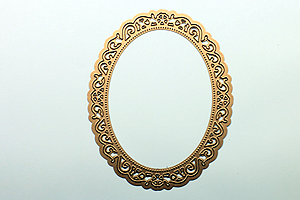
- Detailed dies (Spellbinders™ Floral Ovals used here)
- Die cutting machine with cutting plates
- Wax paper
- Metal Shim
- Piercing tool
- Nylon brush (Spellbinders™ Tool 'n One used here)
- Tape (optional)
Step-by-Step
-
Step 1
Start with a clean die. Make sure any remnants of paper from previous cutting have been removed.
-
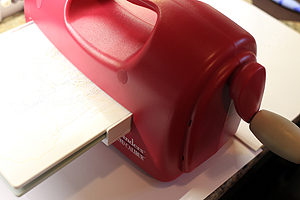
Step 2
Use the recommended plates for your die cut machine, and layer metal shim, die with cutting edge up, wax paper and cardstock between cutting plates.
TIP:
Tape wax paper and cardstock to the die template to prevent shifting in Step 3. Be careful that you are not wrapping tape around to an edge that will be cut and potentially show on your finished project.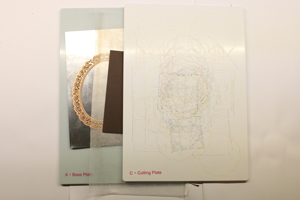
-
With small intricate dies, several layers of wax paper against the cutting edge will help loosen both the cut embellishment and the cut chads from the die template. I tested up to 4 layers of wax paper.
-
Step 3
Roll appropriate stack through preferred die cut machine according to manufacturer directions.
-
Step 4
After one pass through the die cut machine, the scrap pieces of cardstock may turn loose from your die cut shape, but a second pass will help ensure the little bits are cut as well. Turn your metal shim (if plate size allows), die template, wax paper and cardstock stack 90 degrees on the cutting plate.
TIP:
Try shifting the die and cardstock stack to a different edge of the plate before running it through your machine a second time.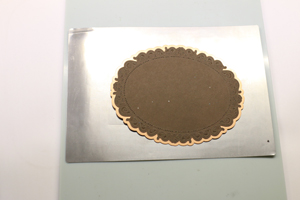
-
Altering the stack position will allow for machine pressure to emphasize different areas of the die. Run the entire stack through your die cut machine a second time.
-
Step 5
The wax paper helps the cut cardstock fall from the die when removed from the cutting plate stack.
-
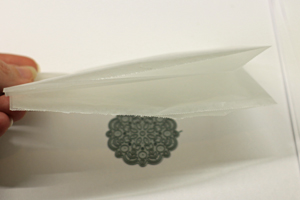
Step 6
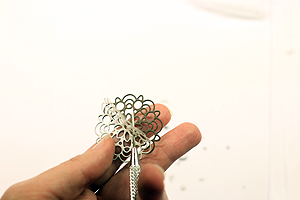
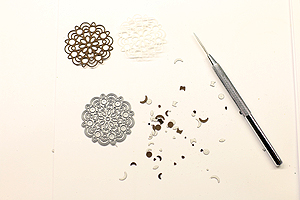
Separate wax paper from paper die shape. Punch any hanging chads with a paper piercer (or nylon bristle brush) if necessary.
-
Smaller, more intricate dies may need to be worked with a piercing tool to separate the wax paper from the die cut cardstock.
-
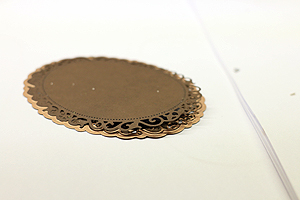
Step 7
Use a combination of nylon bristle brush and paper piercer to release small chads of cardstock from the back of the die template to your trash can or work surface so that it is ready for the next use.
TIP:
Hold the die in one hand while brushing or tapping so that the chads have room to move when poked by bristles or tapped with the piercing tool.
-
Step 8
The wax paper layer does help to loosen the cut pieces of cardstock, both the intended shape and the chads, from the die template. Tap and gently brush over the back.
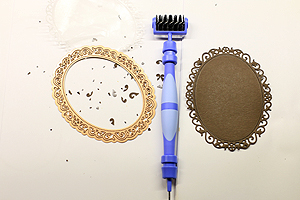
A piercing tool will be especially helpful on smaller die cut shapes to remove any pesky pieces of cardstock that remain after brushing.
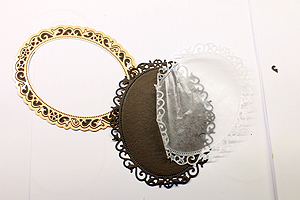
Step 9
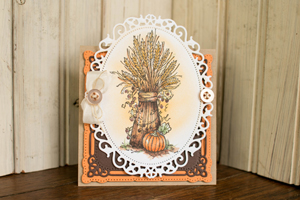
Use cut pieces to complete a card or other project.
Video!
Your Turn
You've seen the tutorial, now you try it! We've got a section of the gallery set aside for Cutting with Detailed Dies. Try this technique, then upload your artwork to the gallery. Show us your creations!
***Please note - Internet Explorer/Edge is not a supported browser, and will not allow you to see the videos. Please use Chrome, Firefox or Safari to view our tutorial videos.
The Author

Products used here
Find out more about a product used in this tutorial.
* *
*
Remove those pesky little negative die cutouts that want to stay stuck in your die templates and create decorative pierced paper designs with the Tool 'n One.
Visit our platinum partners:
© 2013-2024 MH Sub I, LLC dba Internet Brands.
Manage Preferences
Your Privacy Choices ![]()
Questions and Comments
We'd love to get your feedback or questions. Leave your comment below.
Thank you,
Anne
Susie ~
Helpful tip for cleaning your work table of the chads. Use a lint roller to pick up all those small paper pieces.
Who makes the small, round die cut that you used?
I have used both paper and cardstock shims in varying sheet quantity. I can't confirm why it works better, but it certainly does for me. There is no guess work, and I feel like the results are much more consistent. My guess is that the stiffness of the metal shim equalizes the pressure across the entire surface of the die.
Page 1 of 2 pages 1 2 >