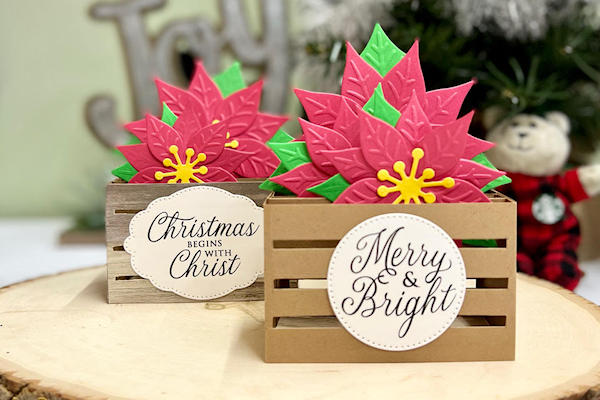
Crate Card
by Helen Gullett
Make a pop-up card that looks like a classic wood crate.
Supplies
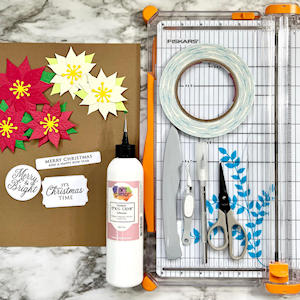
- Kraft cardstock (patterned paper, optional)
- Paper flowers (premade or diecuts, Darice Poinsettia set used here)
- Sentiments (optional, Paper Poinsettias Mega digital stamp set from Graciellie Designs used here)
- Paper trimmer
- Kraft knife
- Scissors
- Bone folder
- Double sided tape
- Permanent adhesive glue
- Other supplies as needed to complete the project (used here: Dare 2B Artzy Double Dots Circle Die Set and Oval Scalloped Framelit Dies)
Step-by-Step
-
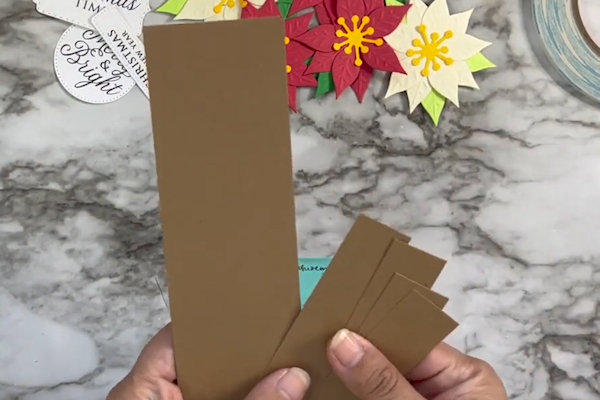
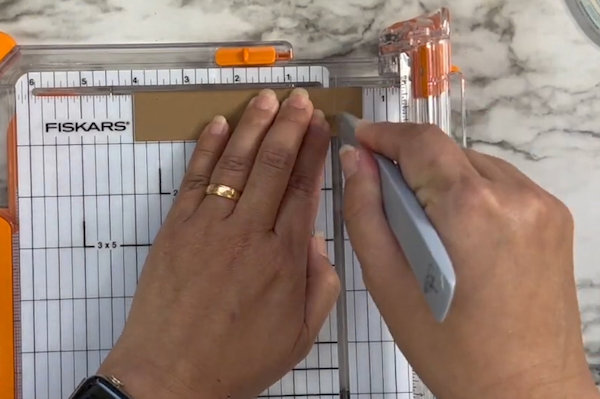
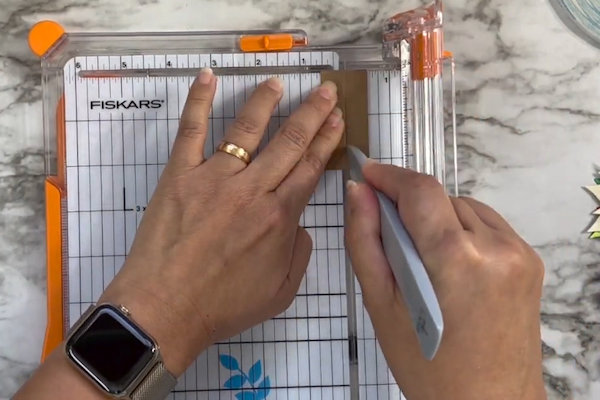
Step 1
Prepare kraft cardstock base by cutting strips:
2 1/4” x 11”
1” x 4 1/2" (cut three)
1” x 2 1/4" -
Prepare die cut flowers, sentiments, or other ‘fillers’ for your crate.
-
Step 2
Score the large strip at 2”, 5 1/2", and 7 1/2".
-
Step 3
Score the three 4 1/2" strips 1/2" from each end.
-
Score the smallest strip down the center from a short side.
-
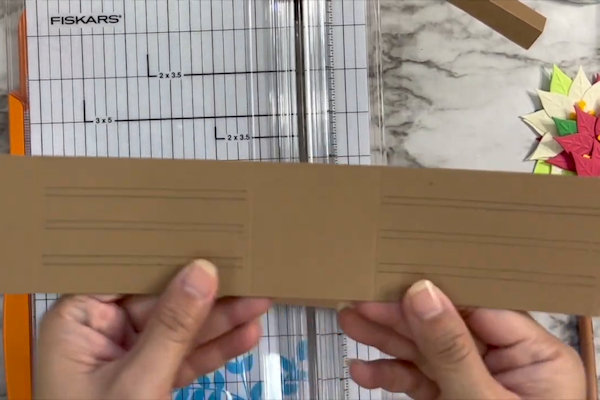
Step 4
You can leave the box as is without the crate look, or you can cut slats. Measure and mark at the end of each long side at 1/2” and 5/8” from the top and bottom, and 1 1/16” and 1 3/16” (center).
-
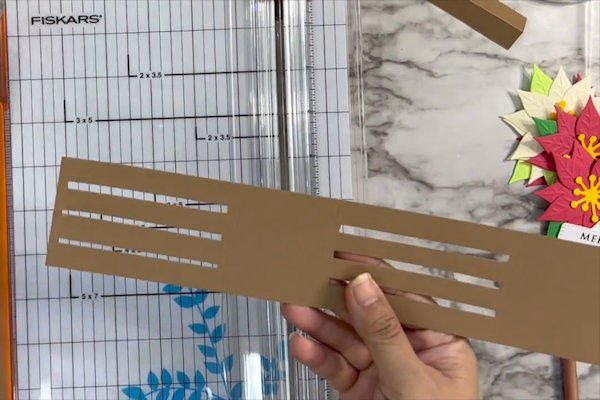
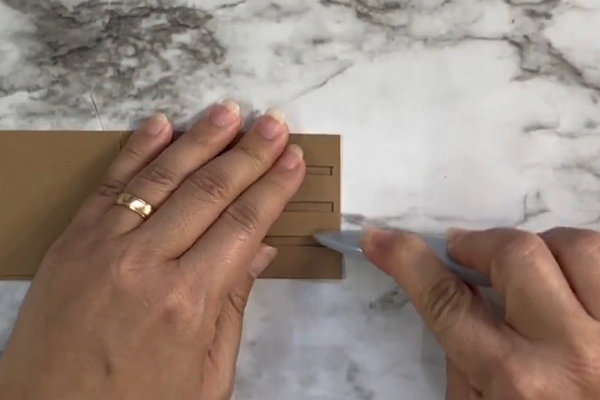
Step 5
Trace between the marks 1/8” from the score lines.
-
Cut away the strips to create the slatted look.
-
Step 6
Fold and burnish all score lines.
-
Fold the three 4 1/2" strips in a Z. Fold the small piece in half.
-
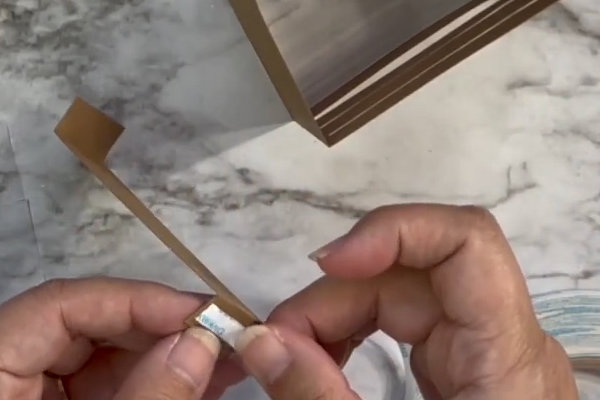
Step 7
The small piece will act as a hinge to glue the box together. Trim one side if needed so it doesn’t show through the slats. Use glue or double sided tape to create the box corner.
-
Step 8
Add double sided tap to the tabs on the inner strips.
-
Adhere the tabs to the short sides of the inside of the box, lining the up the strips with the top of the box, and making sure the strips go straight across. Repeat with the remaining strips, spacing them evenly across. The box should fold flat.
-
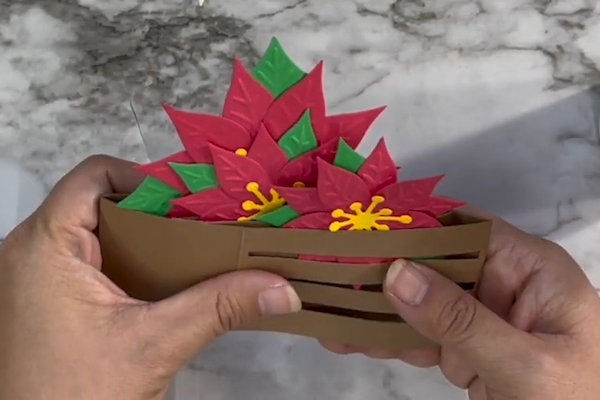
Step 9
Adhere the flowers or other die cuts onto the inner strips to fill the box. Take care in positioning so the card can still fold flat.
-
Step 10
Embellish the front of the card if desired to complete the project.


Video!
Your Turn
You've seen the tutorial, now you try it! We've got a section of the gallery set aside for Crate Card. Try this technique, then upload your artwork to the gallery. Show us your creations!
***Please note - Internet Explorer/Edge is not a supported browser, and will not allow you to see the videos. Please use Chrome, Firefox or Safari to view our tutorial videos.

Questions and Comments
We'd love to get your feedback or questions. Leave your comment below.
Christmas blessings to you and yours,
C
Page 1 of 1 pages