Corner Tuck Card
by Dee Slater
Use a corner element to hold this fun-fold card closed.

Supplies
- Cardstock (Stampin' Up!® Dandy Designs Designer Series Paper, Balmy Blue, Basic White, and Real Red Cardstock used here)
- Paper trimmer
- Scoring tool and bone folder
- Adhesive (Tombow Multipurpose Liquid Glue used here)
- Other supplies as needed to complete the project (SU supplies used here: Friendly Gnomes Photopolymer Stamp Set, Tuxedo Black Memento Ink, Stampin' Blends, Balmy Blue Classic Stampin' Pad, Stampin' Dimensionals, Heart Punch Pack, Baker's Twine, Heart Pearls, Clear Wink Of Stella Glitter Brush, Gnomes Dies
Step-by-Step
-
Step 1
For the card base, cut two pieces of cardstock:
8” x 4 1/4", scored on the long side at 2 1/2", and 4 1/4" x 3”. Set the 3” piece aside. -
Fold and burnish on the score line.
-
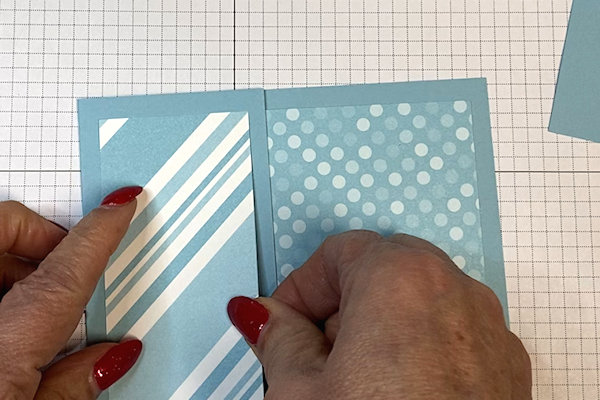
Step 2
Add layering pieces to the front and inside of the card base. These are cut to 3 3/4” x 2” and 3 3/4" x 5”.
-
Step 3
Cut a 2” square in half diagonally for the corner element.
-
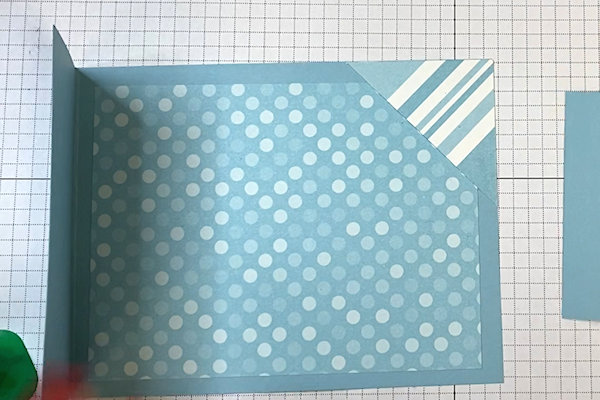
Step 4
Add glue or double sided tape only on the top and side (not the diagonal) of the triangle to form the tuck pocket. Use thin bead of glue.
-
Add the piece to the upper corner of the inside of the card base.
-
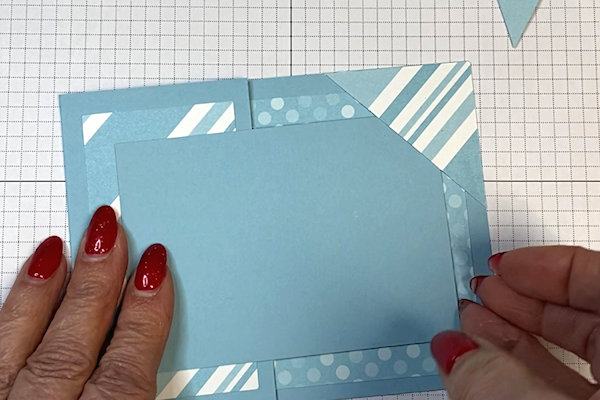
Step 5
Adhere the 4-1/4” x 3” cardstock to the card base making sure to only use adhesive on the back left side.
-
TIP:
To help with placement, check the position of the cardstock with the corner element first. -
Step 6
Embellish the front and inside of the card as desired. Here, the cardstock panels used are 2 3/4" x 4”.
-
Step 7
Complete the project.


Video!
Variations
-
The sizes of the corner element and tucking panel can be adjusted to accommodate different designs – be creative!

Your Turn
You've seen the tutorial, now you try it! We've got a section of the gallery set aside for Corner Tuck Card. Try this technique, then upload your artwork to the gallery. Show us your creations!
***Please note - Internet Explorer/Edge is not a supported browser, and will not allow you to see the videos. Please use Chrome, Firefox or Safari to view our tutorial videos.

Questions and Comments
We'd love to get your feedback or questions. Leave your comment below.
Page 1 of 1 pages