Coloring with Distress Inks

by Yvonne Hagane

Learn how to watercolor with distress inks.

Supplies
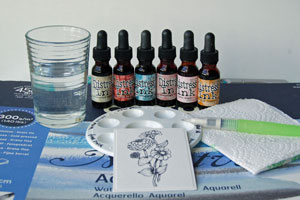
  • Water brush, without water
  • Watercolor paper
  • Distress reinker
  • Water
  • Waterproof ink (Jet Black Archival ink used here)
  • Stamps (Flourishes Zinnias used here)

Step-by-Step

  1. Step 1

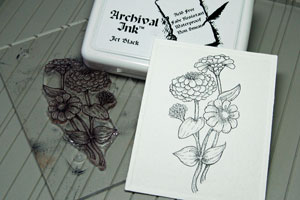
    Stamp your image on a piece of watercolor paper with waterproof ink.
  2. Step 2

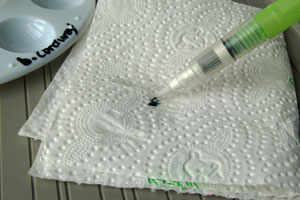
    Add ink to the moistened waterbrush and wipe off excess ink on a paper towel before you start.
  3. Step 3

    Color the background of your image. Weathered Wood reinker was used here.
  4. Step 4

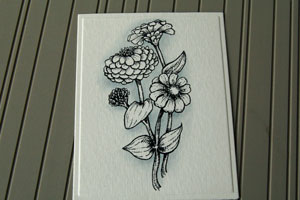
    Color the leaves with a light green reinker. Bundled Sage was used here.
  5. Step 5

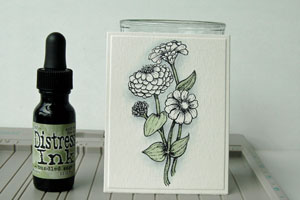
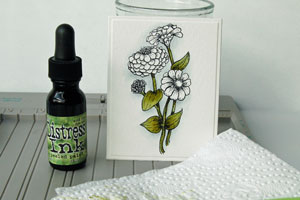
    Use a darker color reinker to the areas you want to shade. Peeled Paint reinker was used here. Use a clean, moistened brush to blend the colors together.

    Wipe off excess color from the brush with the tissue.
  6. Step 6

    Color the flowers with a light color. Spun Sugar was used here.
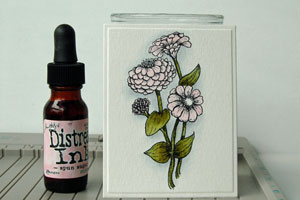
  7. Step 7

    Add a darker color to the parts of the flower that you want to shade. Victorian Velvet was used here.
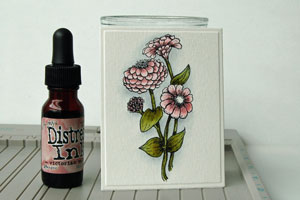
  8. Step 8

    To add even more debth, add an even darker color to the shaded areas of the flowers. Aged Mahogany was used here.
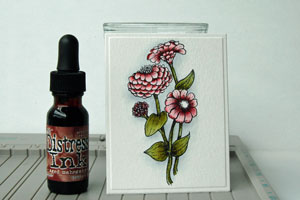
  9. Step 9

    Add the color to the center of the flowers. Wild Honey was used here.
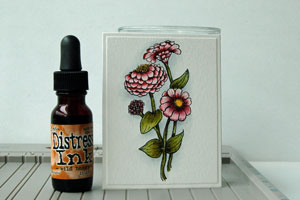
  10. Step 10 (Optional)

    For a soft look, sponge a light color around the edges. Antique Linen Distress ink was used here.
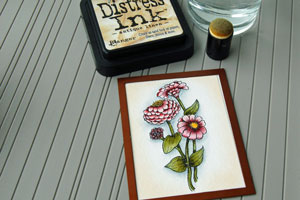
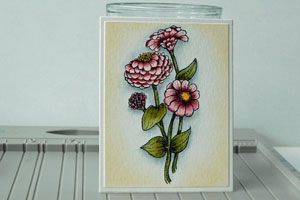
  11. Your colored image is finished.

  12. Step 11 (Optional)

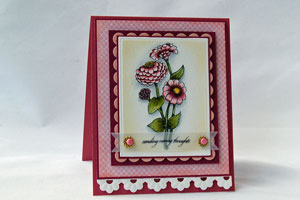
    Finish your card.

Video!

Your Turn

You've seen the tutorial, now you try it! We've got a section of the gallery set aside for Coloring with Distress Inks. Try this technique, then upload your artwork to the gallery. Show us your creations!

***Please note - Internet Explorer/Edge is not a supported browser, and will not allow you to see the videos. Please use Chrome, Firefox or Safari to view our tutorial videos.

Questions and Comments

We'd love to get your feedback or questions. Leave your comment below.

Thank you for this tutorial. I have just bought some Distress Inkpads and was looking for some ways to use them.
Aileen  |  Mon Aug 15, 2011 at 6:45 AM
thanks for a great tutorial and your coloring skills as well as your finished project are both excellent
mary marsh  |  Wed Aug 31, 2011 at 6:17 AM
Thanks, Beate! I've used Copics a lot but recently got more Distress Inks. Love how you colored this Flourishes image. This is a beautiful card! Thanks to you and Yvonne for this wonderful instruction and inspiration!
CherylQuilts  |  Wed Aug 31, 2011 at 6:33 AM
You never cease to amaze me with your talents! Thank you for your time and energy with the tutorials and pictures. I learn soooo much as we go along here!
"Di."  |  Wed Aug 31, 2011 at 6:36 AM
Great tutorial, this is an awesome way to use my distress inks. Thanks so much Yvonne for taking the time to write this tutorial.
Kris  |  Wed Aug 31, 2011 at 6:49 AM
What a GORGEOUS work of ART!!! I LOVE it!!
Karen Barber  |  Wed Aug 31, 2011 at 6:55 AM
Thanks for another great tutorial. I always learn so much from them. This is a practical way to get more use out of products I have. Your project turn out beautiful! Thanks for sharing.
Anita  |  Wed Aug 31, 2011 at 7:31 AM
You've made a beautiful card and I thank you for the tutorial. I will now go out and purchase some of these inks. Thank you. I look forward to the emails from you.
Debbie  |  Wed Aug 31, 2011 at 7:37 AM
I really enjoyed watching this video. It was so relaxing to watch you paint, and you gave some very useful tips. Thanks for sharing your techniques and ideas, Beate.
Scrapjanny  |  Wed Aug 31, 2011 at 7:40 AM
What is "watercolor paper"?
Yvonne  |  Wed Aug 31, 2011 at 7:57 AM
Beautiful! Thanks for the tutorial and another use for reinkers.
Deb  |  Wed Aug 31, 2011 at 7:58 AM
Can I use a Distress pad the same way you used the liquid reinker?
Roberta Mitchell  |  Wed Aug 31, 2011 at 8:07 AM
I would also like to know couldn't you use the pad and wet your brush.
linda  |  Wed Aug 31, 2011 at 8:13 AM
Roberta and Linda,
Yes you can also use the pad as shown in the video. Just press the inky side of the pad to a non porous surface like your craft mat or a piece of plastic. Then pick the ink up from there.
beate  |  Wed Aug 31, 2011 at 8:17 AM
Yvonne,
Watercolor paper is special paper for watercoloring. It is a very loosely woven, thick paper that absorbs a lot of ink.
beate  |  Wed Aug 31, 2011 at 8:18 AM
Beate, your video looks amazing!! Love your card and the image is so beautifully colored. you ROCK! Thanks so much.
Yvonne Hagane  |  Wed Aug 31, 2011 at 8:31 AM
Fantastic! Very good - I've never used them but will now!
Susan Hatfield  |  Wed Aug 31, 2011 at 8:49 AM
Love you tutorial and card. Would you mind telling me what border you used for the white trim at the bottom of your card?
Nancy Huntley  |  Wed Aug 31, 2011 at 9:00 AM
Nancy,
I can answer that for Yvonne. I have that die pack and love it. It's called Floral Doily Accents from Spellbinders.
beate  |  Wed Aug 31, 2011 at 9:02 AM
As usual, Beate, your tutorials are wonderful! Was thinking I wouldn't be able to do this, as I don't have the re-inkers. Then you told us how to do it using the pads. GREAT!
Renee Drew  |  Wed Aug 31, 2011 at 9:29 AM

Page 1 of 3 pages  1 2 3 >

You need to be logged in to comment

GET OUR NEWSLETTER


Splitcoaststampers's privacy policy