Coffee Filter Prints
by Dina Kowal
Use coffee filters to transfer watercolor powders to photo paper.

Supplies
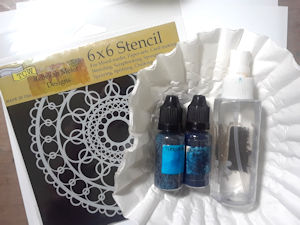
- Craft sheet
- Coffee filters
- Watercolor powders (Brusho and Color Burst used here)
- Water mister
- Glossy photo paper (HP glossy inkjet paper used here)
- Stencil (The Crafter's Workshop® Ring Doily Stencil Template used here)
- Roll of paper towels
- Other supplies as needed to complete the project (used here: Impression Obsession stamps CL577 Maya, E13710 Curtsy Silhouette, C13499 Happy Everything, C13433 Never Give Up, Hero Arts May 2018 My Monthly Hero kit, Spellbinders August 2018 Small Die of the Month kit, Little Boys at Play die, Darice® 4.25 x 5.75 Embossing Folder: Wire Fence)
Step-by-Step
-
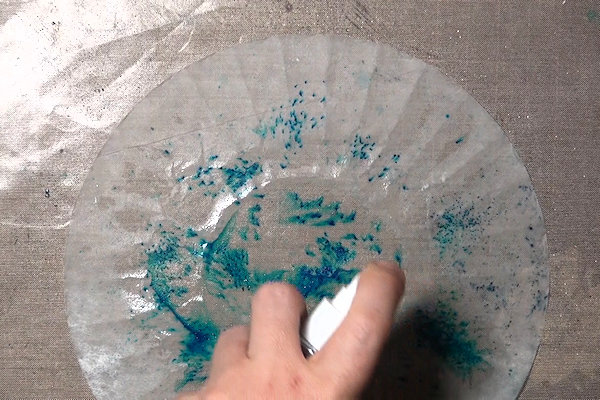
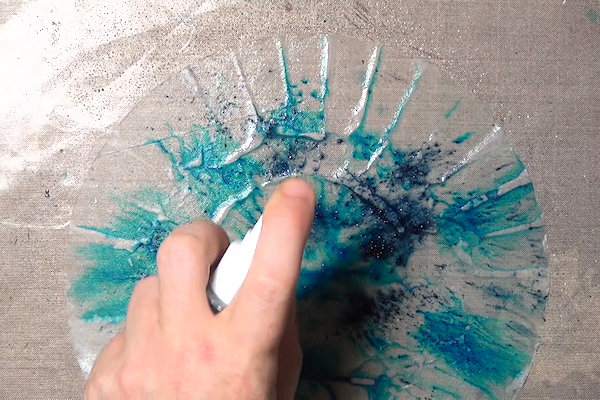
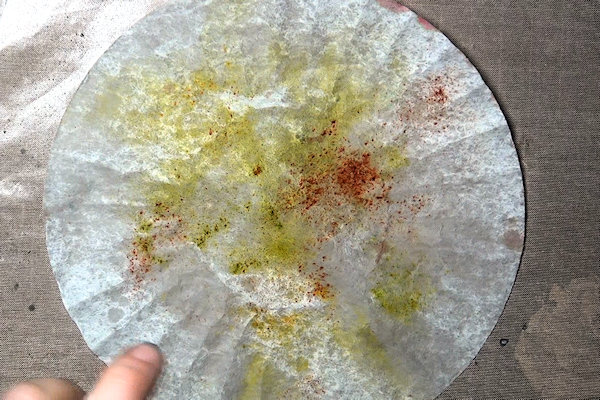
Step 1
Working on a craft sheet, sprinkle watercolor powders onto a flattened coffee filter.
-
Step 2
Mist the coffee filter with water, allowing the powders to activate and begin to bleed and blend.
-
Add more powders as desired, and mist until the color has spread to your liking.
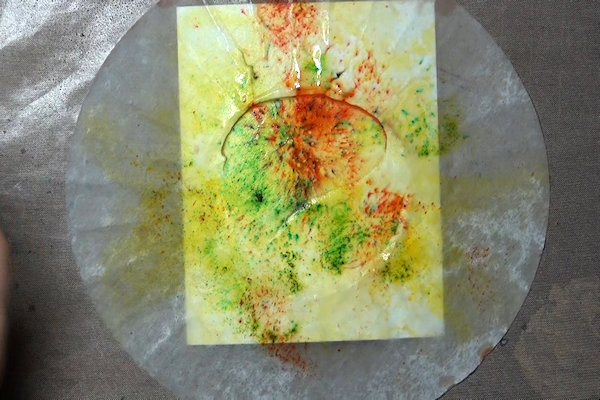
-
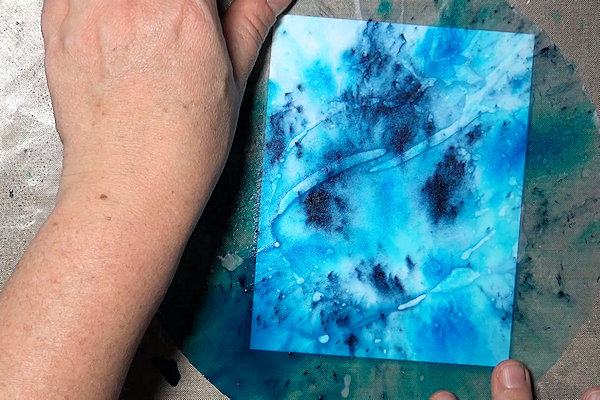
Step 3
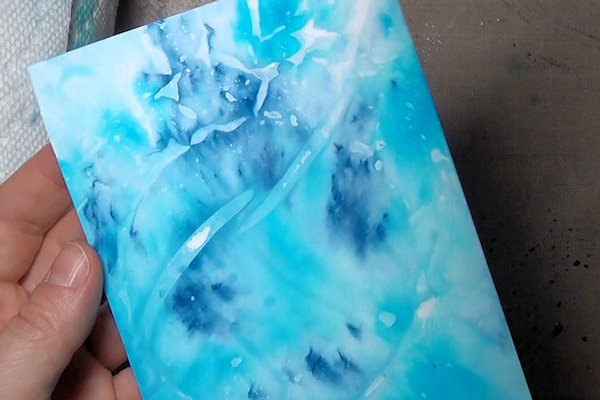
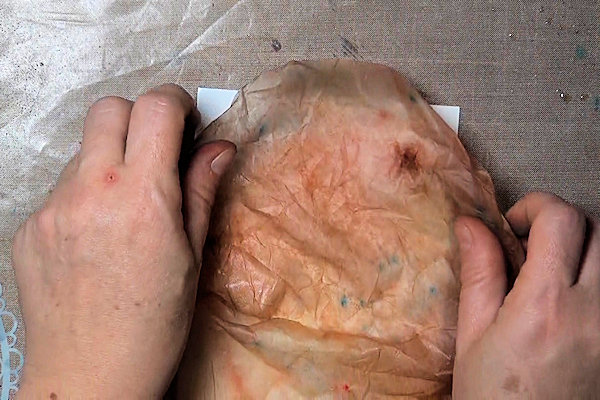
Carefully lift the coffee filter and lay it over a piece of glossy photo paper.
NOTE:
Glossy photo paper does not have the same properties as glossy cardstock. Results on glossy cardstock will not be the same. -
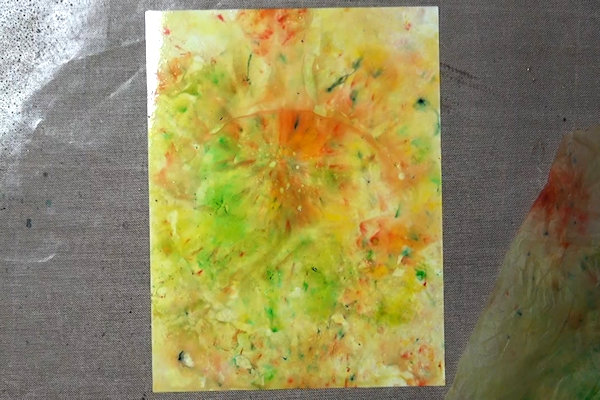
Step 4
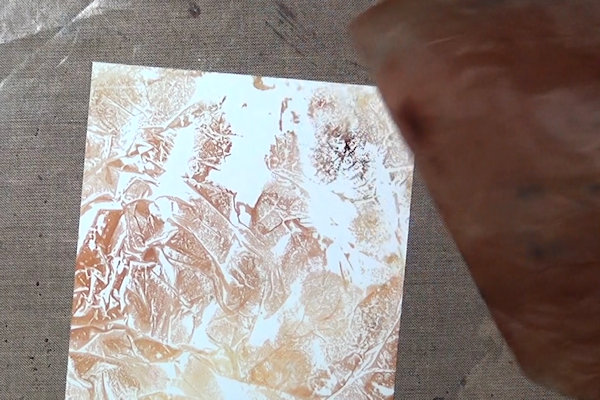
Roll a paper towel roll over the panel to blot the excess water. The photo paper will have taken an instant "print" of the coffee filter, which will not fade when dried.
NOTE:
Rolling the full roll of paper towels allows for a quick and frictionless blotting of the moisture on the full panel. It's a great method, and the paper towels can be used on projects too! -
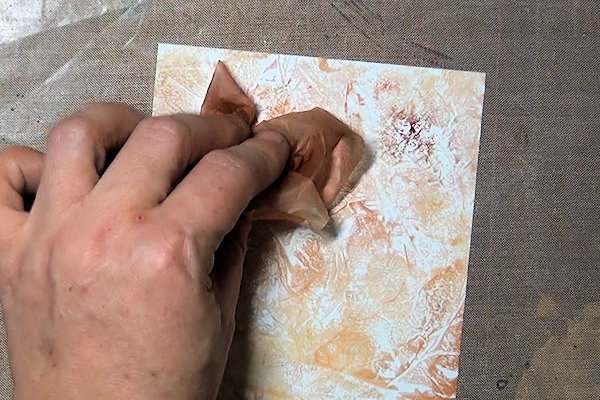
Step 5
Repeat the previous steps to add more layers to the background, or leave the print as is.
-
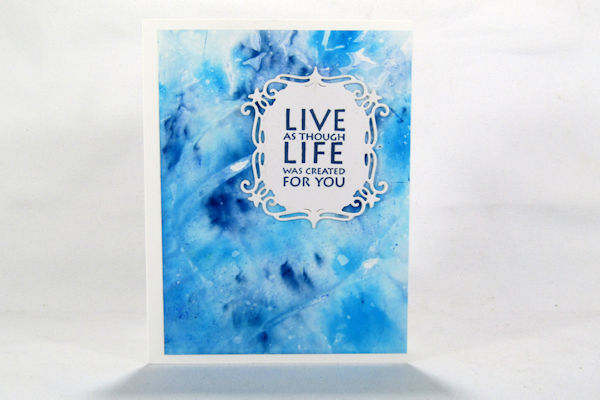
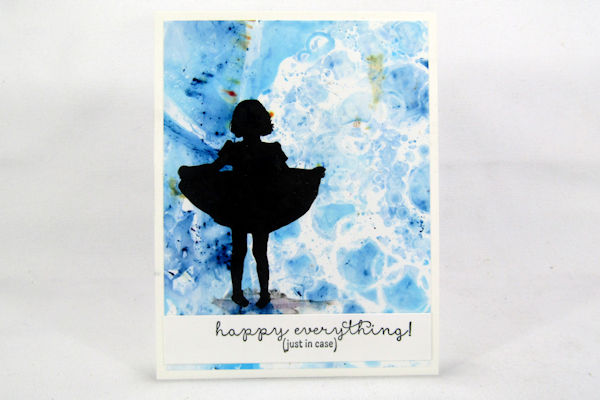
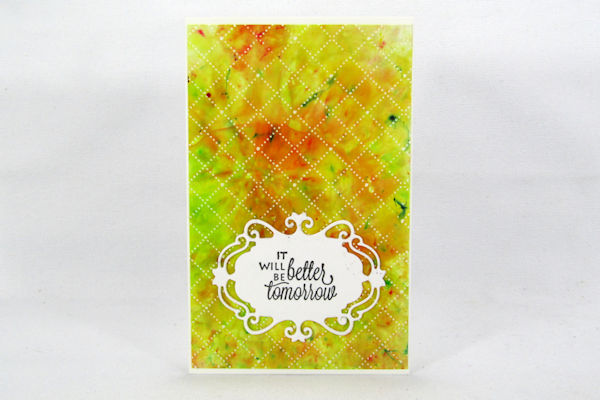
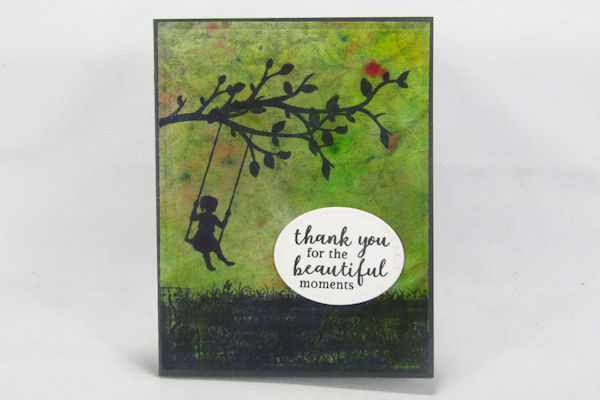
Use the panel to complete a card or other project.
-
Step 6
Multiple prints or layered prints can be made from a single coffee filter. Additional powder and water can be applied if needed.
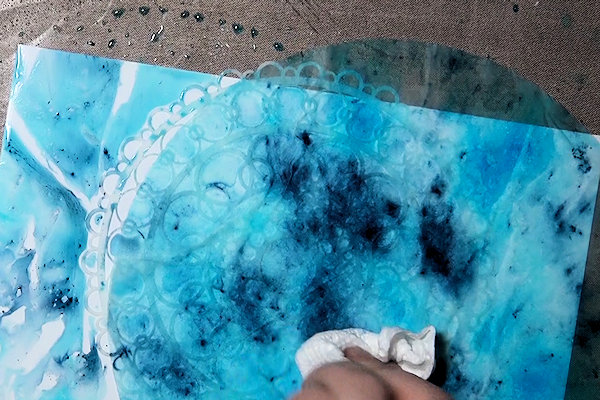
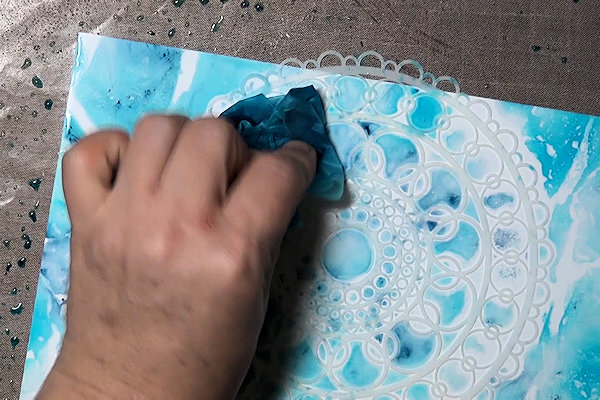
For this sample, a stencil was used to add a negative image to the print. -
To get into the smaller areas, crumple the filter and dab it through the stencil.
-
Step 7
Remove excess water with paper towels as above.
-
Use the panel to complete a card or other project.
-
Step 8
Alternate method:
Working on a craft sheet, sprinkle watercolor powders onto a flattened coffee filter. Mist the coffee filter with water lightly, allowing the powders to activate. -
Lay the filter over the photo paper and mist again until the powders begin to bleed and blend.
-
Step 9
Continue moving the filter around the panel, filling the background.
-
Remove excess water with paper towels as above.
-
Step 10
Use the panel to complete a card or other project.
-
Step 11
Flatten out an inked, crumpled and damp coffee filter.
-
Lay it over a piece of photo paper for a unique print.
-
Step 12
Crumple the filter again and dab it over the panel to fill in white spaces, or use several colored filters to make a design.
-
Use the panel to complete a card or other project.
-
Step 13
Don’t throw those pretty coffee filters away! They can be used for background panels after they dry. Click over to the Tie Dye Background tutorial and follow steps 8-9 to mount them onto cardstock panels.
-
Use the panel to complete a card or other project.


.jpg)
Video!
Your Turn
You've seen the tutorial, now you try it! We've got a section of the gallery set aside for Coffee Filter Prints. Try this technique, then upload your artwork to the gallery. Show us your creations!
***Please note - Internet Explorer/Edge is not a supported browser, and will not allow you to see the videos. Please use Chrome, Firefox or Safari to view our tutorial videos.

Questions and Comments
We'd love to get your feedback or questions. Leave your comment below.
Where did you get the stamp �live as though life was created for you�; it�s a wonderful Maya Angelou quote and I would love to use it on some encouragement cards.
Shirl
Thanks
Shirl
Page 1 of 2 pages 1 2 >