Cloudy Backgrounds
by Dina Kowal
Learn two ways to fill in a cloudy sky - sponging and watercolor.
Supplies
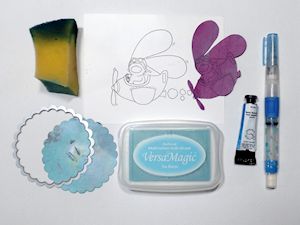
- Mixed media or watercolor paper (Fabriano 90# Hot Press Studio Watercolor paper used here)
- Stamped image that makes sense outdoors (The Cat’s Pajamas Kick Some Grass and Take Off stamp sets used here)
- Light blue inkpad (Versamagic Sea Breeze used here)
- Watercolor medium (QoR Watercolor tube paints used here)
- Scalloped circle punch or die
- Waterbrush, or paint brushes and water
- Post-It Note for masking
- Sponge
- Other supplies as needed to complete the project (used here: shipping tag, sentiment stamps, decorative paper, Scor-Pal, trimmer)
Step-by-Step
-
Step 1
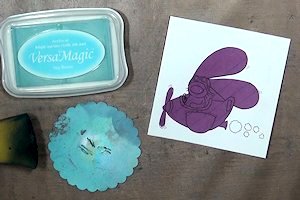
Stamp an outdoor image, or one that makes sense with a cloudy background. Create a mask and cover the image for the next step.
-
Step 2
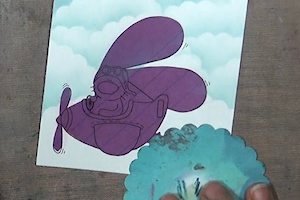
For sponged clouds, punch or die cut a scalloped circle out of heavy cardstock.
The punch used for the sample is about 3 inches wide, and there are about 3 scallops to the inch on the edge.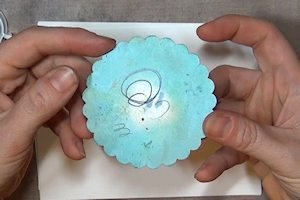
-
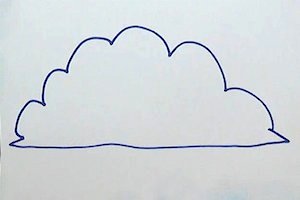
Keep a typical cumulus cloud shape in mind, with fluffy, rounded bumps across the top and a basically flat bottom.
-
Step 3
Beginning at the top of the card and working across, sponge upward off the edge of the cloud template with a light blue ink, covering about an inch of the edge.
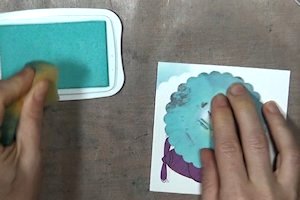
-
Lift the template and rotate it upward slightly. Lay the template at the end of the first sponged area lining up the scallops, and sponge again, covering about an inch or less. One side of the first cloud-top bump is created.
-
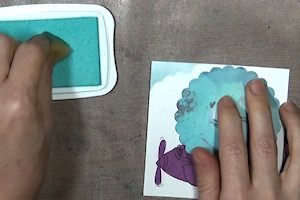
Step 4
Rotate the template downward, and replace it at the end of the sponged line, lining up the scallops. Sponge again, completing the other side of the bump.
-
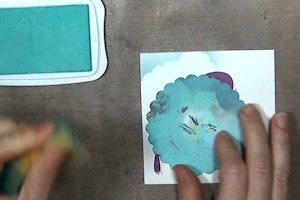
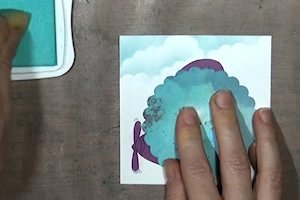
Step 5
Continue in this way across the panel until one row of cloud tops is complete. Each sponged section should be about an inch long.

-
Step 6
Move down the panel slightly and begin another row. Be sure to vary the pattern from one row to the next.
-
Keep adding rows of clouds until you’ve achieved the look you want.
-
Step 7
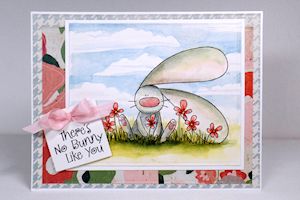
Use the panel to complete a card or other project.

-
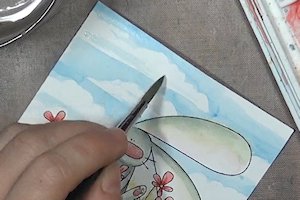
Step 8
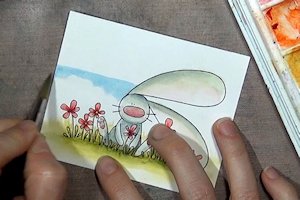
To create watercolored clouds, you will be painting the sky between the clouds. Pick up light blue watercolor paint or another water soluble medium with a damp brush. Beginning at the edge of the stamped image, pull color to the side, creating a wedge shaped area of blue.
TIP:
If you have trouble envisioning the cloud shapes without an outline to guide you, lightly sketch in some clouds with a pencil before painting.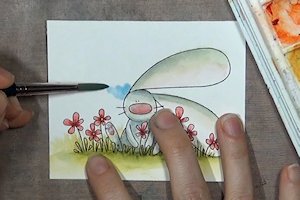
-
Step 9
Pull the color in a scalloped line from the bottom of the wedge, creating the top of the cloud below.
-
Pull the color in a straight line from the top of the wedge to create the bottom of the cloud above.
-
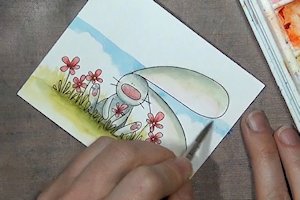
Step 10
The cloud top (bottom of your painted area) should rise and then fall. Keep the edge of your painted area moving and wet to avoid hard edges in your watercoloring.
-
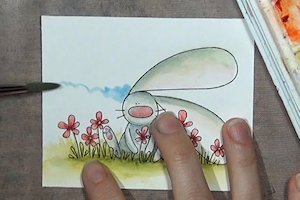
Step 11
Repeat on the other side of the image, keeping the clouds at about the same level for continuity.
-
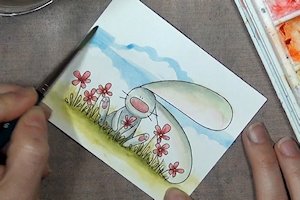
Step 12
Extend the straight line to the side, and then work up the other way, creating the top of the cloud with a scalloped line.
-
Work the painted area up and into a straight line above the cloud.
-
Step 13
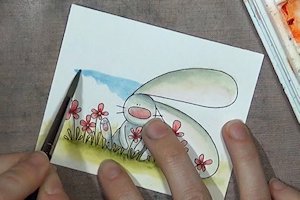
Continue moving around the sky area in this way, until you have the cloud coverage you want.

-
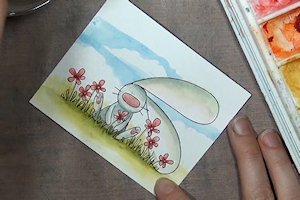
Step 14
To add more depth to the sky, pull some light horizontal lines of blue across the sky, especially toward the bottom of the clouds.
-
Step 15
Use the panel to complete a card or other project.
Video!
Your Turn
You've seen the tutorial, now you try it! We've got a section of the gallery set aside for Cloudy Backgrounds. Try this technique, then upload your artwork to the gallery. Show us your creations!
***Please note - Internet Explorer/Edge is not a supported browser, and will not allow you to see the videos. Please use Chrome, Firefox or Safari to view our tutorial videos.

Questions and Comments
We'd love to get your feedback or questions. Leave your comment below.
Linda
Those inexpensive clear Mylar dividers from the dollar store are good for making permanent templates, stencils & masks as they cut easily with scissors.
Having several different shapes can make the clouds very realistic, especially when you use them at different angles.
Linda D.
Page 1 of 1 pages