Chipboard Pumpkin
by Dina Kowal
Use oval dies to create a fun pumpkin embellishment.
Supplies
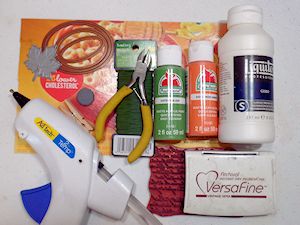
- Chipboard (cereal boxes used here)
- Oval dies in various sizes (Spellbinders dies used here)
- Gesso (white)
- Acrylic paint (orange, green)
- Craft or permanent ink that can be stamped over acrylic paint (Memento Luxe, Versafine, Versamagic, Colorbox craft inks will work - Versafine Vintage Sepia used here)
- Stamps to embellish the project – script, small texture, etc.
- Leaf die
- Die cutting machine
- Florist wire
- Magnet or small clothespin
- Hot glue gun
Step-by-Step
-
Step 1
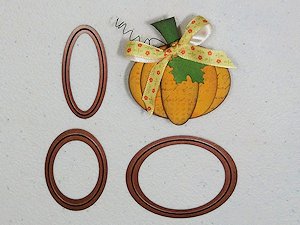
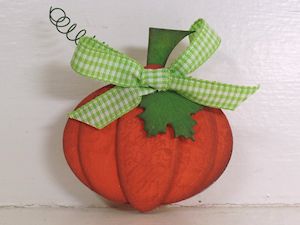
Choose 2-3 oval dies to create the pumpkin shape.
For a tall pumpkin, choose 2 dies. One will be the base. The central oval should be narrower than the base, and about the same height or slightly taller.
-
For a wider pumpkin, choose a die for the base. The next layer can either be a smaller vertical oval that is slightly shorter than the height of the base, or a horizontal oval that matches the height slightly in from the ends (cut 2). The central oval should be vertical and narrow, about the height of the base.
-
Step 2
Die cut the pieces needed out of chipboard. You may want to cut an extra base piece to cover any printing on the back side.
TIP:
Upcycle a cereal box for this project!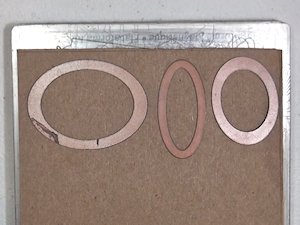
-
Step 3
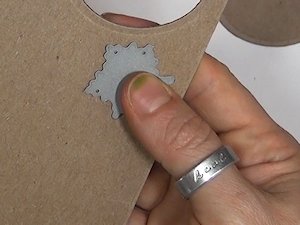
Die cut a leaf from the chipboard.
-
Step 4
Hand cut a stem for the pumpkin from the chipboard sheet as shown. The stem can be long or short, flaring out on one end.

-
TIP:
Use the edge of one of the cut ovals for the curve of the stem.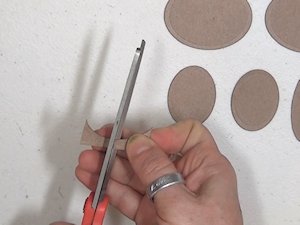
-
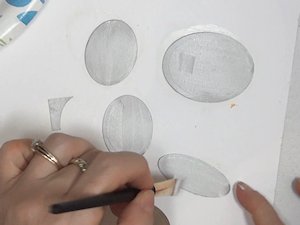
Step 5
Give each piece of the pumpkin a coat or two of white gesso. Chipboard is absorbent, so this will give the paint a good base and prevent it from soaking in. Let dry.
-
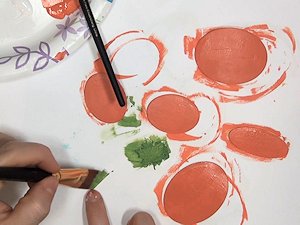
Paint the chipboard pieces using acrylic craft paint. Add a second coat after drying, if needed.
-
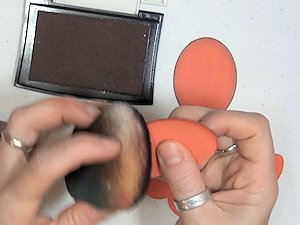
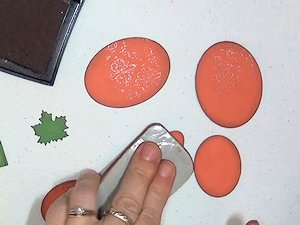
Step 6 (Optional)
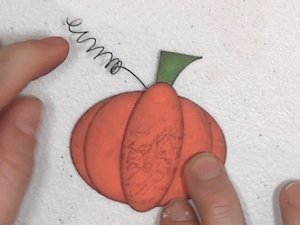
Sponge the edges of the pieces with a darker ink – anything between orange and brown can be used.
-
Stamp lightly with the same ink to add texture and interest to the pieces.
-
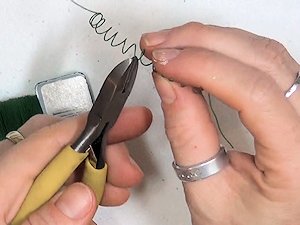
Step 7
Create a 3” long spiral with florist wire by wrapping the wire around a paintbrush handle.

-
Leave about an inch of the wire straight at each end. Cut the spiral in half with wire cutters. Save the other end for another pumpkin.
-
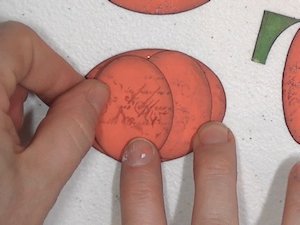
Step 8
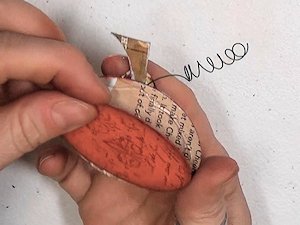
Assemble the pumpkin. Glue the second layer ovals to the base first.
-
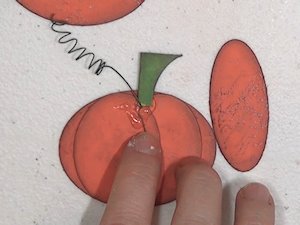
Before adding the central piece, use hot glue to attach the stem and wire spiral.
-
Step 9
Adhere the central oval piece.
-
Adhere the second base piece to the back of the pumpkin to cover any paint or printing.
-
Step 10
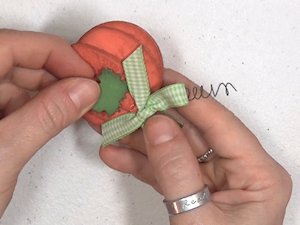
Add the die cut leaf, along with any other embellishments you choose.
-
Step 11
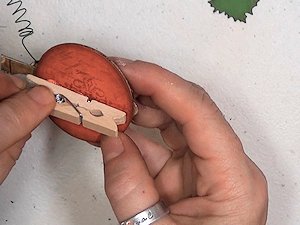
To create a clip or magnet, adhere a clothespin or magnet to the back of the pumpkin using hot glue.
-
Step 12
Complete the project.
Video!
Variations
-
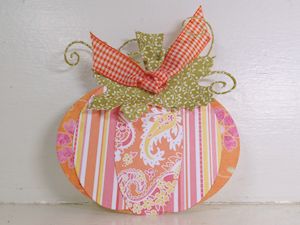
Make a pumpkin card!
For the card base, fold cardstock and use the base oval die to cut, overlapping one edge over the fold.

-
Use patterned papers to cut out the pieces and assemble the pumpkin as done above. Substitute a flourish die for the wire for easier mailing.
Your Turn
You've seen the tutorial, now you try it! We've got a section of the gallery set aside for Chipboard Pumpkin. Try this technique, then upload your artwork to the gallery. Show us your creations!
***Please note - Internet Explorer/Edge is not a supported browser, and will not allow you to see the videos. Please use Chrome, Firefox or Safari to view our tutorial videos.

Questions and Comments
We'd love to get your feedback or questions. Leave your comment below.
Ginny - for a larger one, try making some freehand ovals of the size you want and cut with scissors - after all - in nature pumpkins are all kind of weird shapes!
Page 1 of 1 pages