Creating with Chibitronics
by Allison Cope
Learn the basics for electronic Chibi® stickers and light up your cards.

Supplies
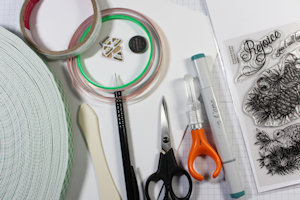
- Chibitronics kit (includes LED Chibitronic Sticker Lights, copper tape, battery, clips, instructions)
- Heavyweight cardstock (Recollections 110# White and Lightweight White used here)
- Dies (My Favorite Things Stitched Rectangle STAX 2 used here)
- Stamps (Power Poppy –Rustic Rejoicing used here)
- Vellum (My Favorite Things used here)
- Stamp positioner
- Scoring tool
- Strong adhesive (Scor- Tape used here)
- 3D foam adhesive(3M Mounting Tape used here)
- Ink (My Favorite Things Black Licorice used here)
- Coloring medium (Copic Markers used here)
- Craft knife (Fiskars Finger Knife used here)
- Scissors
- Pencil
- Other supplies as needed to complete the project
Step-by-Step
-
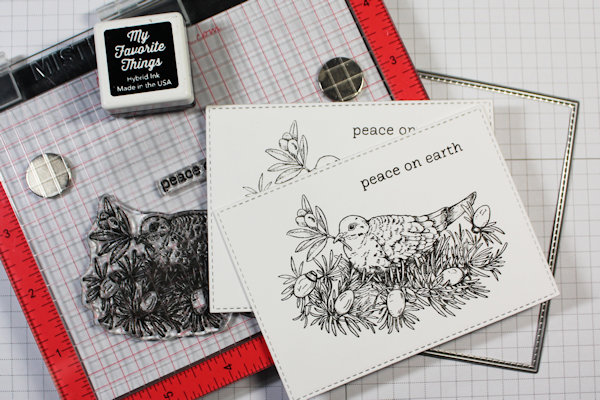
Step 1
Die cut TWO identical pieces of heavyweight cardstock that are larger than your image. These pieces can be cut using a paper trimmer if you don’t have any dies that work.
Stamp your image (and sentiment) on both pieces of cardstock in exactly the same spot.
TIP:
A stamp positioner like the MISTI is handy for this step. -
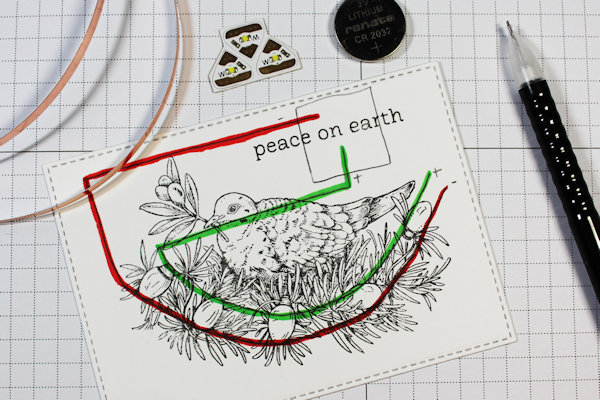
Step 2
On one of your stamped panels, map out where each of your sticker lights will go and where your battery will be located.
From the battery house location, draw a line where your negative copper tape will go (shown in green). This line must be located within 1/8” of your light sticker locations.
From the battery location, draw a line where your positive copper tape will go (shown in red). Ensure your lines are close enough so that your LED light sticker can touch both the negative and positive tape lines. -
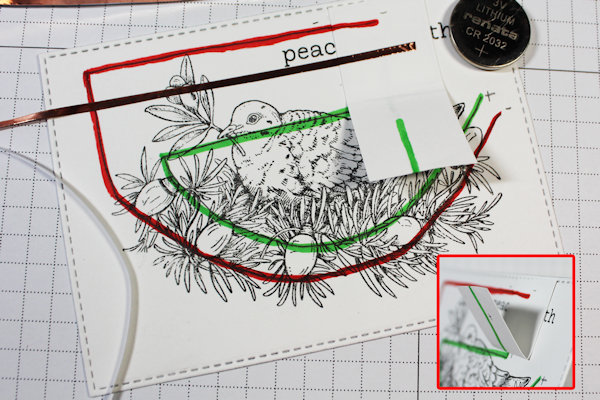
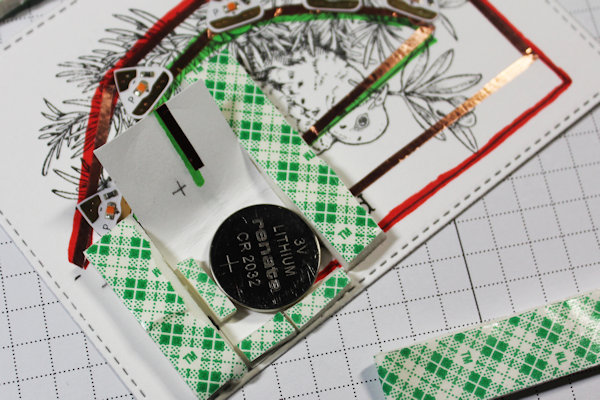
Step 3
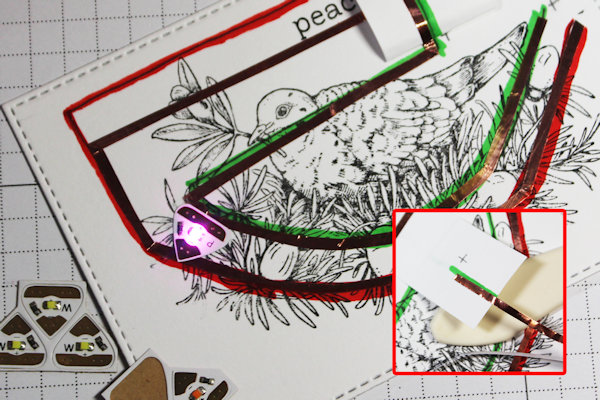
Create a folded battery house using a lightweight scrap of paper. Adhere it to the battery location with the opening towards the outside of your panel. (See inset for close up.)
-
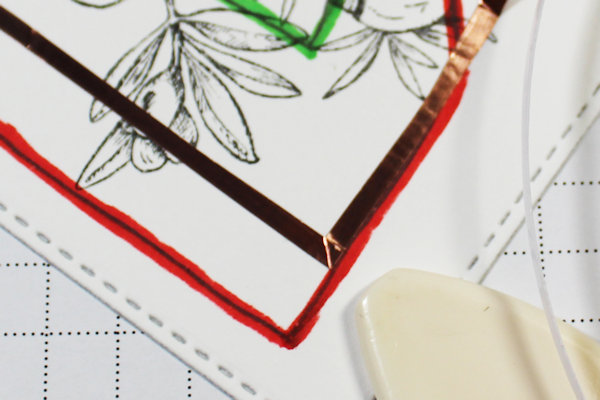
Trim your copper tape in half length wise with scissors. Ensure you create a piece of copper tape longer than you need. You can always trim off the excess.
Begin applying the copper tape inside the battery house on the base layer. -
Step 4
Begin applying the copper tape for the positive line to the inside of the battery house. (See photo inset.) Ensure the tape wraps from the inside of the battery folder to the outer surface of the folder and then carefully across the joint where it meets the panel’s base.
Finish applying your copper tape to the remainder of the positive tape line. Trim any excess if necessary. -
Step 5
Place the LED light stickers on top of the locations where you wish your lights to be. Ensure your positive (point of the triangle) in on the negative tape line and your positive (wide part of the light) is on top of the positive tape line.
-
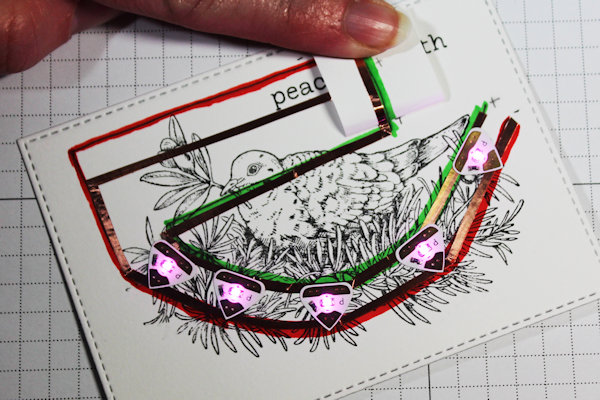
Test each light as you apply each sticker.
-
Step 6
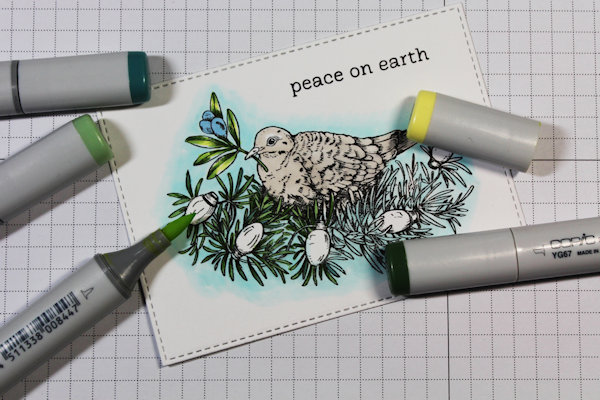
Color the second stamped panel using the coloring medium of your choice.
-
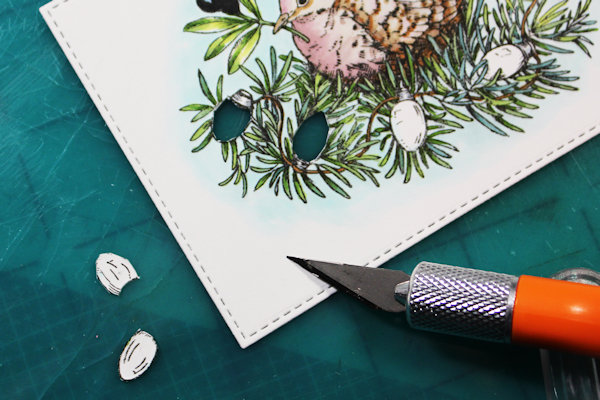
Step 7
Using a craft knife, cut out the locations of the areas in your colored stamped image that you wish your lights to shine through.
Adhere a piece of vellum to the back side of your colored image where you have cut your holes. -
Step 8
Create a small amount of DOUBLE layered foam tape. Adhere a small DOUBLE layer of foam tape on the open side of the battery house. LEAVE THE FOAM TAPE’S BACKING PAPER ON. You may require some DOUBLED foam tape inside the battery house to keep the battery from sliding around (leave the backing paper on!).
Create a few strips of TRIPLE layered foam adhesive.
Create some triple foam tape walls around the outside of the battery house. -
Step 9
Using the remaining TRIPLE layered foam tape, adhere it to the copper tape panel. You can place the layered foam tape right over top of the copper tape. It will not affect your circuit. Leave enough space for your LED lights to function and for your foam tape to not block your cut holes.
-
Step 10
Remove all the backing paper from your TRIPLE layers of foam tape only. Adhere your coloring image over top of your copper taped base.
-
Step 11
Finish decorating your card.
Include a note when mailing so the recipient knows where to press for the card’s full effect.


Video!
Your Turn
You've seen the tutorial, now you try it! We've got a section of the gallery set aside for Creating with Chibitronics. Try this technique, then upload your artwork to the gallery. Show us your creations!
***Please note - Internet Explorer/Edge is not a supported browser, and will not allow you to see the videos. Please use Chrome, Firefox or Safari to view our tutorial videos.

Questions and Comments
We'd love to get your feedback or questions. Leave your comment below.
There are stamp sets by Lawn Fawn, Heffy Doodle and MFT that include stamps like 'press here' to help the recipient know what to do. Also, if you look in the booklet, there are ways to make a Chibi light card with much less foam tape. They use different types of switches. I know this is a beginner tutorial but I thought I'd mention it in case thickness for mailing is an issue for some. I've made one with only one layer of foam tape. One other small thing to mention, it's not idea to have the copper tape change direction AND go up over the switch at the same spot as the tape can eventually wear through if played with a lot.
One other tip: for mailing, add a piece of cardstock between your battery and the housing. This will prevent your card from activating in the mail if something heavy is placed on top. This will make your battery drain, possibly running out before it arrives.
Page 1 of 1 pages