Canvas Panel Card
by Kristen Powers
Use mini canvas panels to create fun mixed media decor.
Supplies
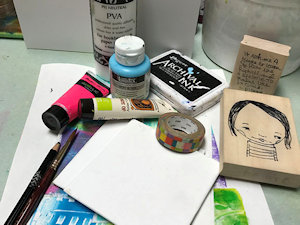
- Two 4” x 4” flat canvas panels (or two same-size pieces of mat board or heavy chip board)
- Gel printed papers or decorative papers of your choice
- PVA glue, gel medium or your favorite white glue
- Washi tape
- Waterproof inkpad
- Stamps (RubberMoon stamps by Mindy Lacefield used here)
- Acrylic paints
- Paintbrush
- Coarse nail file
- Other supplies as needed to complete the project
Step-by-Step
-
Step 1
Apply glue to the back sides of your substrates (canvas panels, matboard, etc.) and mount or collage decorative or gel printed papers to cover any backing or labeling that may be there. Use a coarse file to trim and smooth the edges.
-
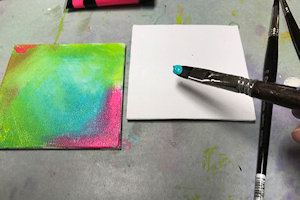
Step 2
Paint the canvas side of your substrates with acrylic paints. You may want to paint solid colors or get crazy and use multiple colors to create a fun abstract-y background!
-
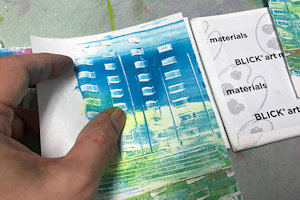
Step 3
Using a separate sheet of paper (another gel print or paper of your choice), stamp your images with a waterproof inkpad. Cut or tear the images out so they will fit nicely onto your painted canvases.
-
Step 4
Apply glue to the images and adhere them to each of your painted canvases.
Add other bits of collage as desired.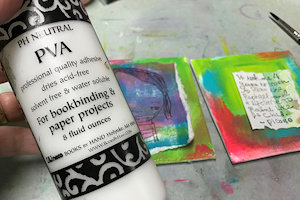
-
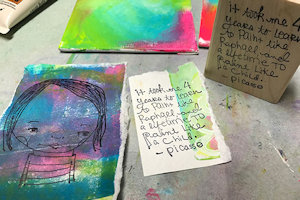
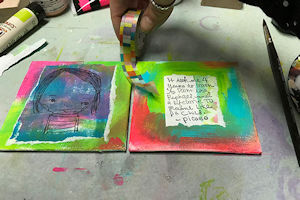
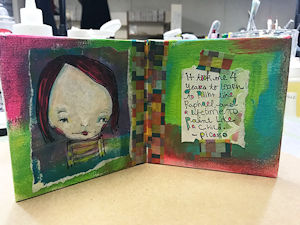
Step 5
Place both of your finished canvases next to each other, leaving a small space between them. Use washi tape to ‘bind’ them. You may want to wrap around the front and back more than once. Once you are done, make sure the ‘card’ folds easily.
-
Step 6
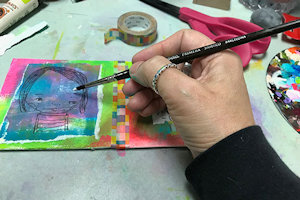
Paint or color in your images.
-
Step 7
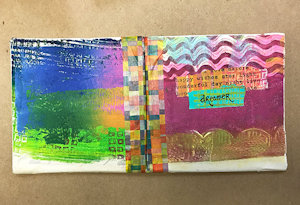
Decorate with pictures, text, or ephemera to on the front or back of the ‘card’ as desired.
-
Step 8
Complete the project.
Video!
Your Turn
You've seen the tutorial, now you try it! We've got a section of the gallery set aside for Canvas Panel Card. Try this technique, then upload your artwork to the gallery. Show us your creations!
***Please note - Internet Explorer/Edge is not a supported browser, and will not allow you to see the videos. Please use Chrome, Firefox or Safari to view our tutorial videos.

Questions and Comments
We'd love to get your feedback or questions. Leave your comment below.
Page 1 of 1 pages