Bouncing Brayer
by Charmaine Ikach
Create a groovy background with a multicolored ink pad and brayer!
Supplies
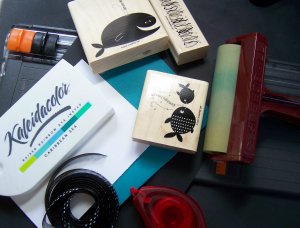
- Kaleidacolor® ink pad (Caribbean Sea used here)
- Brayer with rubber attachment
- Neutral Cardstock (Whisper White here) NOTE: Glossy White cardstock works too!
- Solid stamps
- 8.5”x 5.5” piece of cardstock for the card base (Taken with Teal here)
- Paper Trimmer
- Additional cardstock for layering
- Embellishments of choice
Step-by-Step
-
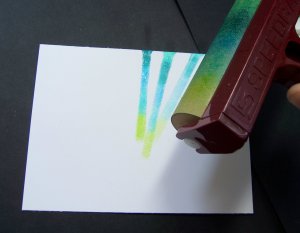
Step 1
Push the palette of the Kaleidacolor pad together and ink the brayer.

-
Step 2
Bounce (don’t roll) the brayer on neutral cardstock, making sure to keep one end of the brayer at the center of the cardstock. Continue to bounce brayer on cardstock while rotating cardstock with free hand. Re-ink brayer as needed.
-
-
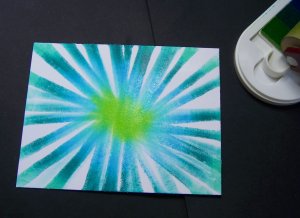
Step 3
Depending upon how much “white space” is desired, either stop here or keep bouncing brayer around cardstock adding ink. Here, no white space was wanted, so the cardstock was rotated and ink applied until all white space was filled with color.
-
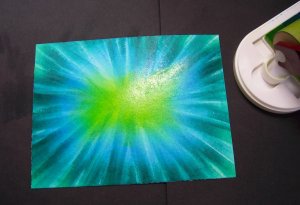
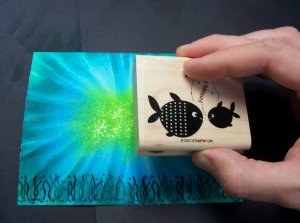
Step 4
Stamp focal images.
-

-
Step 5
Trim, embellish and finish card!

Video!
Your Turn
You've seen the tutorial, now you try it! We've got a section of the gallery set aside for Bouncing Brayer. Try this technique, then upload your artwork to the gallery. Show us your creations!
***Please note - Internet Explorer/Edge is not a supported browser, and will not allow you to see the videos. Please use Chrome, Firefox or Safari to view our tutorial videos.

Questions and Comments
We'd love to get your feedback or questions. Leave your comment below.
Vera
I thought the result was truly fascinating and beautiful.
Many thanks. Angela
Thanks
Page 1 of 1 pages