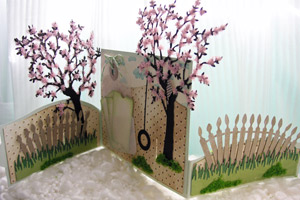
Bendi Fold

by Bibiana Martinez-Ziegler

Create this unique shaped card using 3 pieces of cardstock. Technique courtesy of Emma Fewkes

Supplies
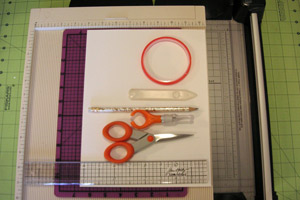
  • One 5 1/2" x 8 1/2" piece of cardstock
  • Paper trimmer
  • Scoring board
  • Self-healing mat
  • Ruler
  • Scissors
  • Hobby blade
  • Pencil with eraser
  • Bone folder
  • Strong Adhesive Tape

Step-by-Step

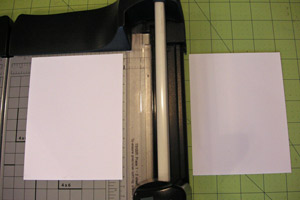
  1. Step 1

    Cut your 5 1 /2" x 8 1/2"piece of cardstock at 4 1/4".
    You will have 2 panels measuring 4 1/4" x 5 1/2".
  2. Step 2

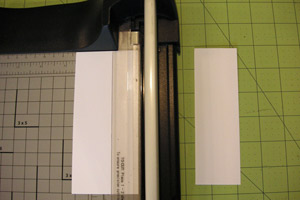
    Cut one of the panels (4 1/4" x 5 1/2") at 2 1/2".
  3. Step 3

    You will have 1 piece of cardstock for the base and you will have 2 pieces of cardstock for the swinging flaps.
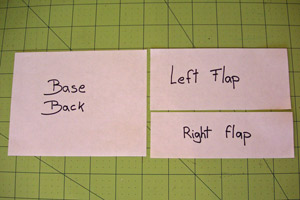
  4. Step 4

    Score 1/2" on each end of the swinging flaps.
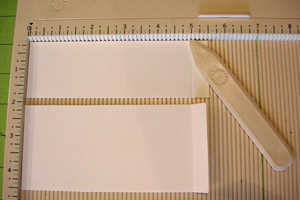
  5. Step 5

    Trace a line with pencil at 1/4" on the opposite side of the scored line of each flap on those lines hand free cut 2 notches .
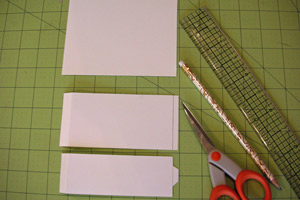
  6. Step 6

    Trace a line with pencil on the base piece of cardstock at 4" from the edge.
    Trace a second line on the left swinging flap at 2" from the edge.
    Mark with pencil on top of those lines where you will make the slits for the notches to be inserted.
    Cut the slits with Hobby Blade.

  7. Step 7

    Erase all your pencil marks and lines.
    Add double sided tape to the end of the flaps, on the scored side.
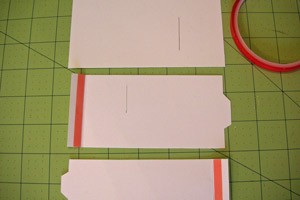
  8. Step 8

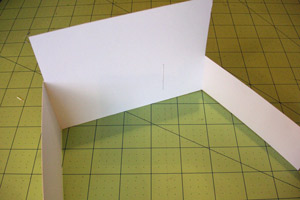
    Tape the flaps to the base.

  9. Step 9

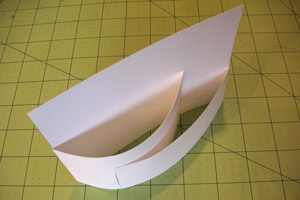
    Insert notches on slits. Make any adjustments.
    .
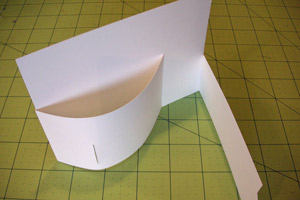
  10. Top view

  11. Step 10 (Optional)

    Trace with pencil valleys on the flaps.
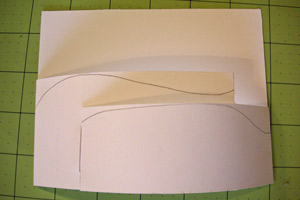
  12. Step 11

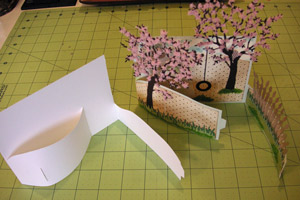
    Trim with scissors. Decorate…as desired.
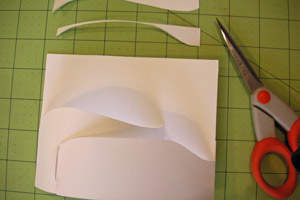
  13. Step 12

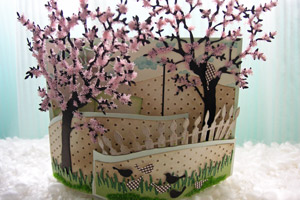
    Finished card closed.

  14. Finished card open.

Video!

Your Turn

You've seen the tutorial, now you try it! We've got a section of the gallery set aside for Bendi Fold. Try this technique, then upload your artwork to the gallery. Show us your creations!

***Please note - Internet Explorer/Edge is not a supported browser, and will not allow you to see the videos. Please use Chrome, Firefox or Safari to view our tutorial videos.

Questions and Comments

We'd love to get your feedback or questions. Leave your comment below.

I love this card!!!
Where did you find the cherry blossm paper and the cute little birds? This will make a perfect Mother's Day card, for my Mother in Law! Thanks for posting.
Elizabeth Hallahan  |  Sat May 11, 2013 at 9:51 AM
Brilliant!
Eveline.
Eveline van Heijst  |  Wed May 22, 2013 at 2:52 AM
Hi, I have seen this fold recently and I liked it a lot! With your decorations you really added the WOW factor! I absolutely love the trees (also in real life)!!! Need to go shopping! wink
Eva-Lena Stegmann  |  Wed May 22, 2013 at 3:18 AM
I really like this one; certainly something different!!! Will have to make it soon. Thanks for sharing.
Lois Andrews  |  Wed May 22, 2013 at 3:44 AM
WOW!! Magical, breathtaking stuff! What else can I say?! Biddy.
Bridget Keenor  |  Wed May 22, 2013 at 4:45 AM
This is absolutely stunning! So creative and beautiful. Thank you for sharing your talent with us.
Catherine  |  Wed May 22, 2013 at 5:03 AM
Oh my goodness, this is sooooooooo amazing! Bibiana you are so creative, thanks for making this awesome tutorial!
Kris  |  Wed May 22, 2013 at 5:16 AM
A-MA-ZING card. Really beautiful.
Jackie  |  Wed May 22, 2013 at 5:24 AM
Hi, thanks for this wonderfull tutorial. I love this Card with the blossom trees- so beautifull.
It just a gift for me.
crissybaer
crissybaer  |  Wed May 22, 2013 at 5:33 AM
Hi, You will also find this card tutorial in the Score, Fold, Create, the Ultimate guide to crafting with Scor-Pal Book. The tutorial was done by Mindy Baxter. It is a very interesting fold. This card is gorgeous.
Diana for Scor-Pal.
Scor-Pal Book  |  Wed May 22, 2013 at 5:39 AM
Awesome tutorial and card. Loved the music you played for this! Thanks for sharing this with us! Best, Curt
Curt  |  Wed May 22, 2013 at 5:43 AM
Love this beautiful card. If mailed, you would have to put in a small box, right? Keep up the wonderful ideas!
Marcia  |  Wed May 22, 2013 at 6:00 AM
Wow! Awesome card. Thanks for sharing. n
Donna Chartrand  |  Wed May 22, 2013 at 6:32 AM
Oh this is fabulous! thank you so much for such a brilliant Tutorial. Judy x
Judy  |  Wed May 22, 2013 at 6:51 AM
Beautiful job, Bibiana!
Debbie Olson  |  Wed May 22, 2013 at 7:07 AM
I also love this card but I have the same question as another posted above? How would it be mailed? Suggestions?

Thanks for sharing.
Bethany  |  Wed May 22, 2013 at 7:09 AM
love this, but I too would like to know how to mail. Is there a box template or instuction somewhere that I missed?
diane forgione  |  Wed May 22, 2013 at 7:13 AM
Wow! This card is spectacular! Great tutorial. (I also LOVE your bracelet.)
Bons  |  Wed May 22, 2013 at 7:20 AM
Wow what a beautiful card I can't wait to try this new technique.
Annamarie Mazieka  |  Wed May 22, 2013 at 7:29 AM
Lovely card!

Emma Fewkes originated this fold and I would love to see her get proper credit for her creativity.

http://ladynthestamp.blogspot.com/2010/12/very-first-creative-crew-gallery_31.html
Cathy S.  |  Wed May 22, 2013 at 7:33 AM

Page 1 of 6 pages  1 2 3 >  Last »

You need to be logged in to comment

GET OUR NEWSLETTER


Splitcoaststampers's privacy policy