Beanie Cap Gift Card Holder
by Carolina Buchting
Create a gift card holder that looks like a beanie cap.
Supplies

- One 5" circle out of solid card stock
- One 2-1/2" semi-circle out of patterned paper
- One 5-1/8" x 1-5/8" strip of solid card stock
- One 5-1/8" x 7/8" strip of patterned paper
- Paper Cutter
- Crop-a-Dile™
- Circle Scissors Plus, or any other tool that allows you to cut a 5” circle
- Edge Punch
- iTop Punch, or a circle punch and you can make the notches with scissors
- White Gel Pen
- One Brad
- One Eyelet
- Bow
- Double Sided Tape, 1/4" and 1/2" width
- Additional card stock for pom-pom
Step-by-Step
-
Step 1
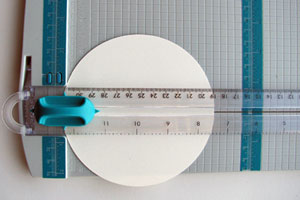
Cut the 5" Circle in half so that you are left with two 2-1/2" semi-circles.
-
Step 2
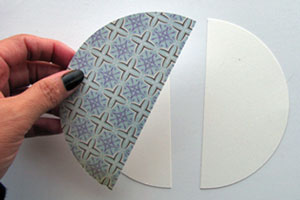
Adhere the 2-1/2" semi-circle patterned paper to one of the 2-1/2" solid card stock semi-circles and set it aside.
-
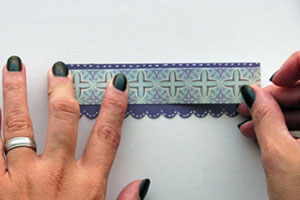
Step 3
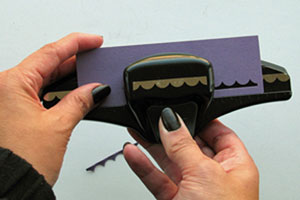
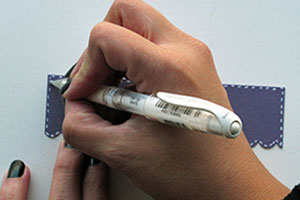
Use a border edge punch on one of the long sides of the 5-1/8" x 1-5/8" strip of solid card stock
-
and add some dashes using the white gel pen.
-
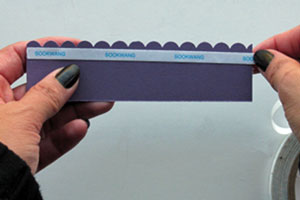
Step 4
Add a strip of 1/2" double sided tape to the 5-1/8" x 7/8" strip of patterned paper and adhere it to the strip you just added the dashes to.
-
Turn it over, and add a strip of 1/4" double sided tape as close to the punched edge as possible.
-
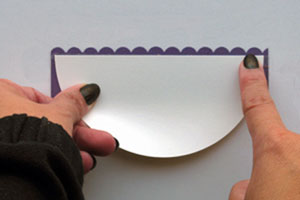
Step 5
Attach the non-decorated 2-1/2" semi-circle (the one without the patterned paper) to the strip.
-
Step 6
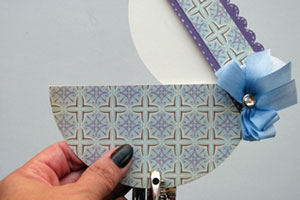
Insert the decorated semi-circle in between the strip and the non-decorated semi-circle. Turn the project over so that you’re able to center the semi-circles.
Hint:The front semi-circle will be taller than he one in the back.
-
Step 7
Holding the strip and semi-circles in your left hand, insert the Crop-a-Dile™ in between the semi-circles and punch a hole.
Important:
Do not punch a hole through the semi-circle in the back, so make sure you place the Crop-a-Diletrade;& correctly.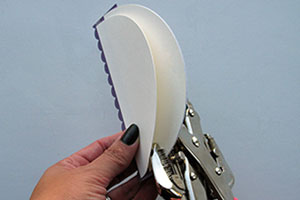
-
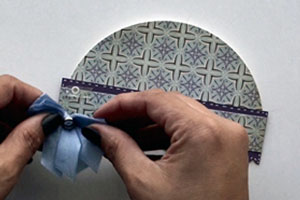
Insert an eyelet, set it, and add bow on top of the eyelet with double-sided tape. Set it aside to work on the pom-pom.
-
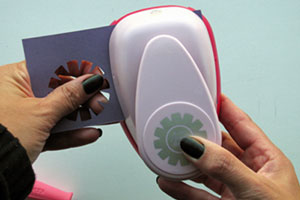
Step 8
Punch a notched circle using the iTop™ punch, fold it in half and then in half again.
-
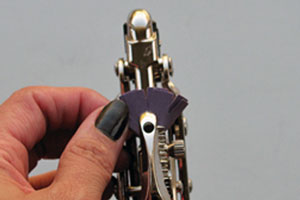
Through all those layers punch a hold using the Crop-a-Dile™. Insert a brad and set it aside.
-
Step 9
Punch a hole in the middle of the front semi-circle and insert the brad and pom-pom. Open the front semi-circle of the beanie and insert your gift card. With that, you are done!
-
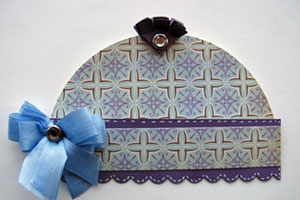
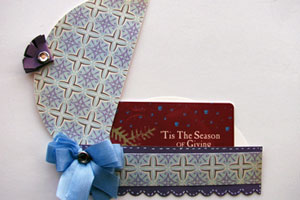
Step 10
Finished gift card holder closed.
-
Finished gift card holder open.
Video!
Your Turn
You've seen the tutorial, now you try it! We've got a section of the gallery set aside for Beanie Cap Gift Card Holder. Try this technique, then upload your artwork to the gallery. Show us your creations!
***Please note - Internet Explorer/Edge is not a supported browser, and will not allow you to see the videos. Please use Chrome, Firefox or Safari to view our tutorial videos.

Questions and Comments
We'd love to get your feedback or questions. Leave your comment below.
Page 1 of 1 pages