Basket Weave Card

by Kelly Acheson

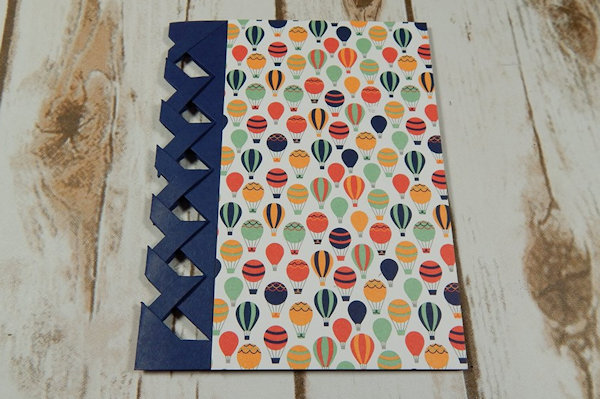
Create a latticed card with a few simple cuts and folds.
Supplies
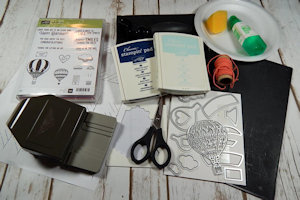
  • Cardstock (Stampin’ Up! Night of Navy, Whisper White, and Carried Away Designer Series Paper used here)
  • Basket Weave Card printable template
  • Scissors
  • Paper trimmer
  • Bone folder
  • Paper clips
  • Adhesive (Tombow Mono Liquid Glue used here)
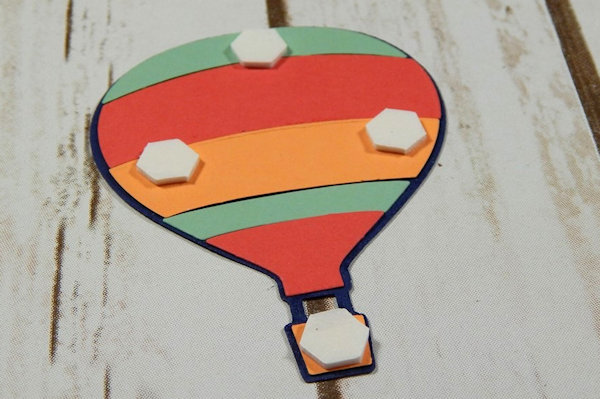
  • Other supplies as needed to complete the project (Stampin’ Up! supplies used here: Die Cutting Machine, Watermelon Wonder, Mint Macaron, and Peekaboo Peach cardstock, Banner Triple Punch, Lift Me Up Stamp Set, Up & Away Thinlits Dies, Big Shot Die Brush, Precision Base Plate, Magnetic Platform, Soft Sky and Night Navy ink pads, Dimensionals or 3D Pop Dots)

Step-by-Step

  1. Step 1

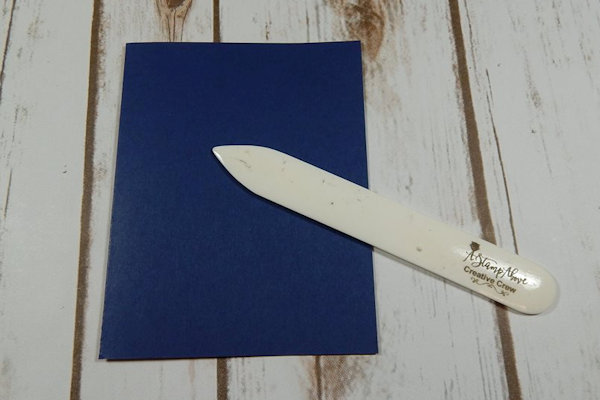
    Cut a cardstock base at 5 1/2" x 8 1/2". Fold it in half and burnish the edge with a bone folder.

  2. Step 2

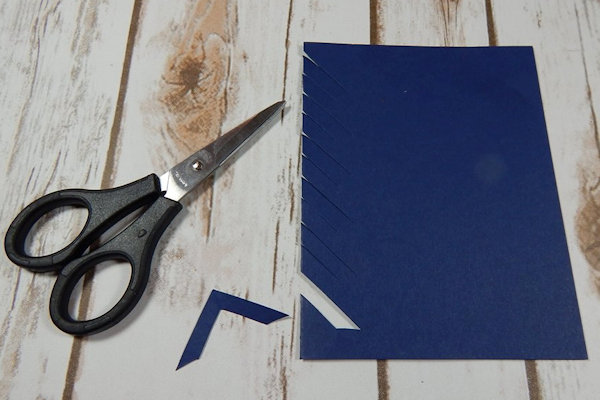
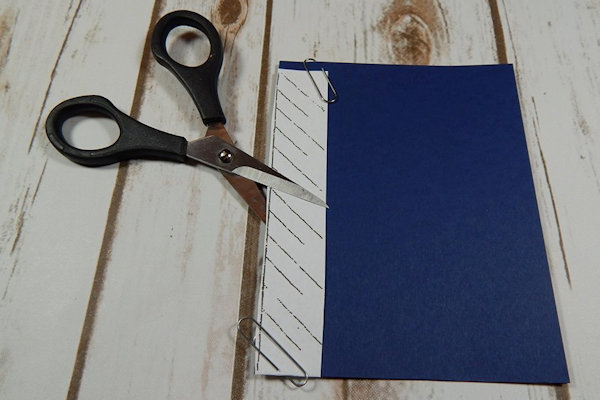
    Place the template over the folded edge of the card base with slash marks facing down, and secure it in place with paper clips. Use scissors to cut on all lines.

  3. Step 3

    Cut the bottom triangle off and set it aside.

  4. Step 4

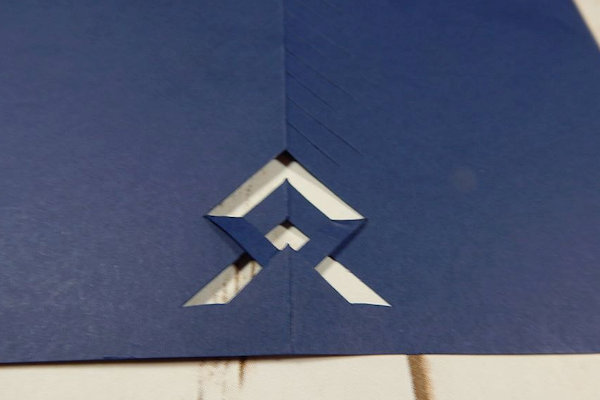
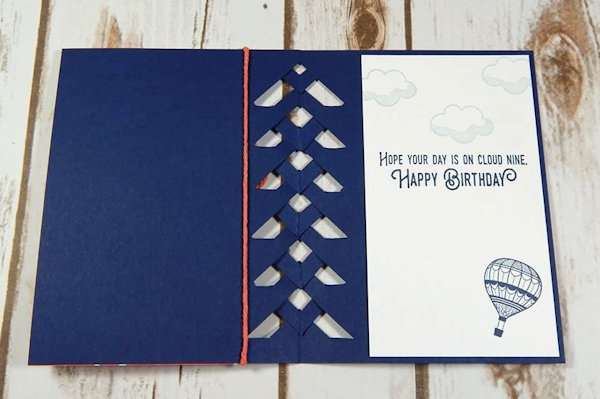
    Open the card. Working on the outside of the card, fold every other triangle down, and tuck it under the one below.

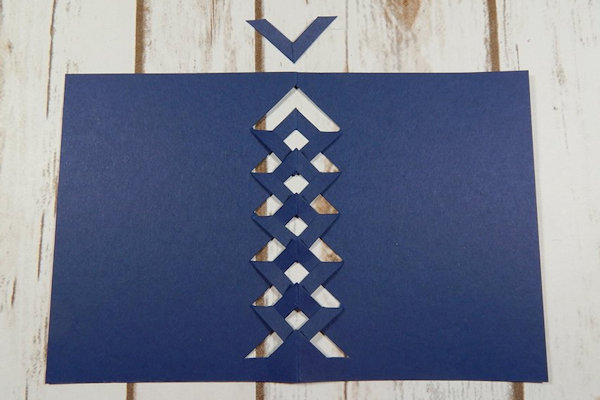
  5. Repeat this step for each of the triangular cuts.

  6. Step 5

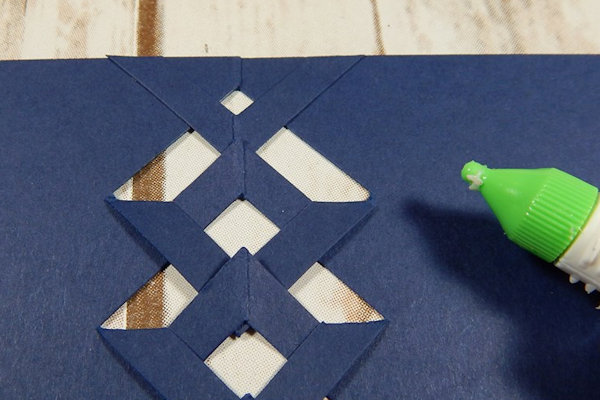
    Add the top triangle to the card using a little glue, and tuck the end under like the rest.

  7. Step 6

    Adhere a 5 1/2" x 3 1/4" piece of patterned paper to the card front with liquid glue.

  8. Step 7

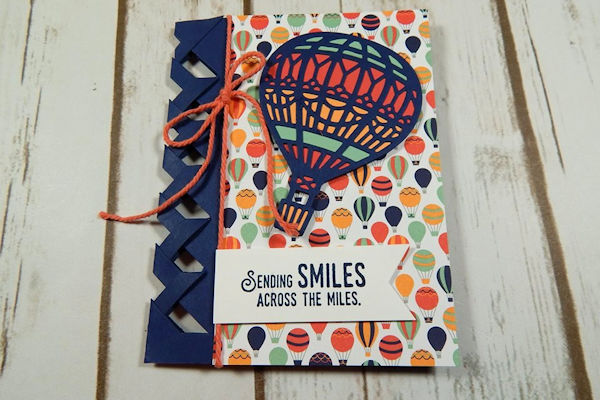
    Embellish the card.

  9. Add a panel to the inside as well.

  10. Step 8

    Complete the project.

Video!

Your Turn

You've seen the tutorial, now you try it! We've got a section of the gallery set aside for Basket Weave Card. Try this technique, then upload your artwork to the gallery. Show us your creations!

***Please note - Internet Explorer/Edge is not a supported browser, and will not allow you to see the videos. Please use Chrome, Firefox or Safari to view our tutorial videos.
Questions and Comments

We'd love to get your feedback or questions. Leave your comment below.

Wonderful tutorial...and a bonus tip about glue! Thanks so much!
Joni S  |  Wed May 3, 2017 at 3:52 AM
Great tut. I can hardly wait to try it and have so many stamps in mind already. Tfs
Vicki-Joy  |  Wed May 3, 2017 at 5:53 AM
I love this! It's beautiful -- adds texture. I feel like I can do this. LOL!!!
Catherine  |  Wed May 3, 2017 at 6:07 AM
What a great new technique! Can't wait to share with my stampin' friends and thanks for the hint about the glue application.
Kathleen Raybon  |  Wed May 3, 2017 at 6:12 AM
I've seen this before but this was a fabulous video. I'm definitely going to do this and show my granddaughter how. Thank you so much.
Robin RICHARDS  |  Wed May 3, 2017 at 6:22 AM
Thanks for the great tutorial, Kelly! Love the basketweave technique. I've been a Stampin' Up! Demonstrator for 6 years and I've never heard the dimensional tip before. My fingernails say THANK YOU! smile
Leanne Cyr  |  Wed May 3, 2017 at 6:34 AM
Awesome great addition to a wedding card I will be making. Hoping to use a ruching ribbon in place of string. Great video and tutorial
Thanks!!
Kendra
kendra berube  |  Wed May 3, 2017 at 6:46 AM
What a great idea to use it on a card, it looks fantastic!
Julie Heyer  |  Wed May 3, 2017 at 7:23 AM
Great Tutorial and you explained everything so so well. Love the technique and tips.Just a beautiful
card... Thanks a million.
Helen Lewis  |  Wed May 3, 2017 at 7:52 AM
Fun basketweave---and great tip on the glue piecing. Thank you!
Prissequito  |  Wed May 3, 2017 at 8:01 AM
I so love this!! I am just getting the balloon set. It is absolutely the best in my eyes!! Gorgeous card!!
Kathy Friedman  |  Wed May 3, 2017 at 9:41 AM
:( I cannot download template.
Vicki-Joy  |  Wed May 3, 2017 at 10:44 AM
What a great tutorial, thank you very much for making it easy. Great look for the air balloon too. Can't wait to try this.
Suzanne Bisson  |  Wed May 3, 2017 at 10:54 AM
Hi Vicki-Joy - you might want to be sure you're using Chrome or Firefox - the most recent versions, and make sure your adobe flash player is up to date. If you update your browser, flash will update automatically
lydia  |  Wed May 3, 2017 at 10:59 AM
What a great technique and a gorgeous card.
Sue Allen  |  Wed May 3, 2017 at 12:18 PM
Thanks for sharing this, love the balloon and the great tip on applying the glue to it.
I have a number of brass stencils for doing cut and tuck patterns that I had forgotten about, must get them out of hiding and have a play with them.
Margaret Jenks  |  Wed May 3, 2017 at 2:35 PM
Great job, Kelly. You're a natural "teacher"--calm voice,
perfect pacing. Your tips are just what I needed. Attended a class a few years ago, and have a draw full of "rejects" because your poignant details were not explained--like only cut the length of the line (one is longer than the next); holding on to that bottom piece; and tucking under. Bless you for taking the time to make this look easy.
TexasJane  |  Wed May 3, 2017 at 3:00 PM
Terrific tutorial. Your hints for gluing were just what I have been looking for. Please do more tutorials. Loved it and the card.
Mary Lou Stark  |  Wed May 3, 2017 at 3:34 PM
I can't get the template to open. Am I doing something wrong.?
Jeanine Lesperance  |  Wed May 3, 2017 at 5:05 PM
Thank you SO MUCH for this template & tutorial! What a great card. And the glue tip is outstanding! TFS!
Kathy Rudolph  |  Wed May 3, 2017 at 5:17 PM

Page 1 of 2 pages  1 2 >

You need to be logged in to comment

GET OUR NEWSLETTER


Splitcoaststampers's privacy policy